

How To Retouch Photos On Iphone
Practice yous want to know how to edit photos on iPhone? The simplest way is to use the editing tools in the iPhone Photos app. From one-tap edits to advanced color and exposure settings, you can heighten your images without leaving your photograph library. In this tutorial, you'll discover how to edit pictures on iPhone using the congenital-in Photos app. Read on to observe how to plough your ordinary photos into stunning edits!
Tabular array Of Contents: How To Edit Photos On iPhone
Click any championship link below to go straight to that section of the commodity:
1. Ensure Your iPhone Is Updated To iOS 13
2. Indistinguishable Your Photograph To Preserve The Original (Optional)
3. Open The iPhone Photograph Editor In The Photos App
iv. Adjust Colour, Brightness & Sharpness
5. Employ A Filter To Adjust The Color Tone
6. Ingather, Rotate, Straighten & Accommodate Perspective
7. Save Your Edited Photo
8. Remove Or Change Your Edits
9. Edit Portrait Way Photos
10. Edit Alive Photos
xi. Edit Videos In The Photos App
12. Benefits Of Using The iPhone Photos App For Editing
13. Limitations Of The iPhone Photos App
1. Ensure Your iPhone Is Updated To iOS 13
The built-in Photos app is one of the best photograph editing apps for iPhone.
And with iOS 13 (iOS is the iPhone operating system), you get a completely redesigned photo editor.

The new Photos app has a wider range of editing tools. And yous can fine‑tune your edits with more than precision than before. You tin even edit videos using the same tools that yous use to edit photos.
To ensure yous have these new iPhone photo editor tools, make sure your iPhone is running the latest iOS 13.
To update your iPhone to iOS 13, open the Settings app from the Home screen. Then become to Full general >Software Update.
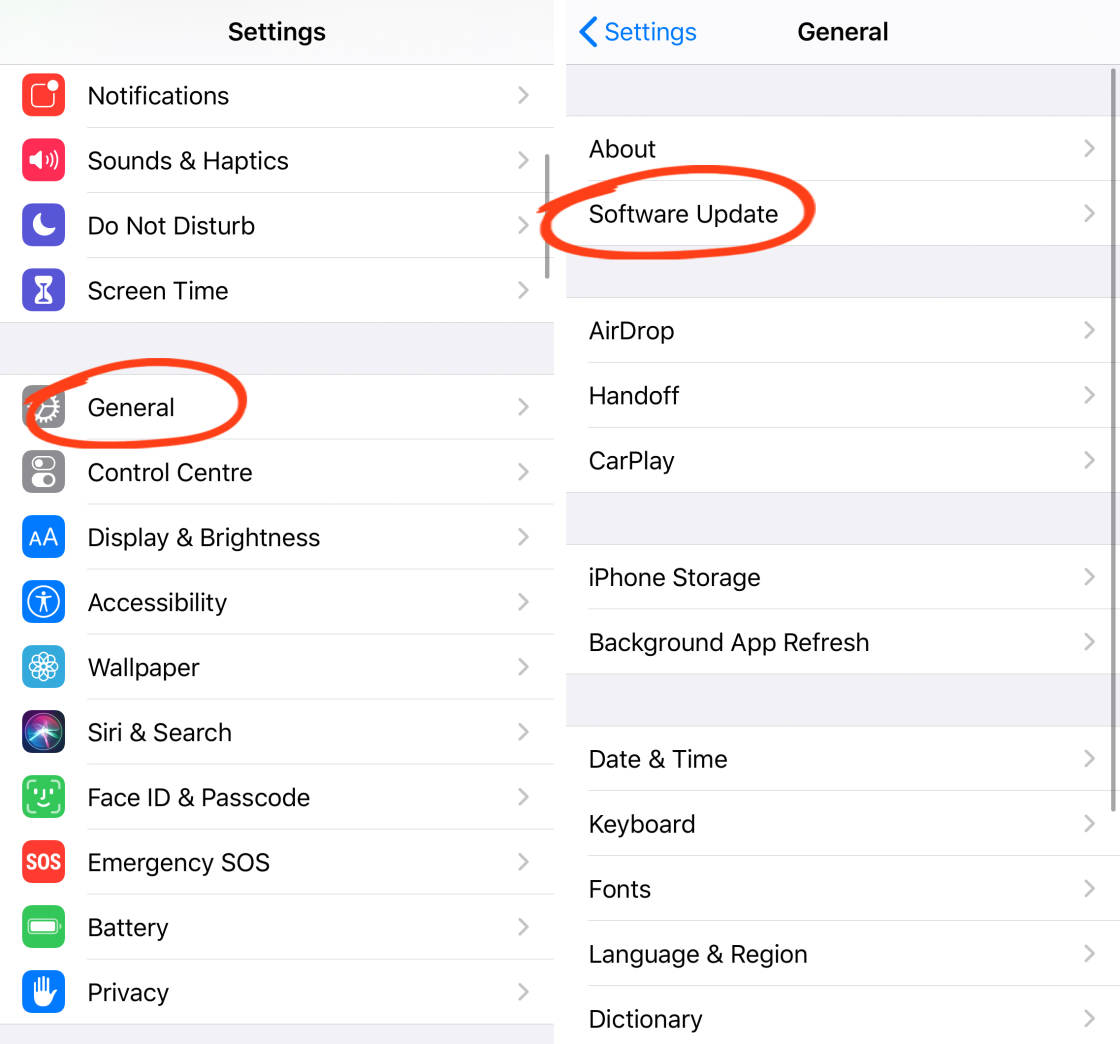
If your software is up to date with iOS 13, you'll already take access to the new photograph editing tools.
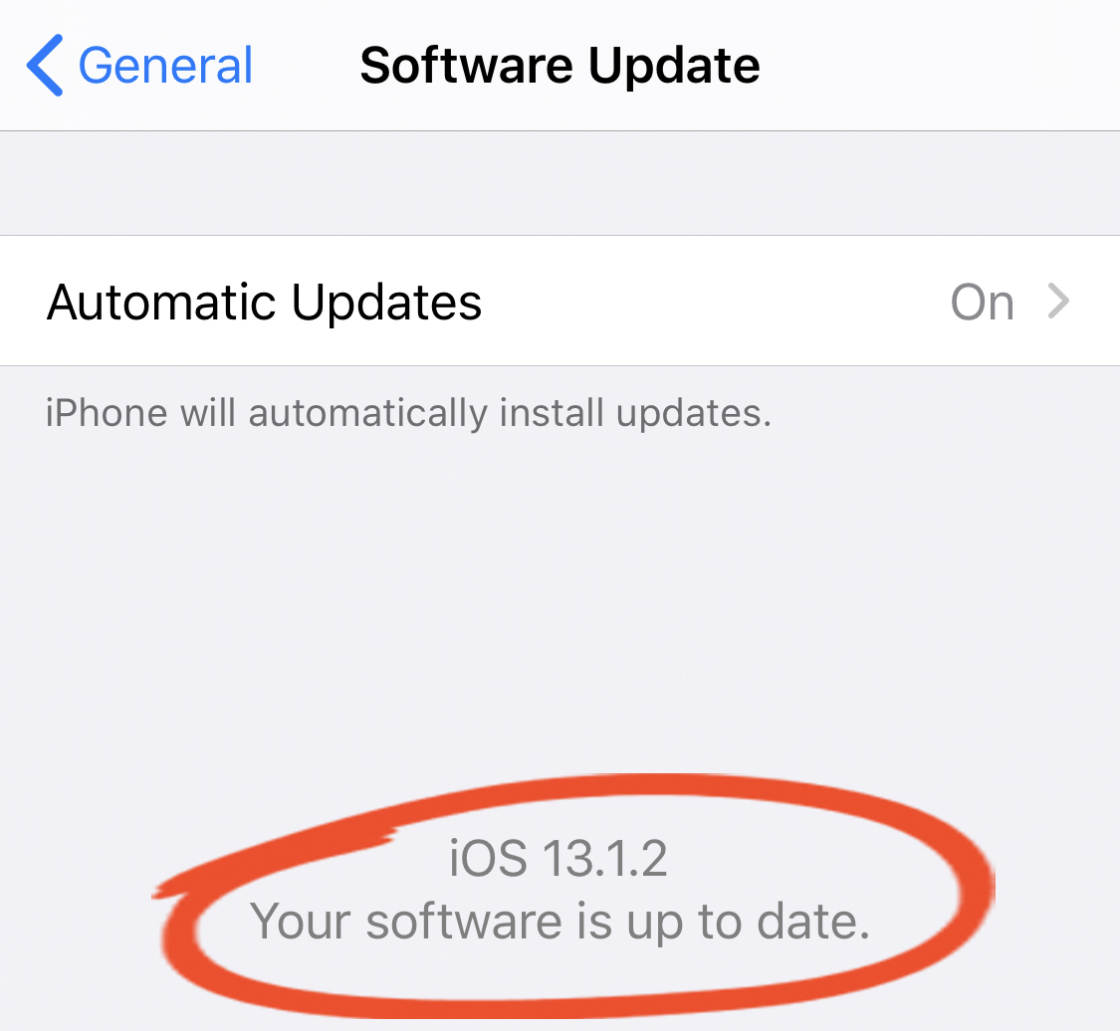
If your software isn't upward to date, follow the on-screen instructions to download and install the latest iOS xiii. (Before doing this, information technology's a good idea to support the data on your iPhone – just in case something goes wrong during the update procedure!)
Note that if you lot have the iPhone 6 or before, you won't be able to update to iOS thirteen. And therefore, you won't have access to the new editing tools in the Photos app. You tin can even so use the old editing tools though – you just won't have as many tools to work with.
2. Indistinguishable Your Photograph To Preserve The Original (Optional)
When you lot edit a photo in the Photos app, the original prototype gets replaced by the edited version.
However, editing in the Photos app is non-subversive. This means you can undo edits or revert back to the original image at whatever time.
But sometimes you lot might desire to continue the original photo, along with a carve up edited version. If so, you tin can easily indistinguishable the image before editing.
To duplicate an paradigm, open it in the Photos app and tap the Share icon at the bottom left. Then ringlet down and tapDuplicate
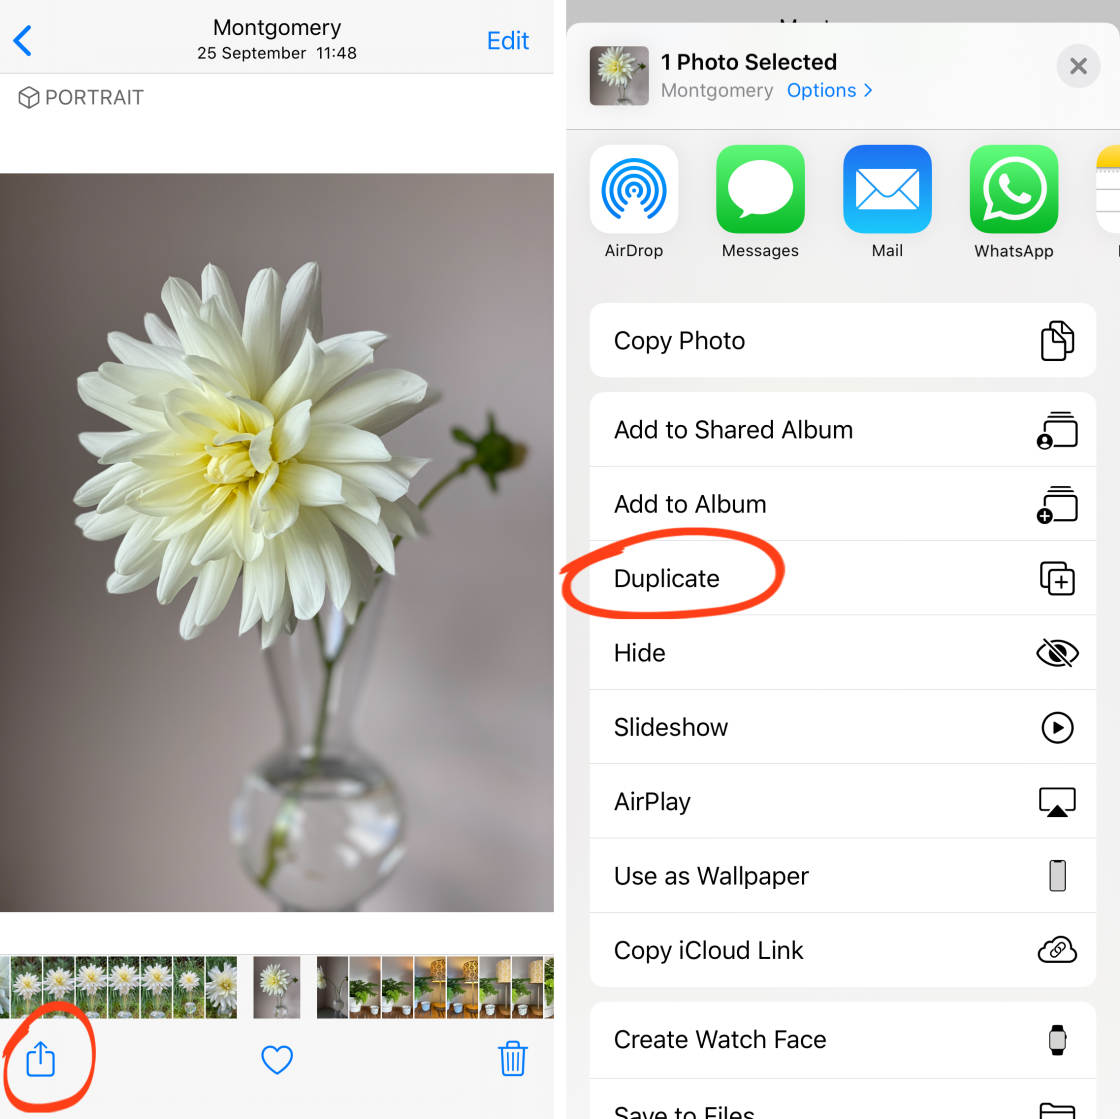
Tap theBack arrow at the top left to return to your photo library.
The duplicate image will appear at the bottom of your photograph library. You tin can edit this image while the original remains unedited.
Read on to acquire how to edit photos on iPhone using the built-in photograph editor tools.
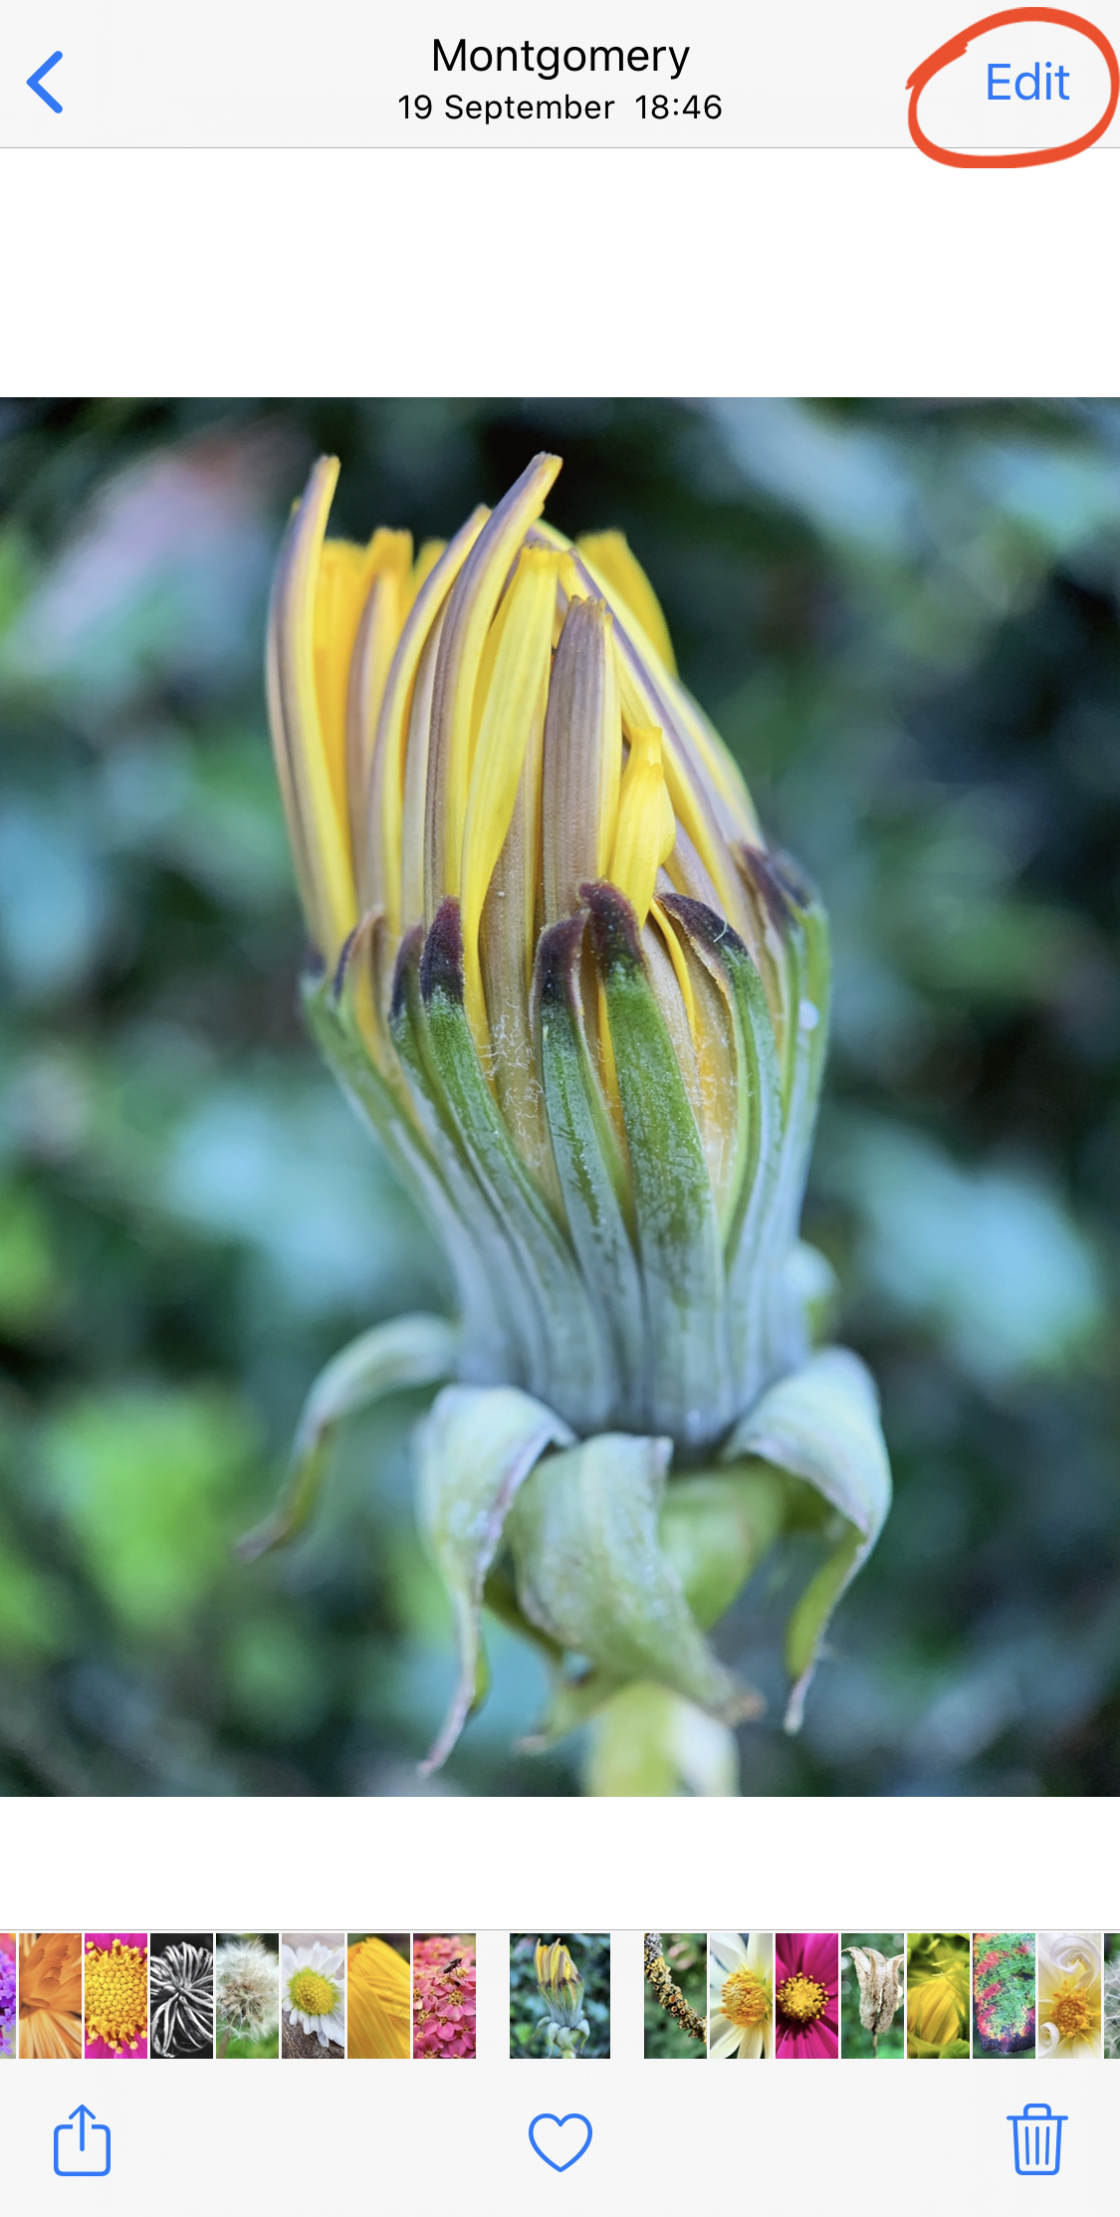
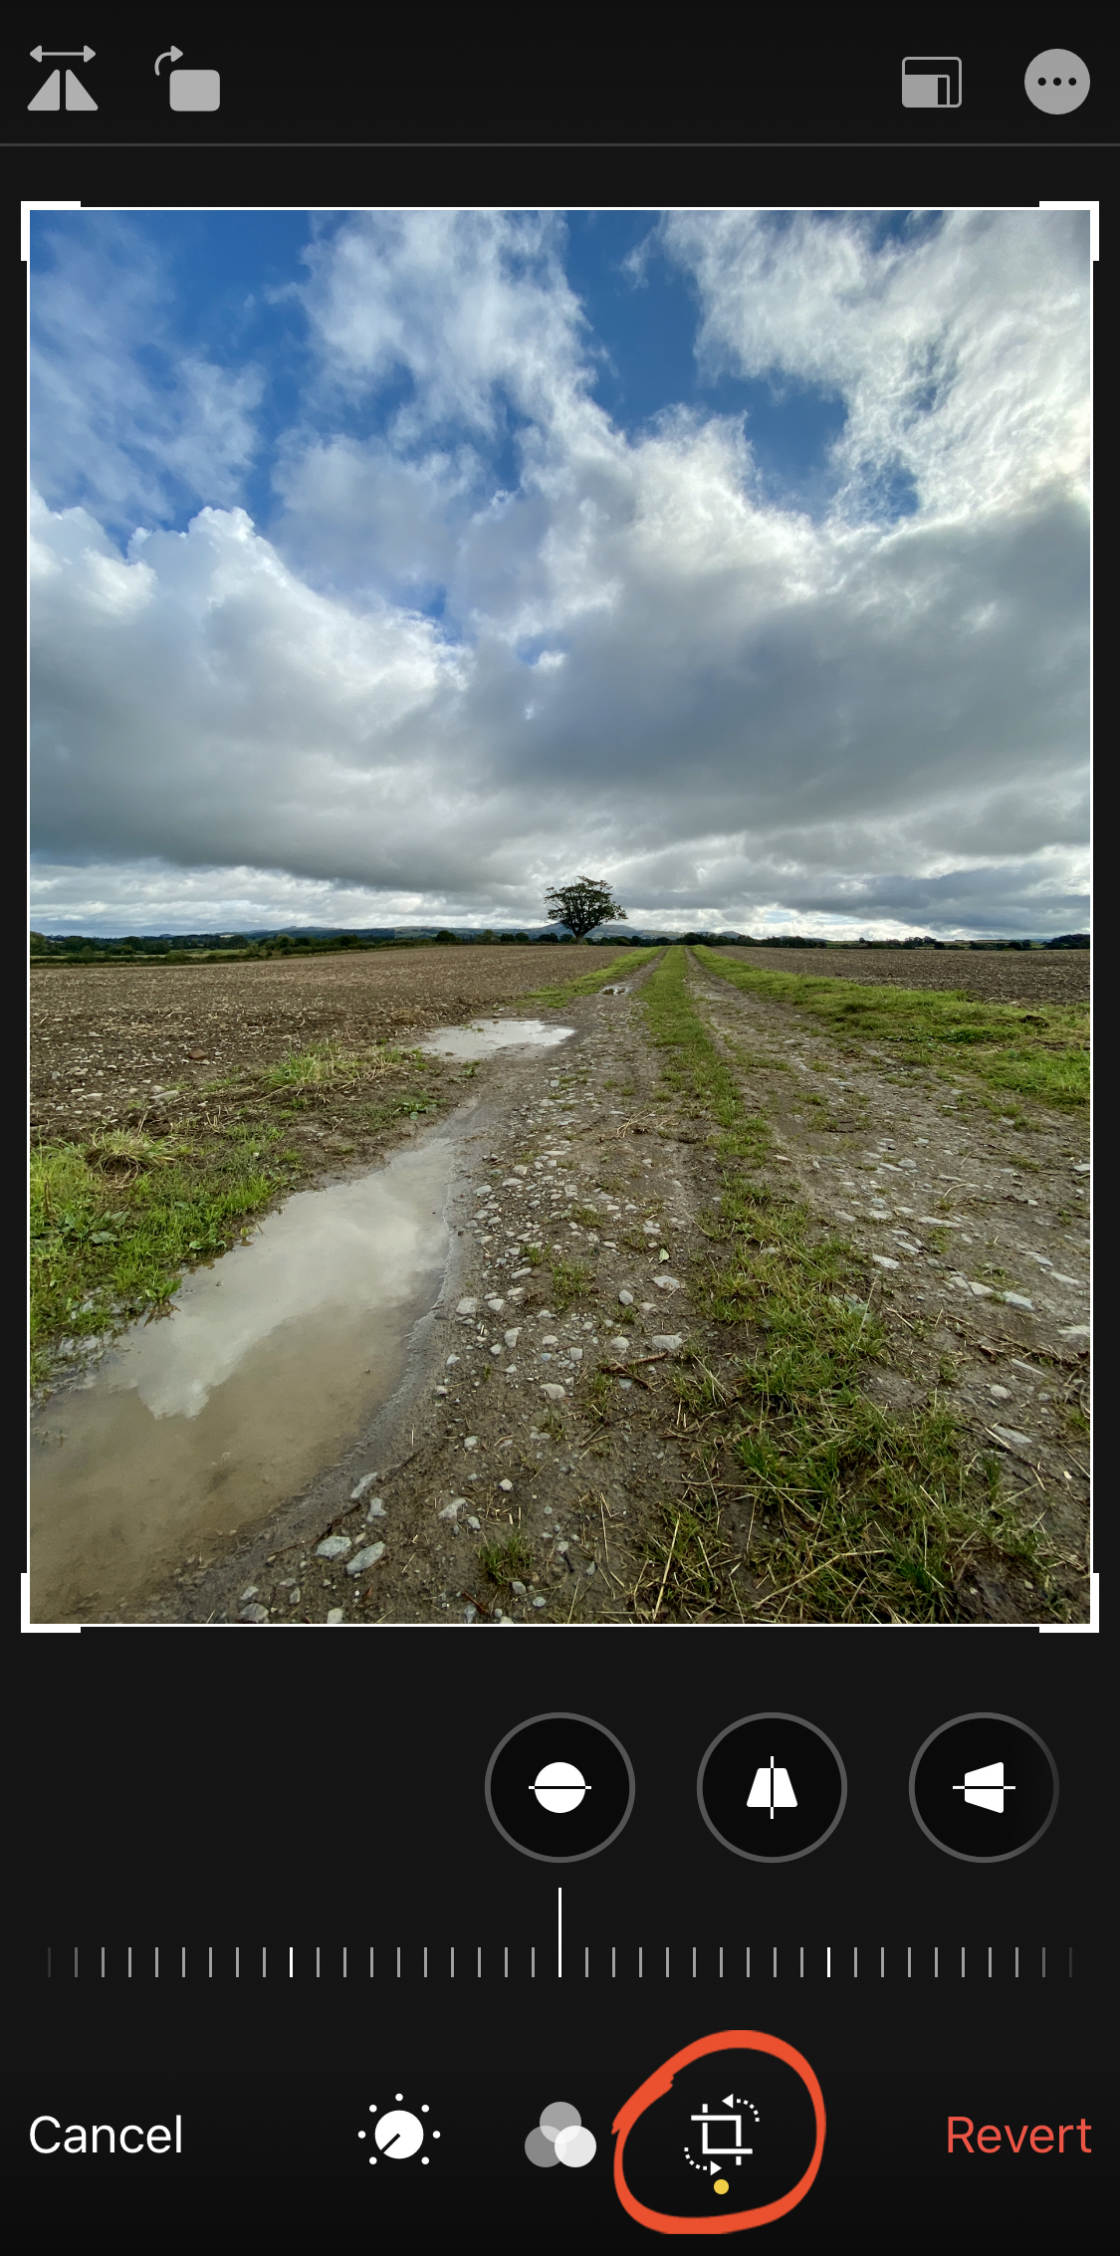
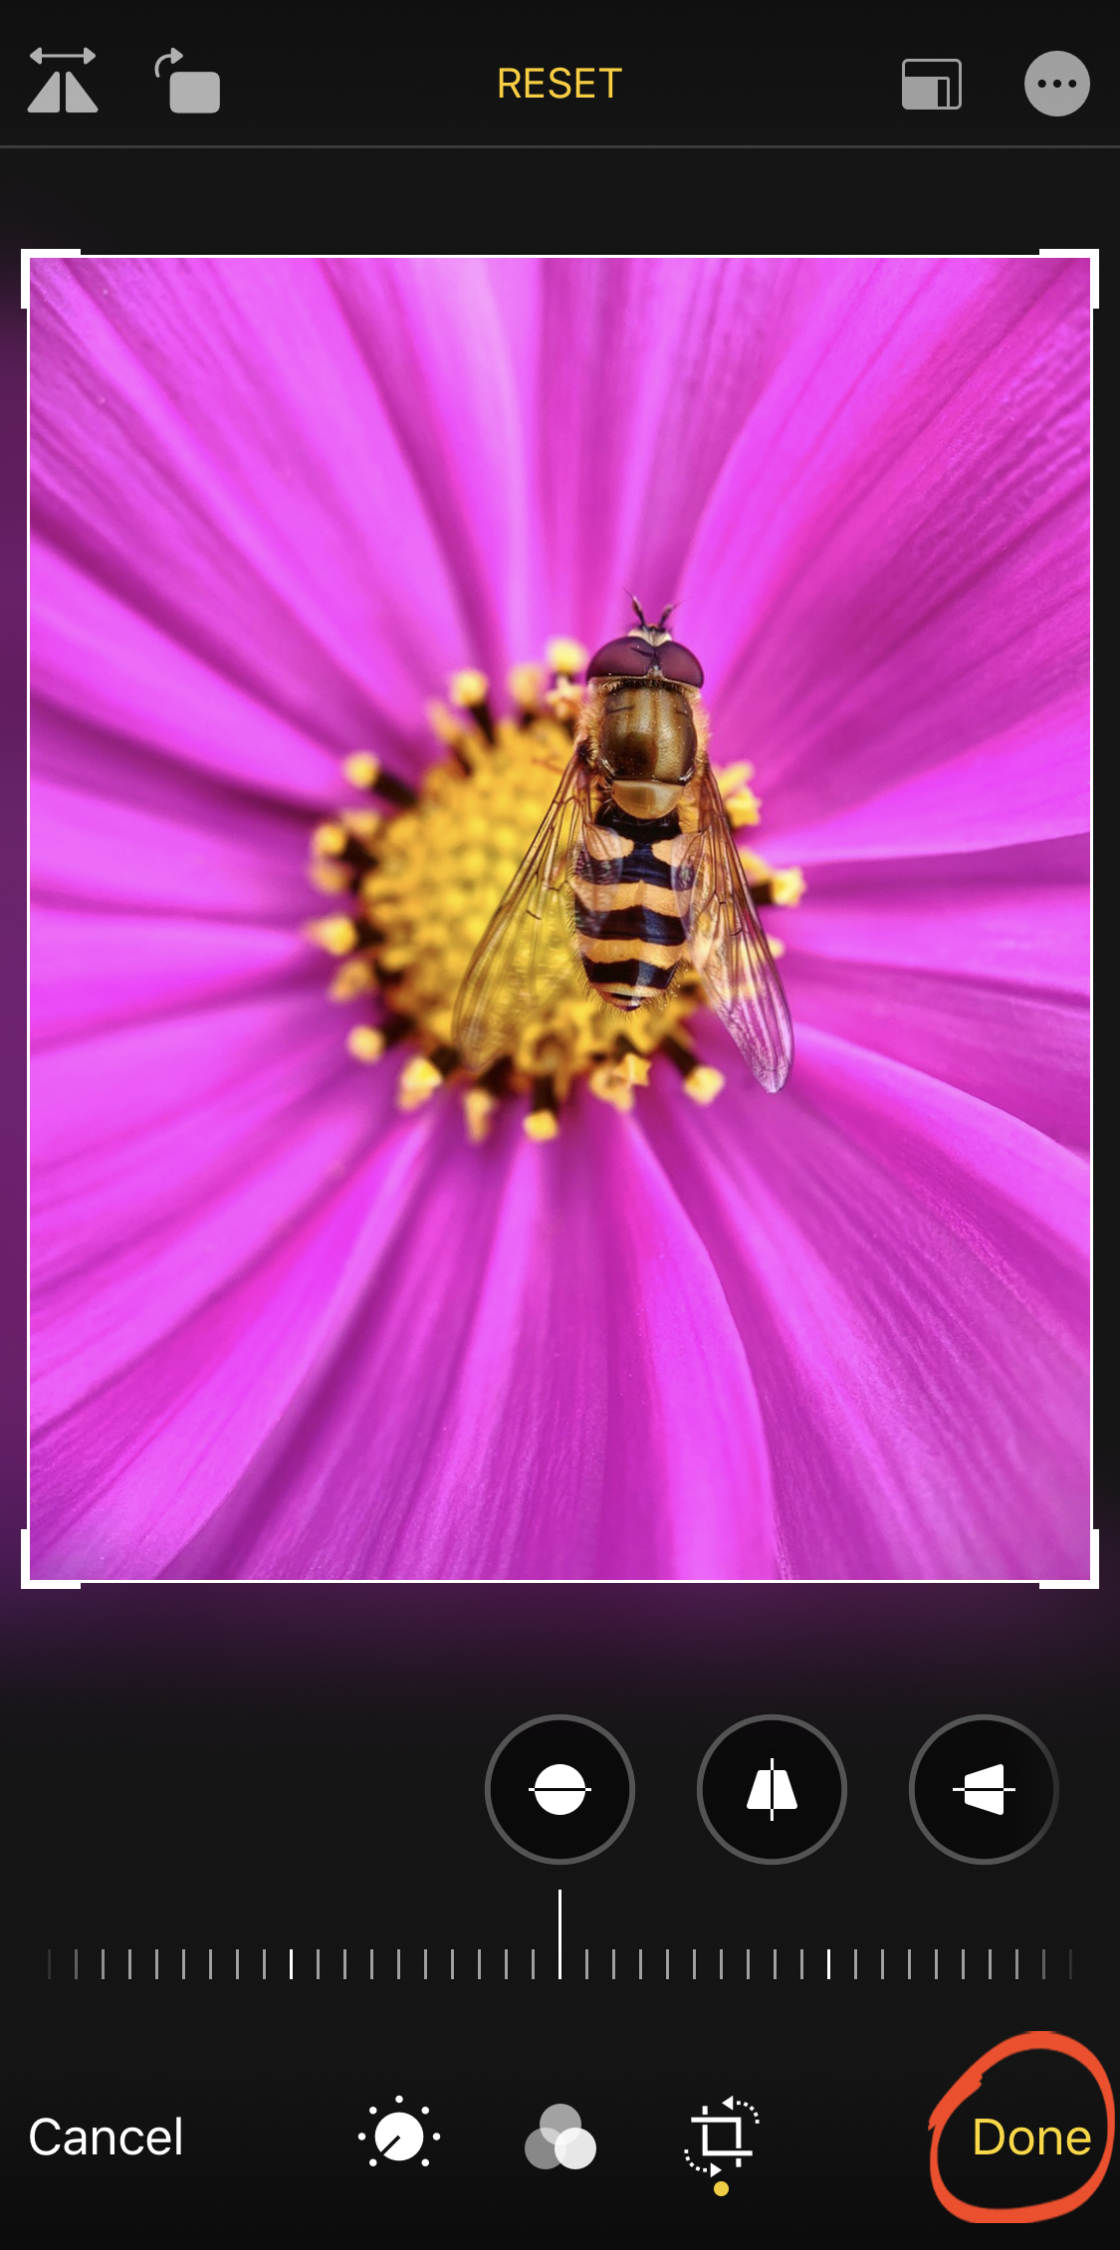
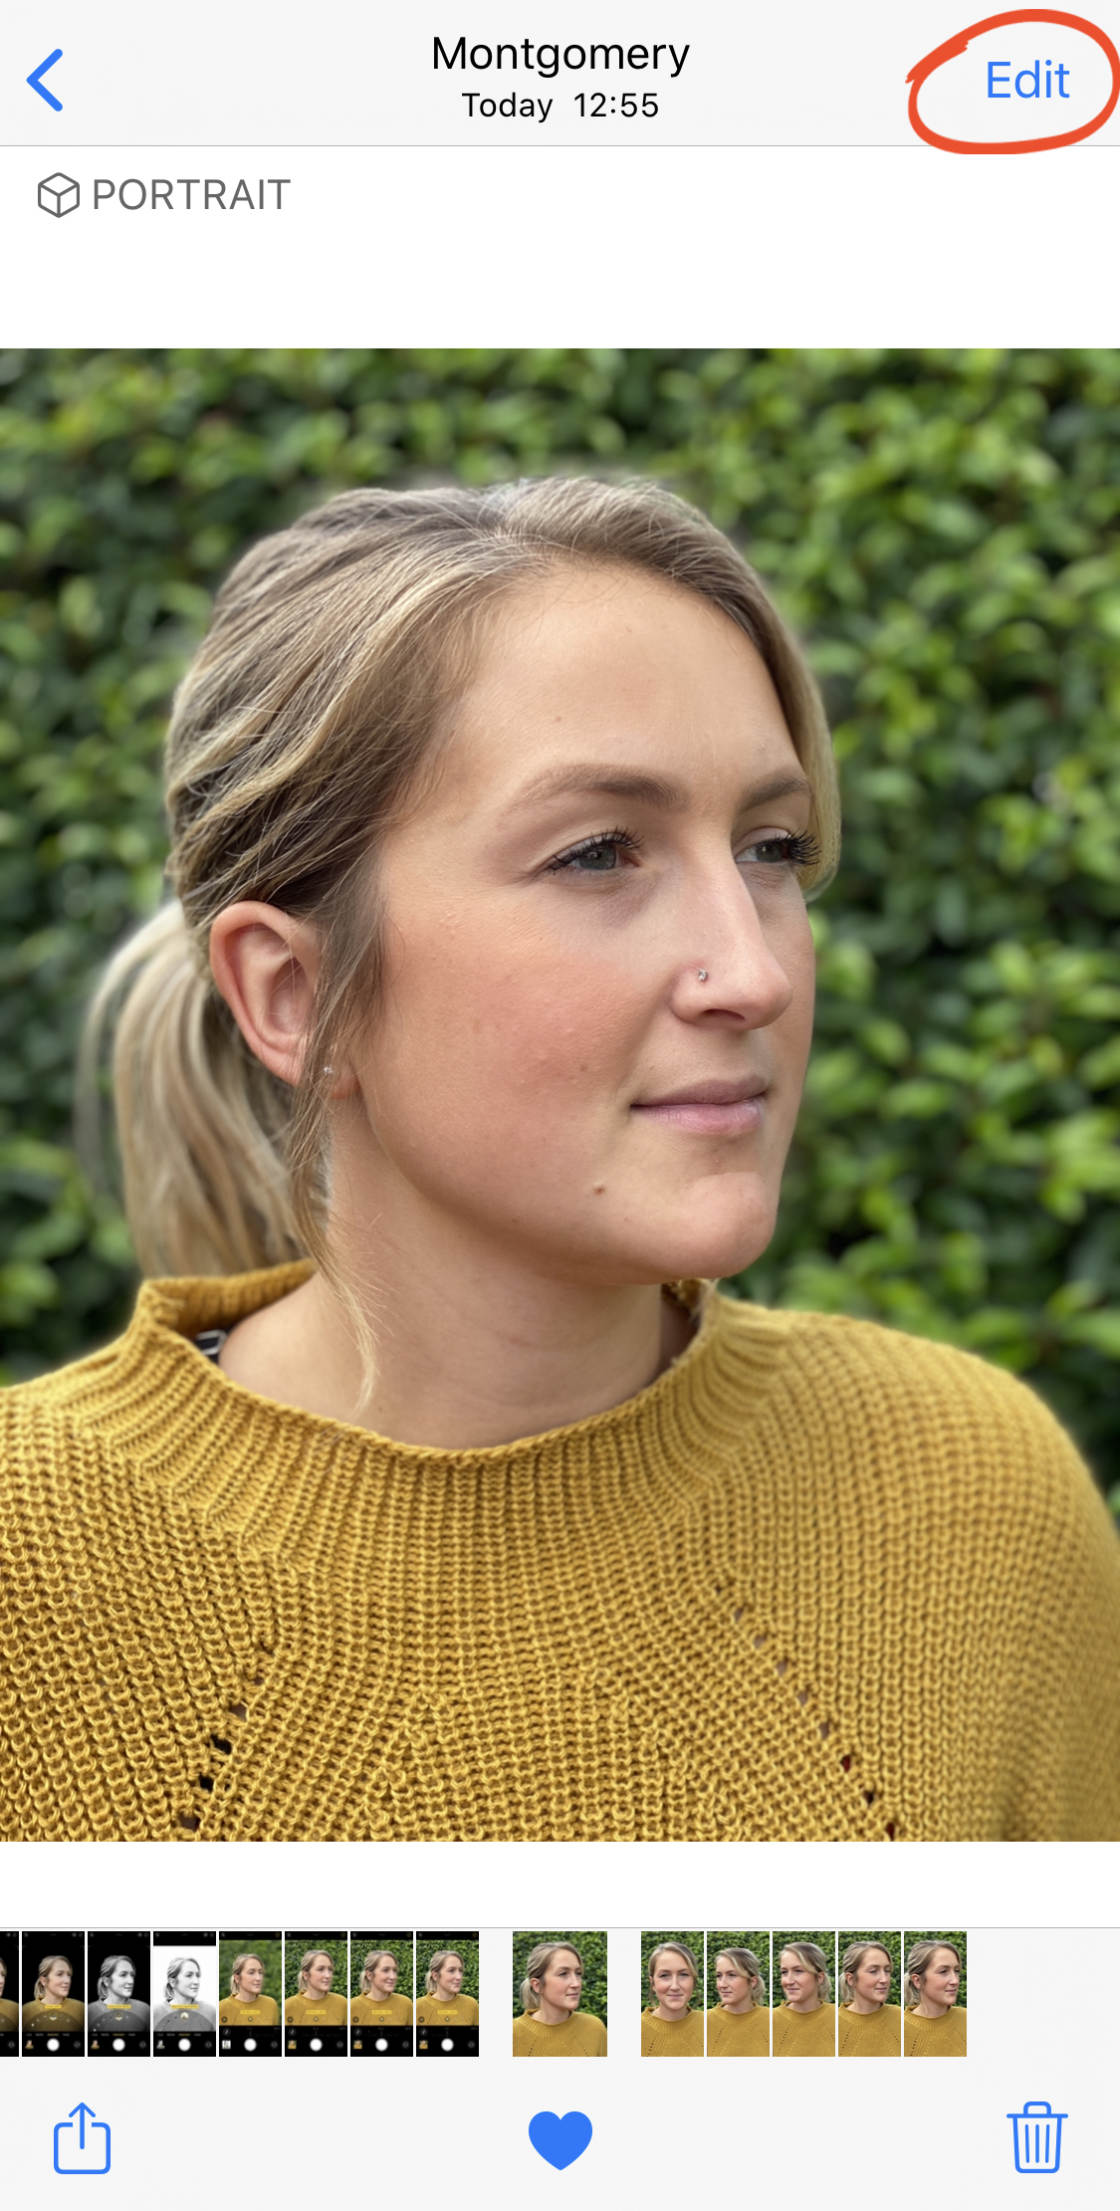
3. Open up The iPhone Photo Editor In The Photos App
And so, how do you open the photograph editing tools in the iPhone Photos app?
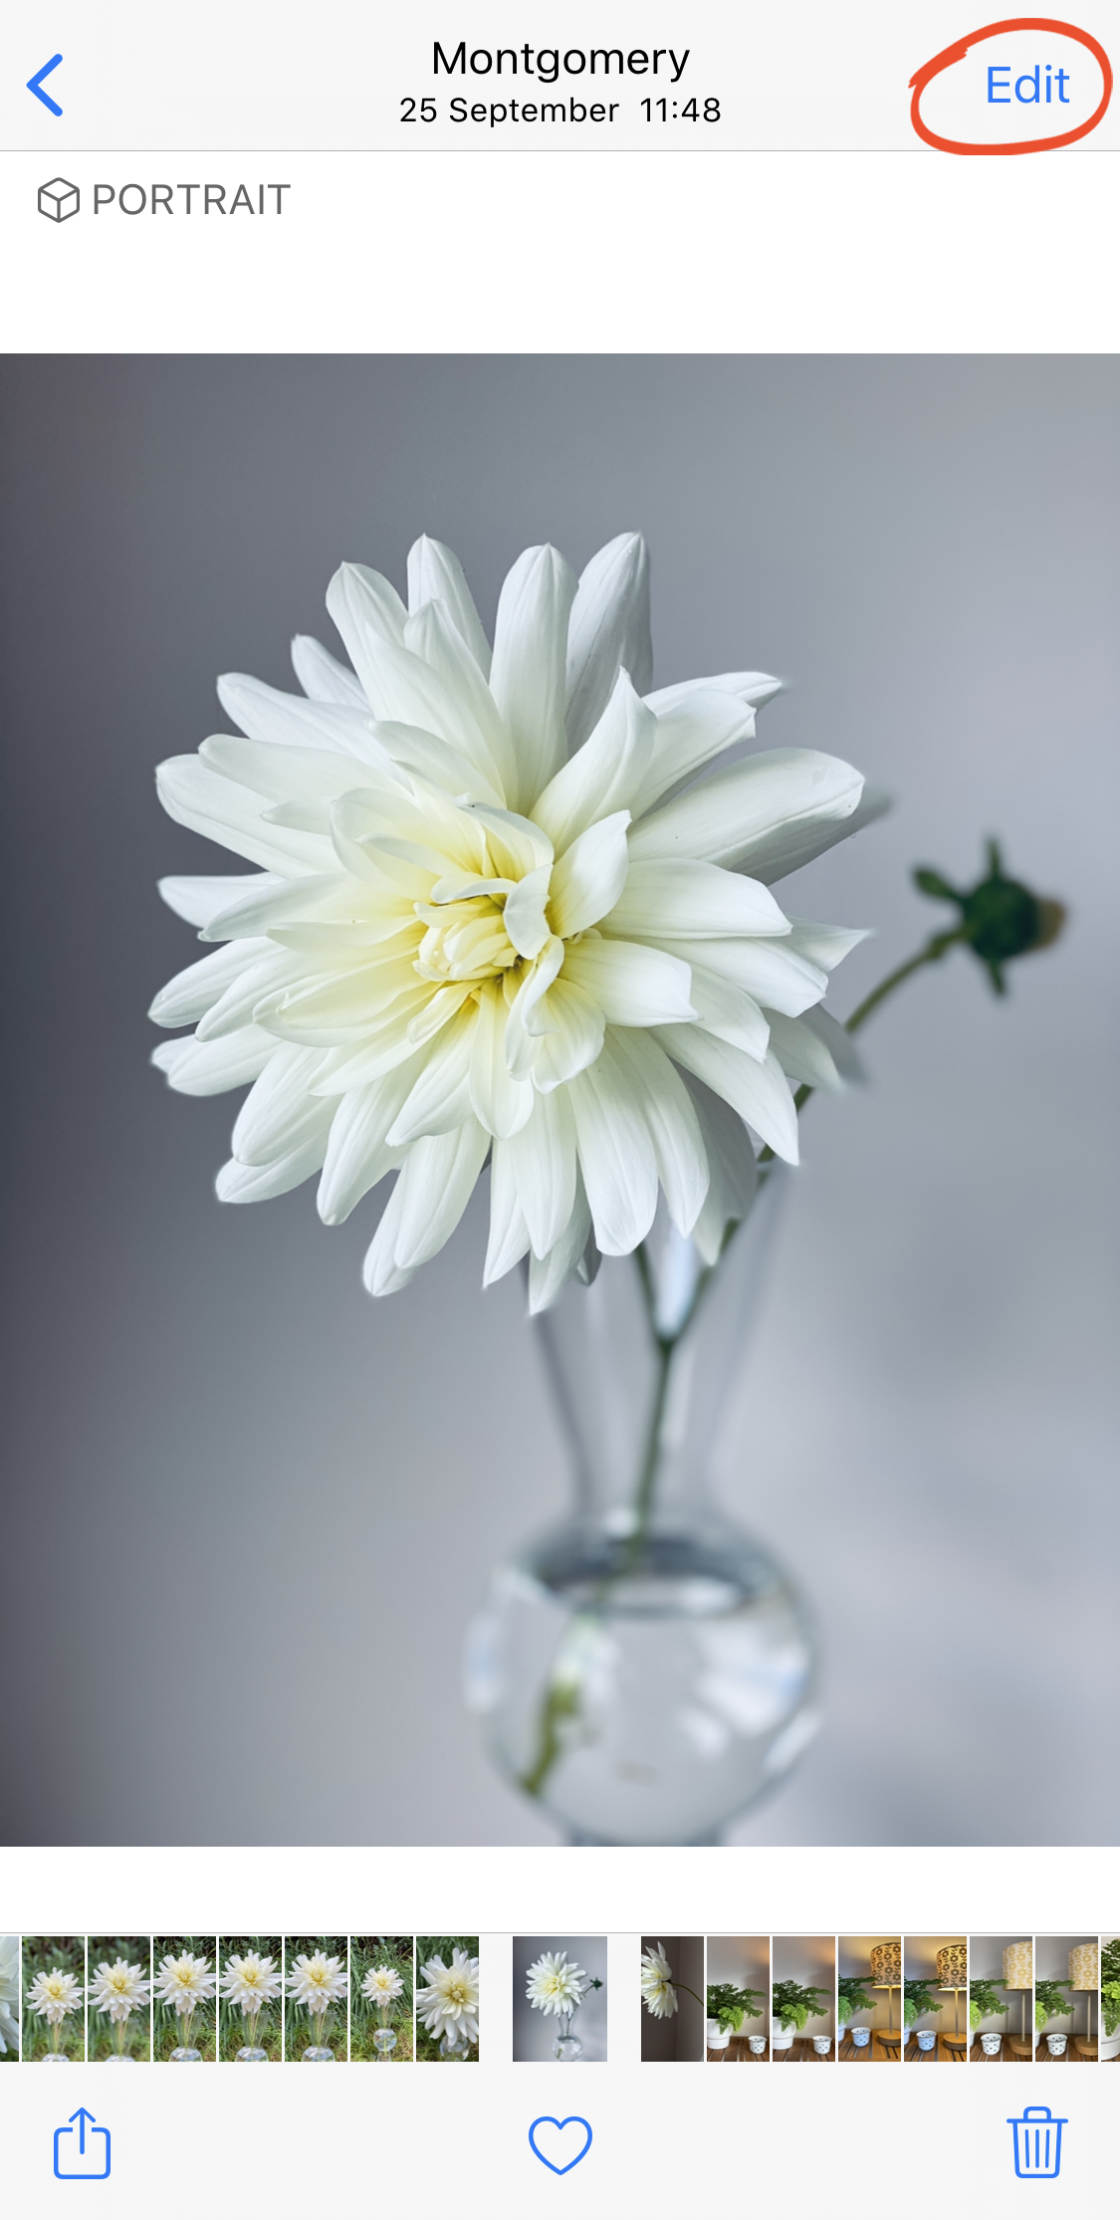
Just open the photograph you want to edit, and so tap Edit at the acme right of the screen.
In the iPhone photo editor, there are three icons at the bottom of the screen. Or if you're editing a Live Photo, in that location will be four icons.
These icons give y'all access to a range of editing tools for improving your epitome.
At present you lot'll larn how to edit pictures on iPhone using these photo editing tools.
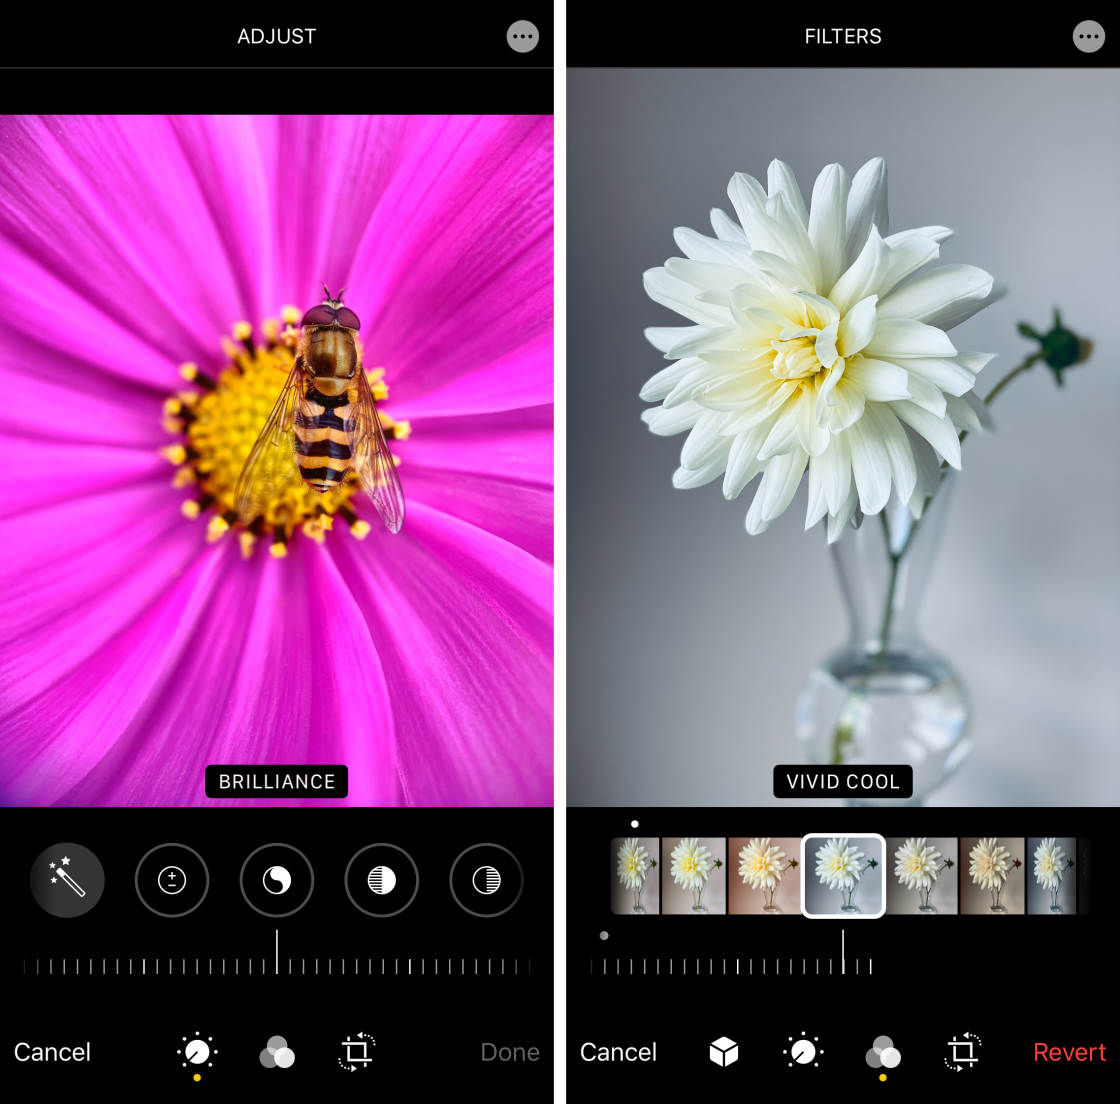
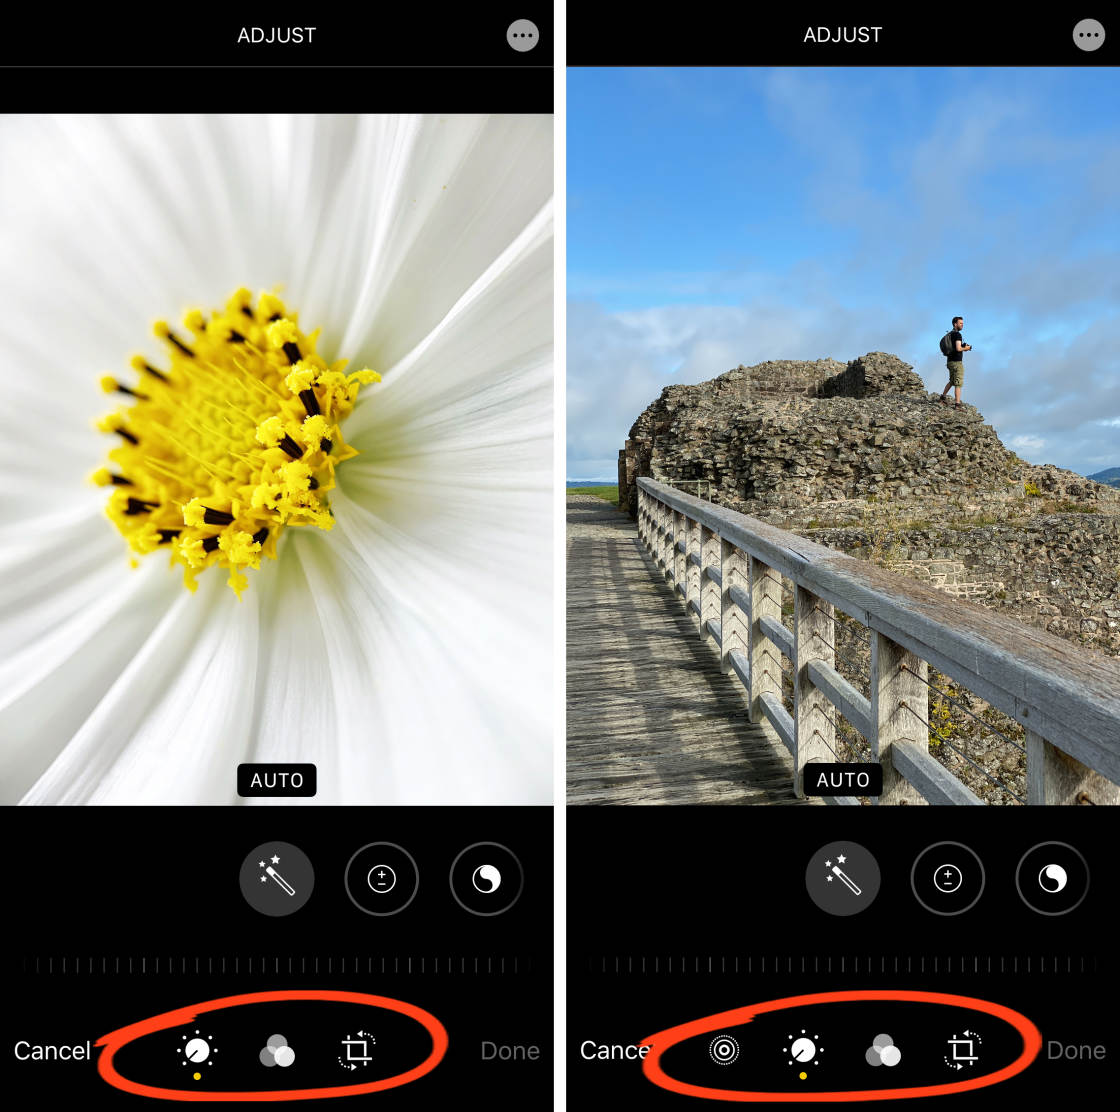
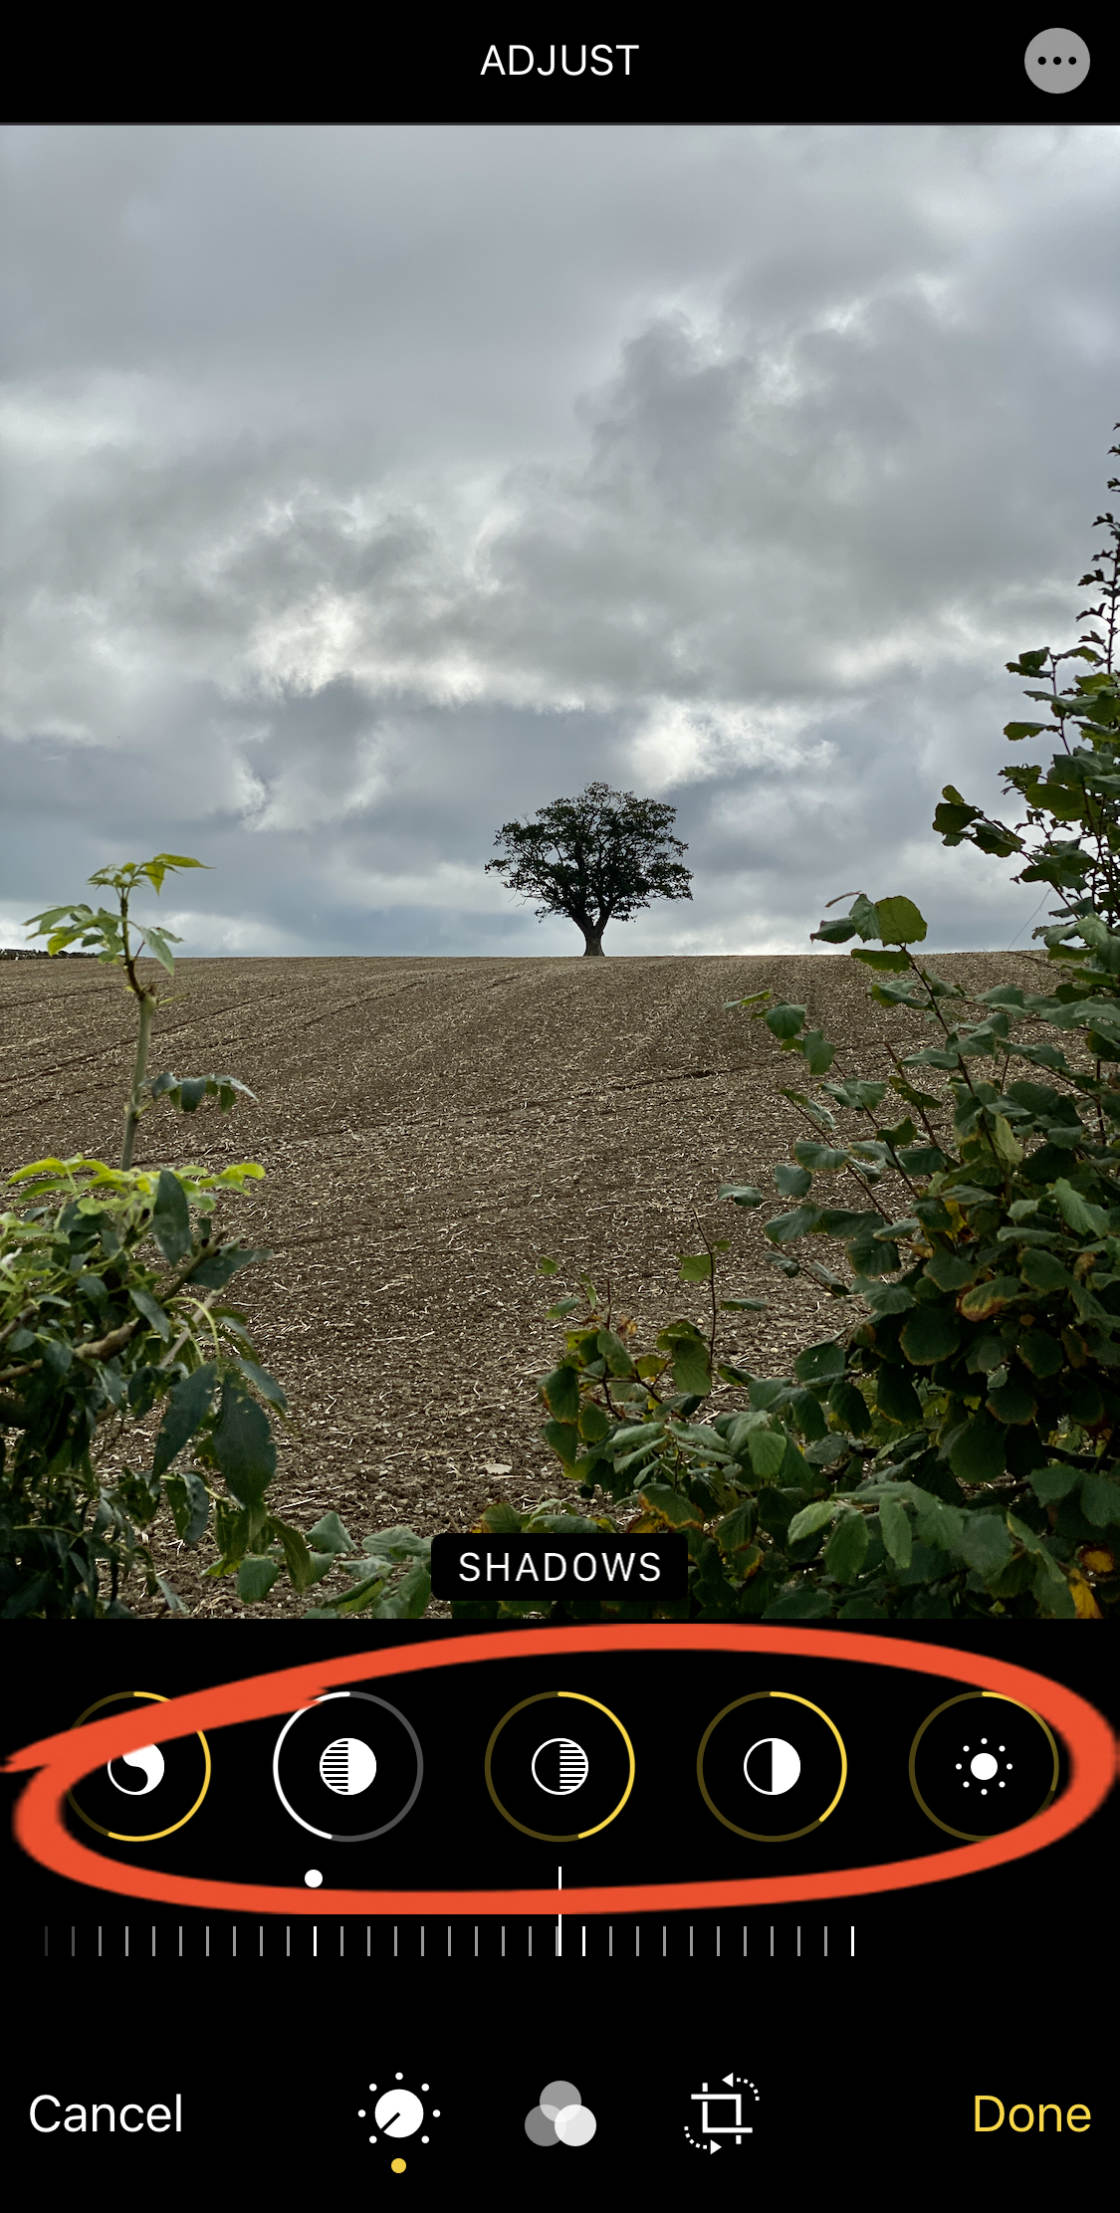
4. Adjust Color, Brightness & Sharpness
Knowing how to edit photos on iPhone allows y'all to turn an boilerplate prototype into an astonishing i!
And the best place to start is by making a few quick adjustments to color, brightness, and sharpness.
To make adjustments to your photograph, ensure the Suit icon (dial) is selected at the bottom of the screen.
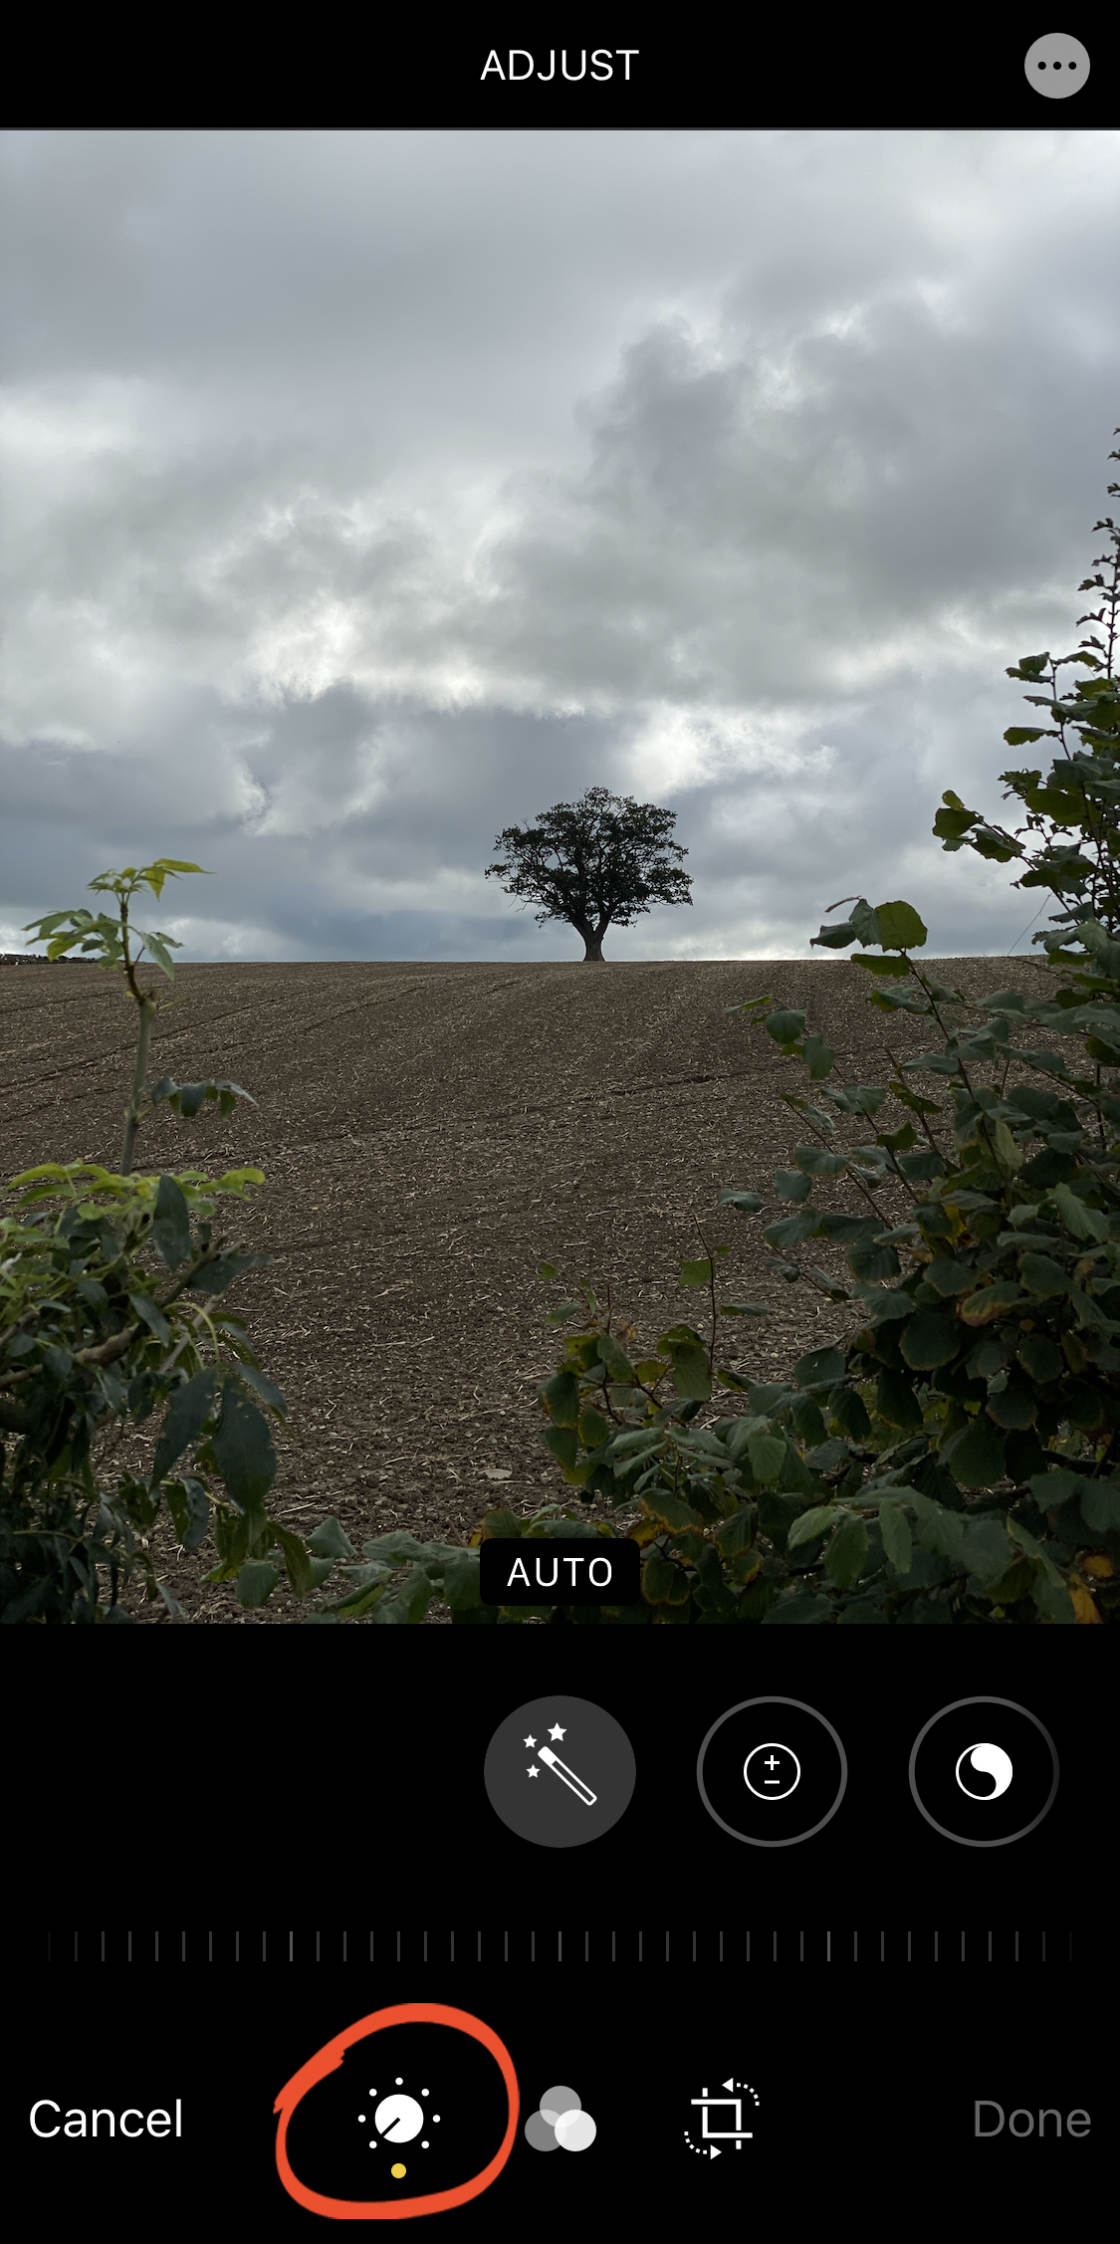
Beneath your photo, you'll see a row of adjustment tools. Swipe beyond to see more tools.
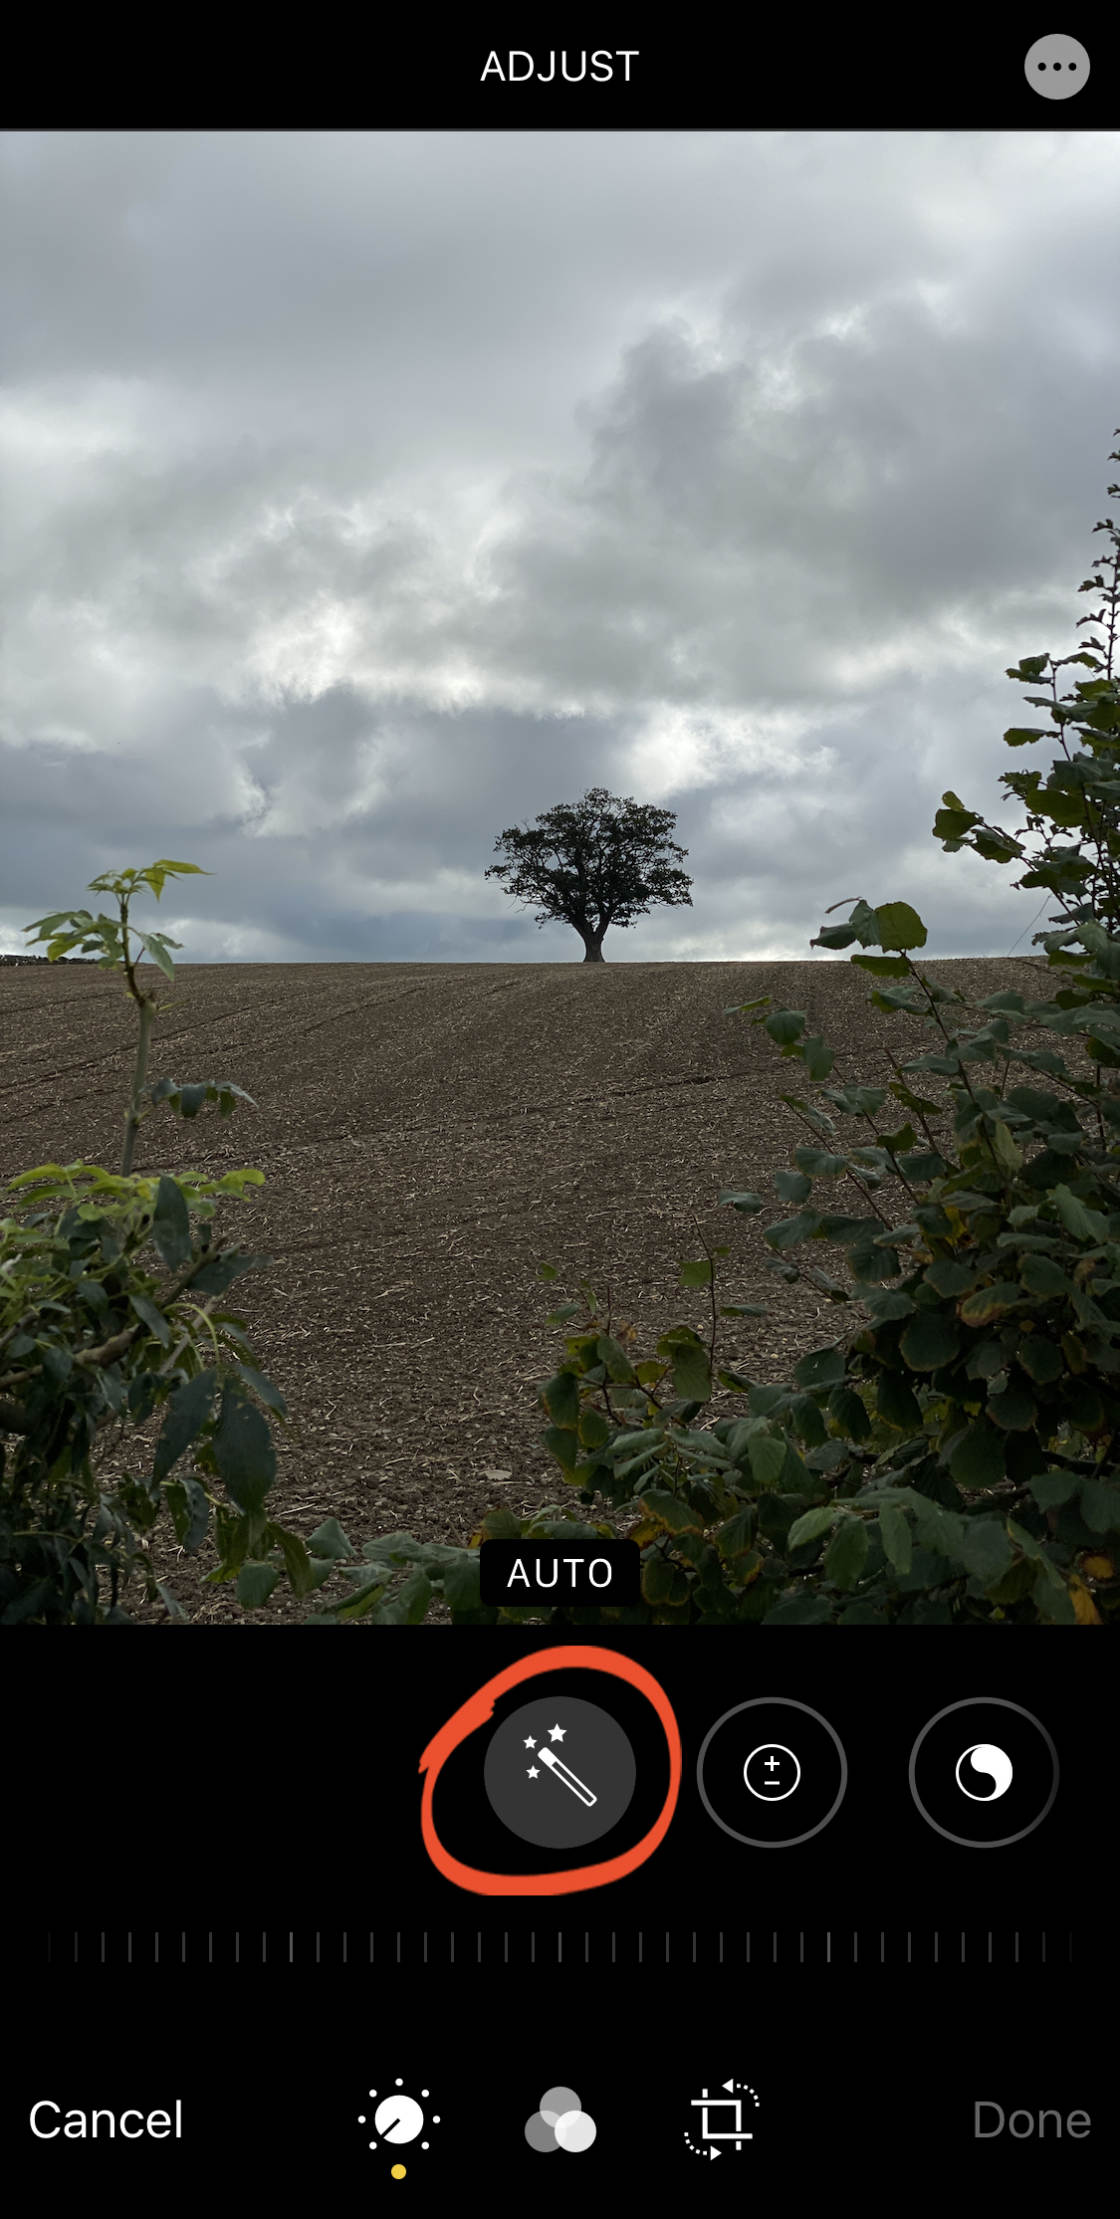
iv.1 Motorcar Raise
The Auto tool automatically adjusts the colors and effulgence levels in your photo.
Simply tap theAuto icon to utilize this one-tap edit. The icon turns pale grey when information technology's switched on.
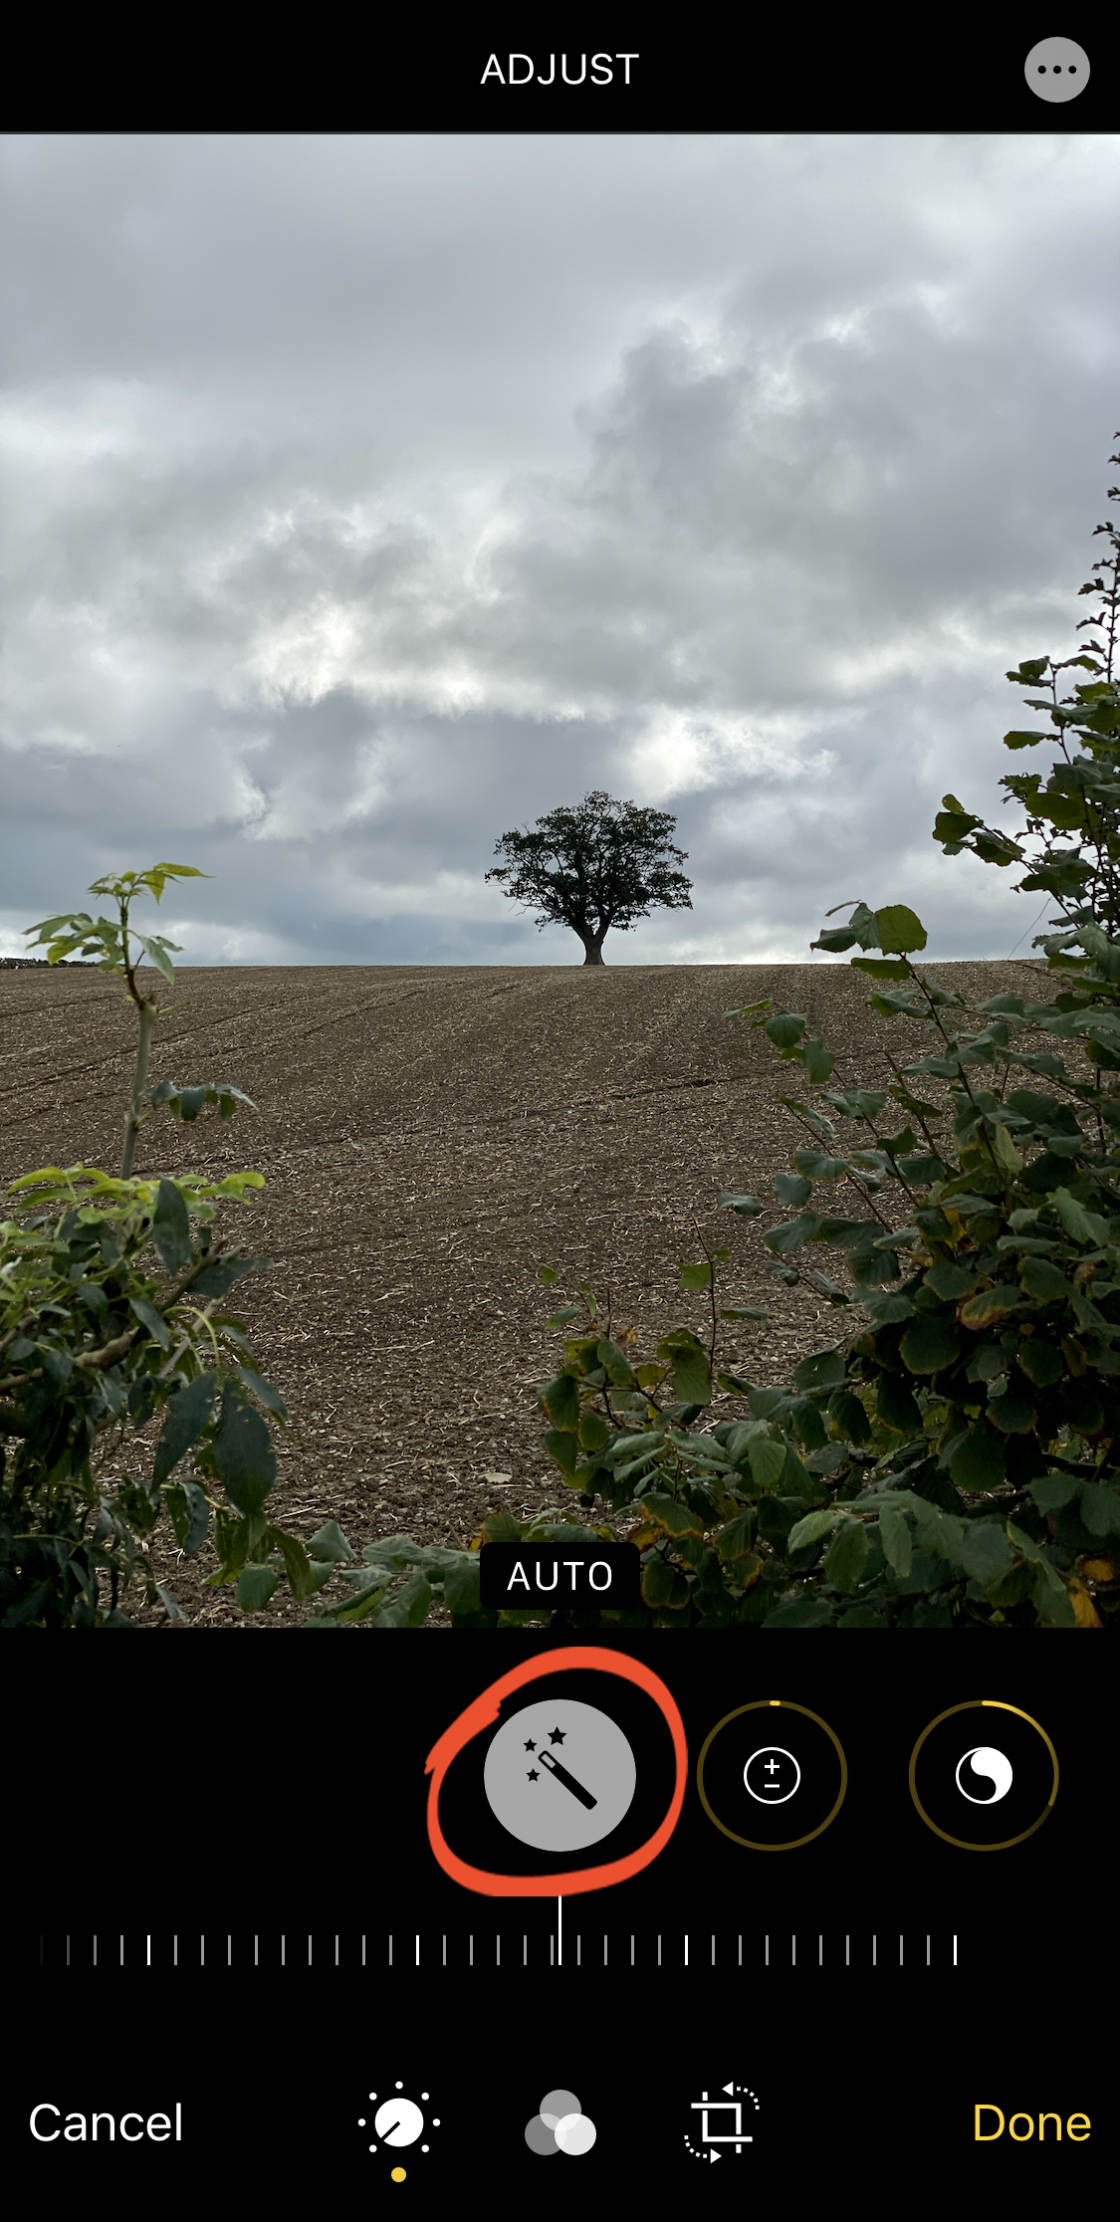
The corking matter nearly the Auto tool is that you can actually fine-tune the edits that it'south made.
Yous tin apply the slider at the bottom of the screen to suit the strength of the edit.
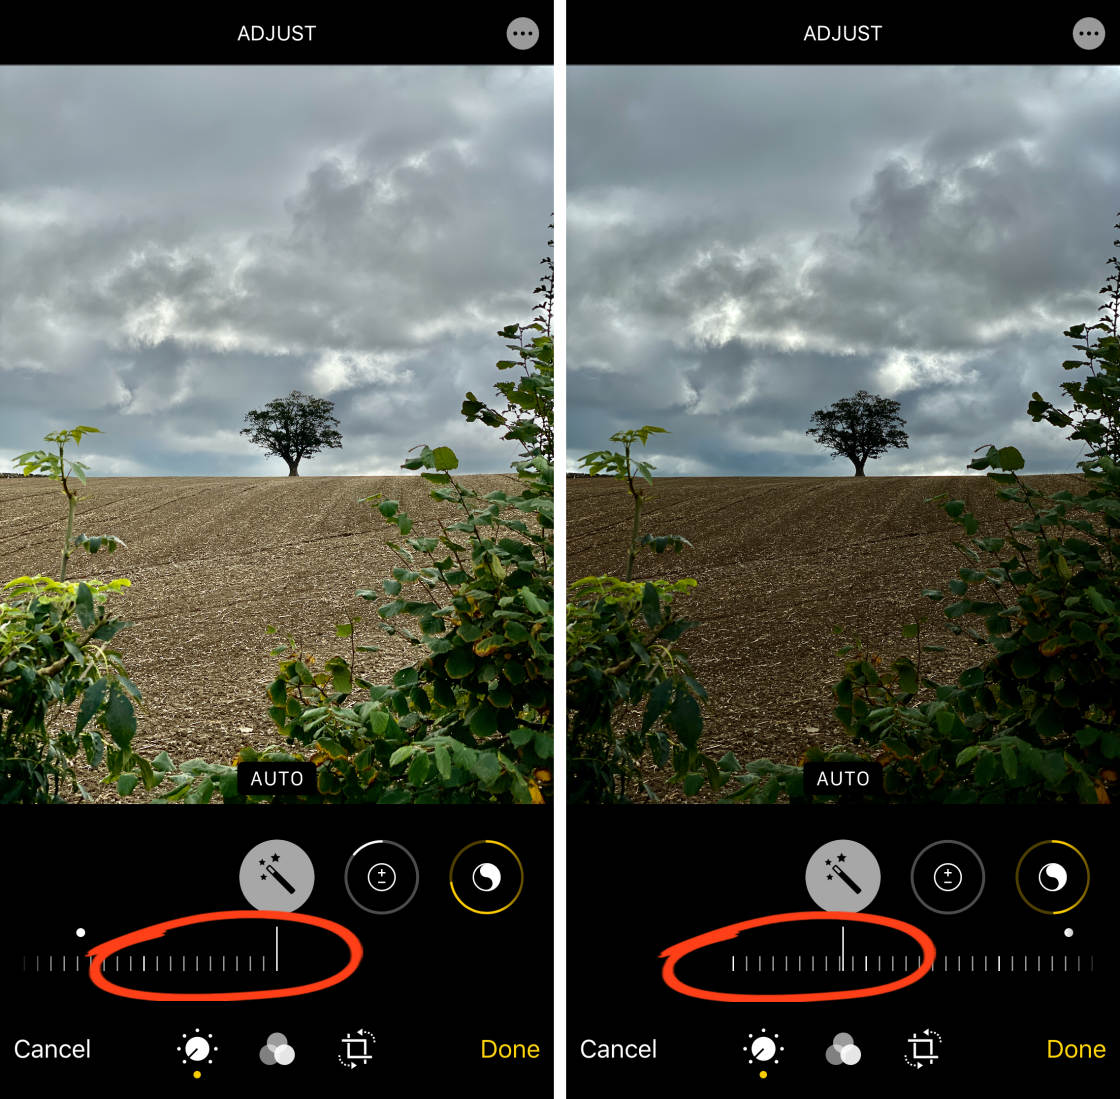
You can also suit the individual edits that have been made to color, brightness, etc. If you swipe beyond the adjustment icons, a bold line indicates which tools the Machine adjustment has used.
To fine-tune an individual aligning, tap on the tool and use the slider to adjust its strength.

If yous desire to remove the Auto edit from your photograph, tap the Automobile icon then information technology turns dark grayness.
Now, you'll find how to use the transmission adjustment tools to make your own edits.
iv.2 Exposure
The Exposure tool brightens or darkens your photo.
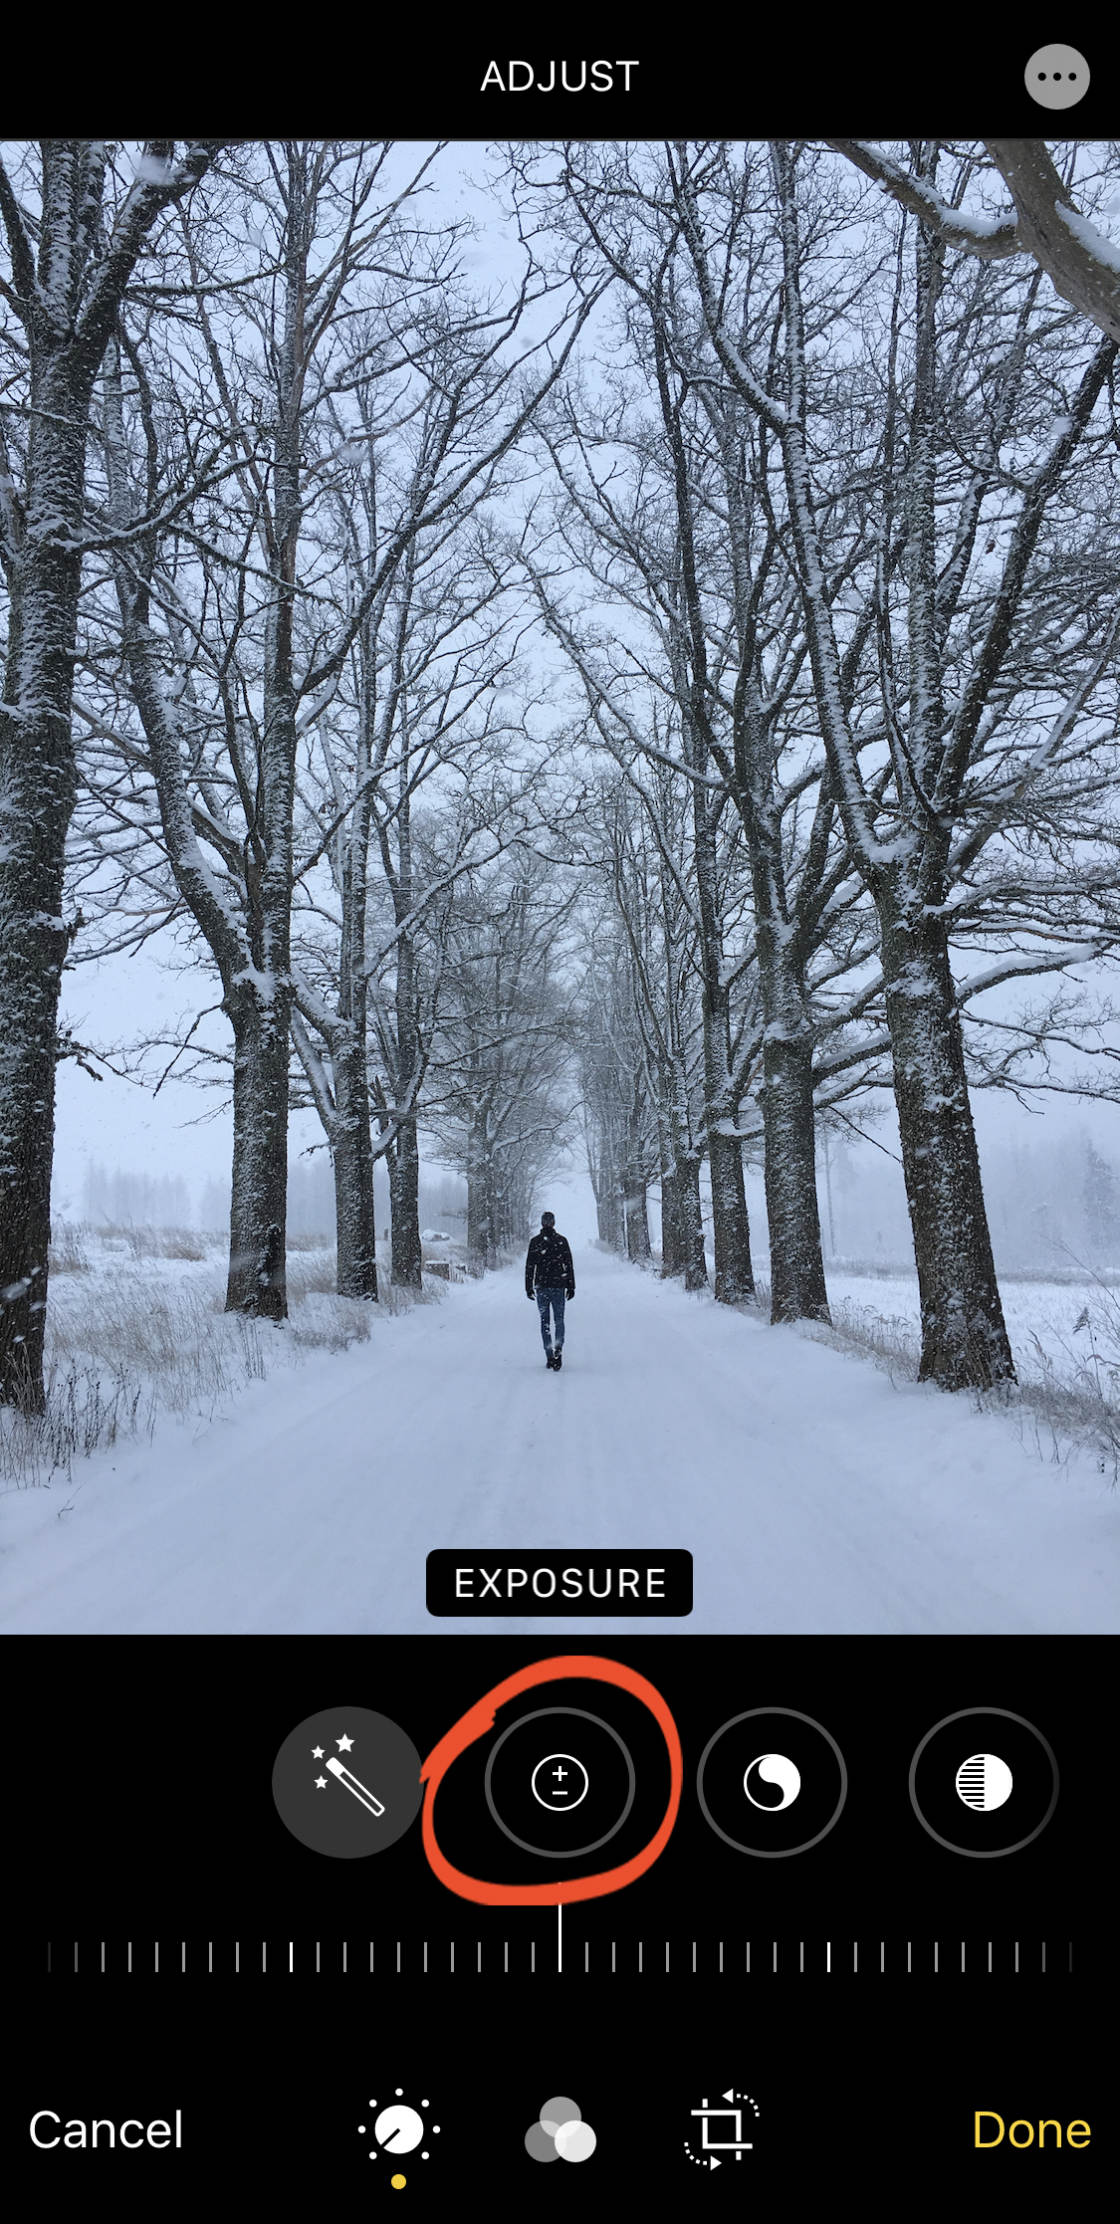
Drag the slider right to brighten the image, or left to darken it.
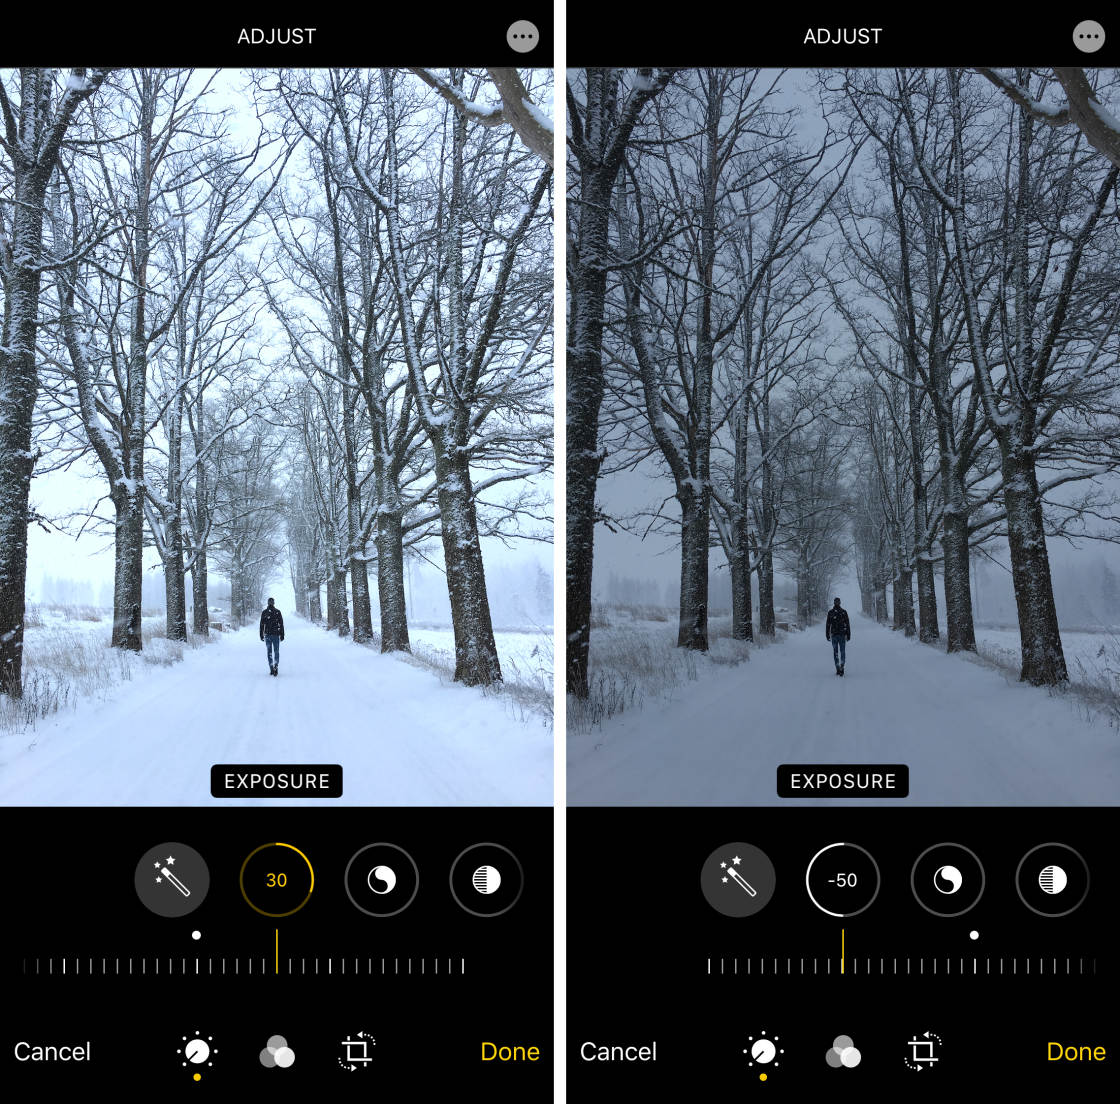
The Exposure tool has more than consequence on the highlights than the shadows. This means that the bright tones in your photo are affected more than than the night tones.
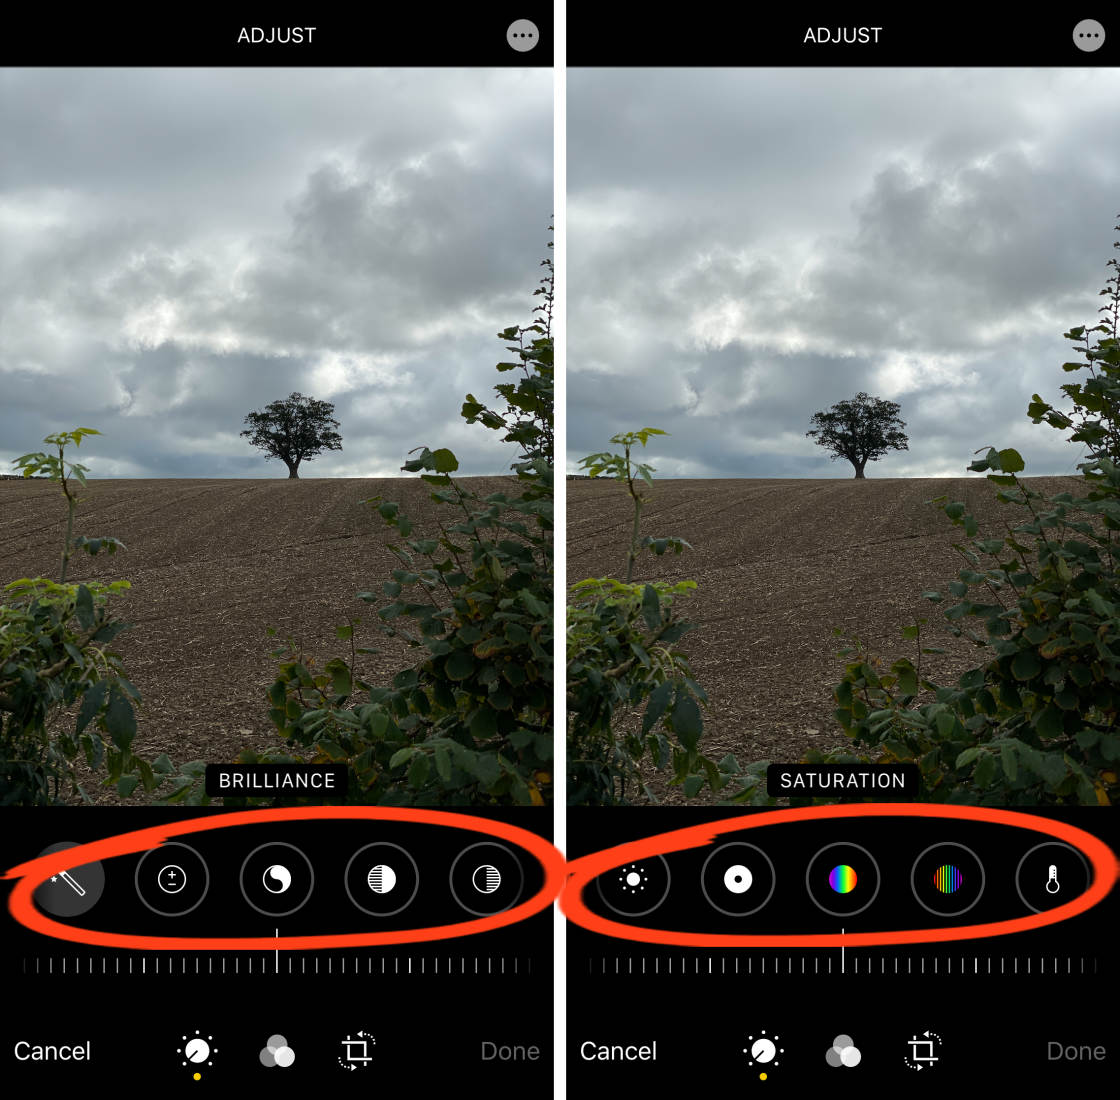
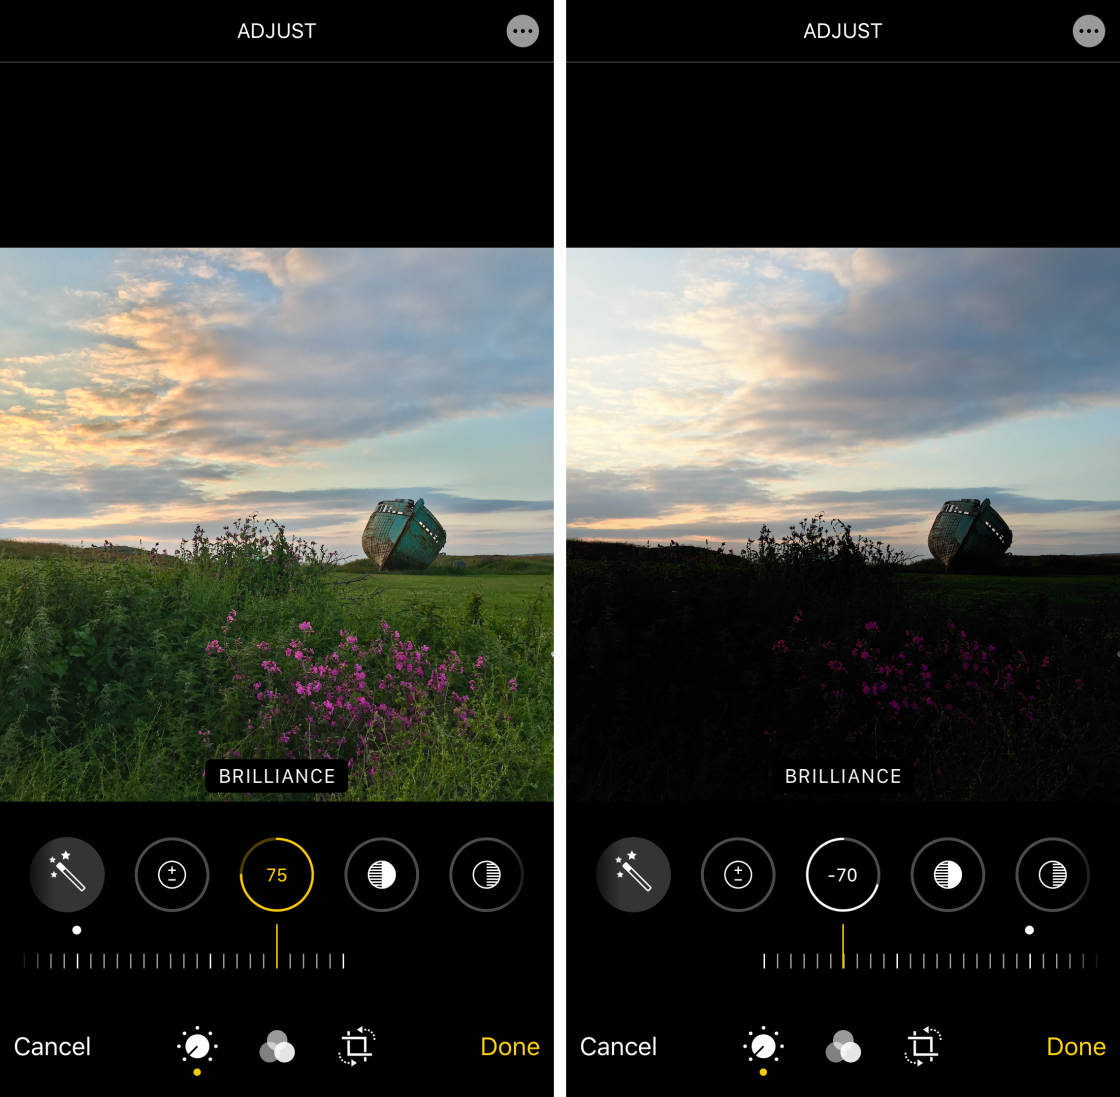
four.three Brilliance
The Brilliance tool is great for bringing out details and making your photograph look richer and more vibrant.
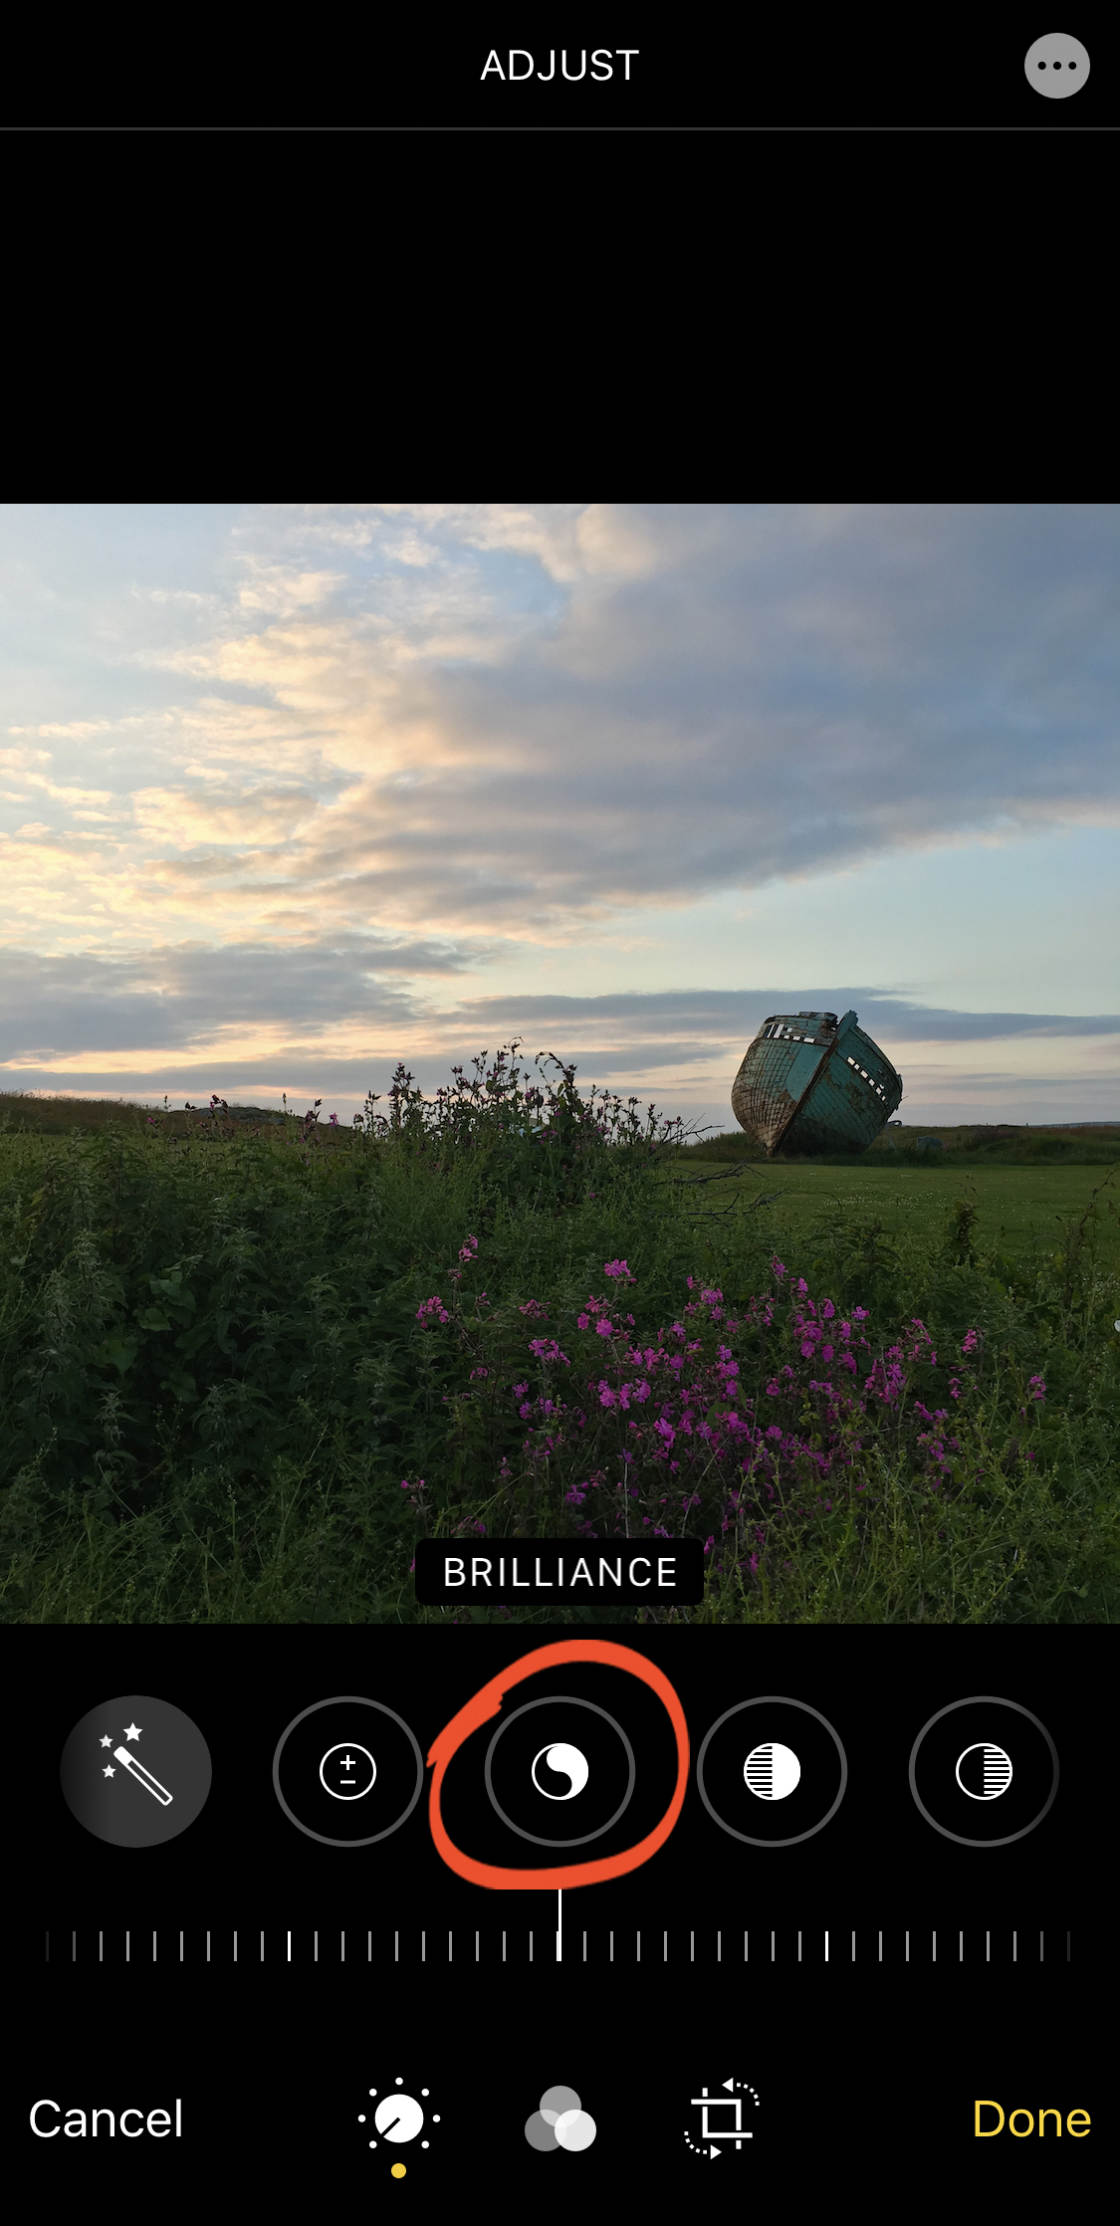
Drag the slider right to burnish shadows and darken highlights. If you elevate left, the shadows will go darker and the highlights brighter.
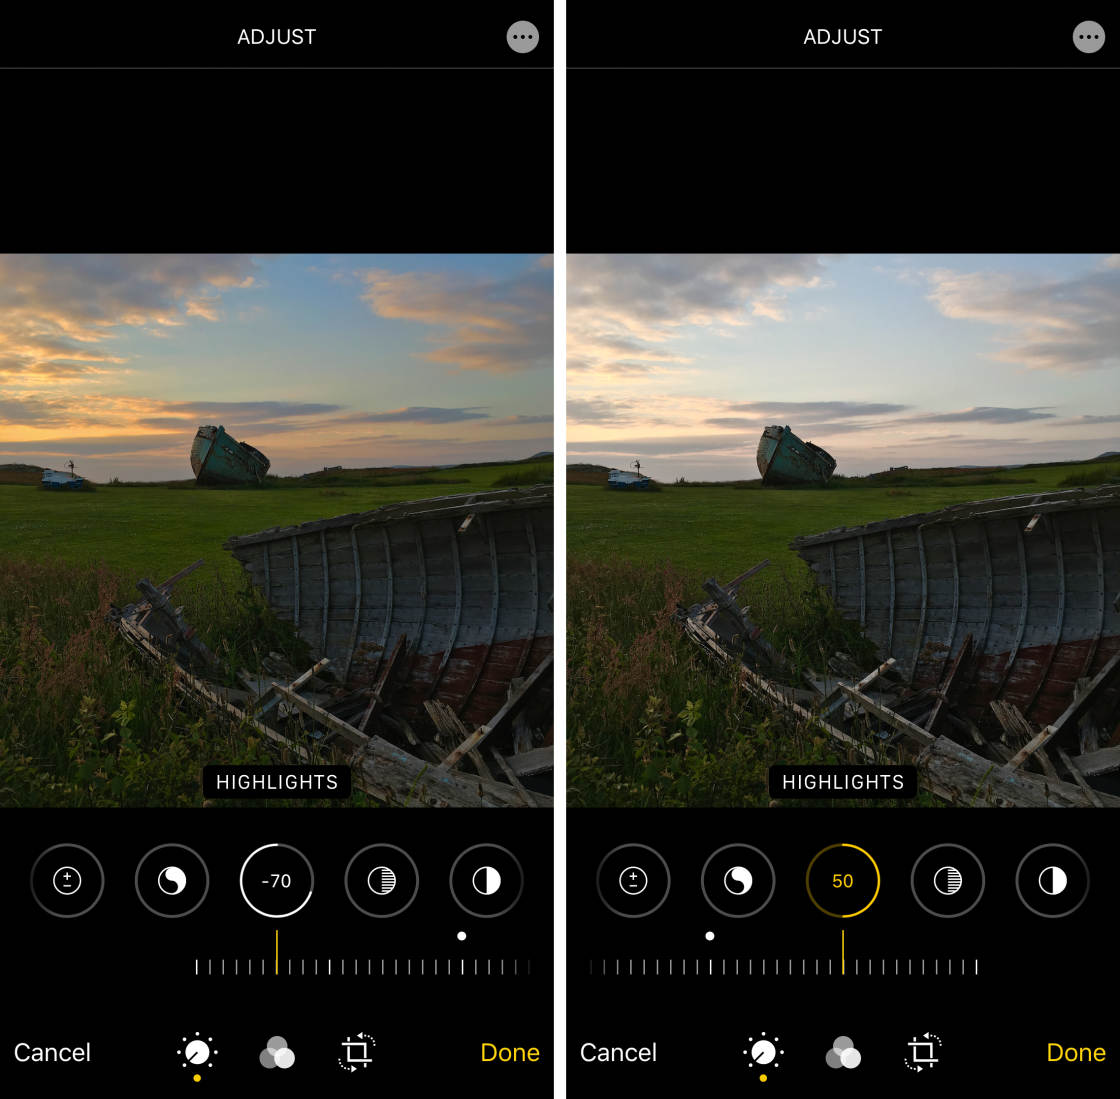
four.four Highlights
The Highlights tool adjusts the brightness of simply the bright areas in your photo.
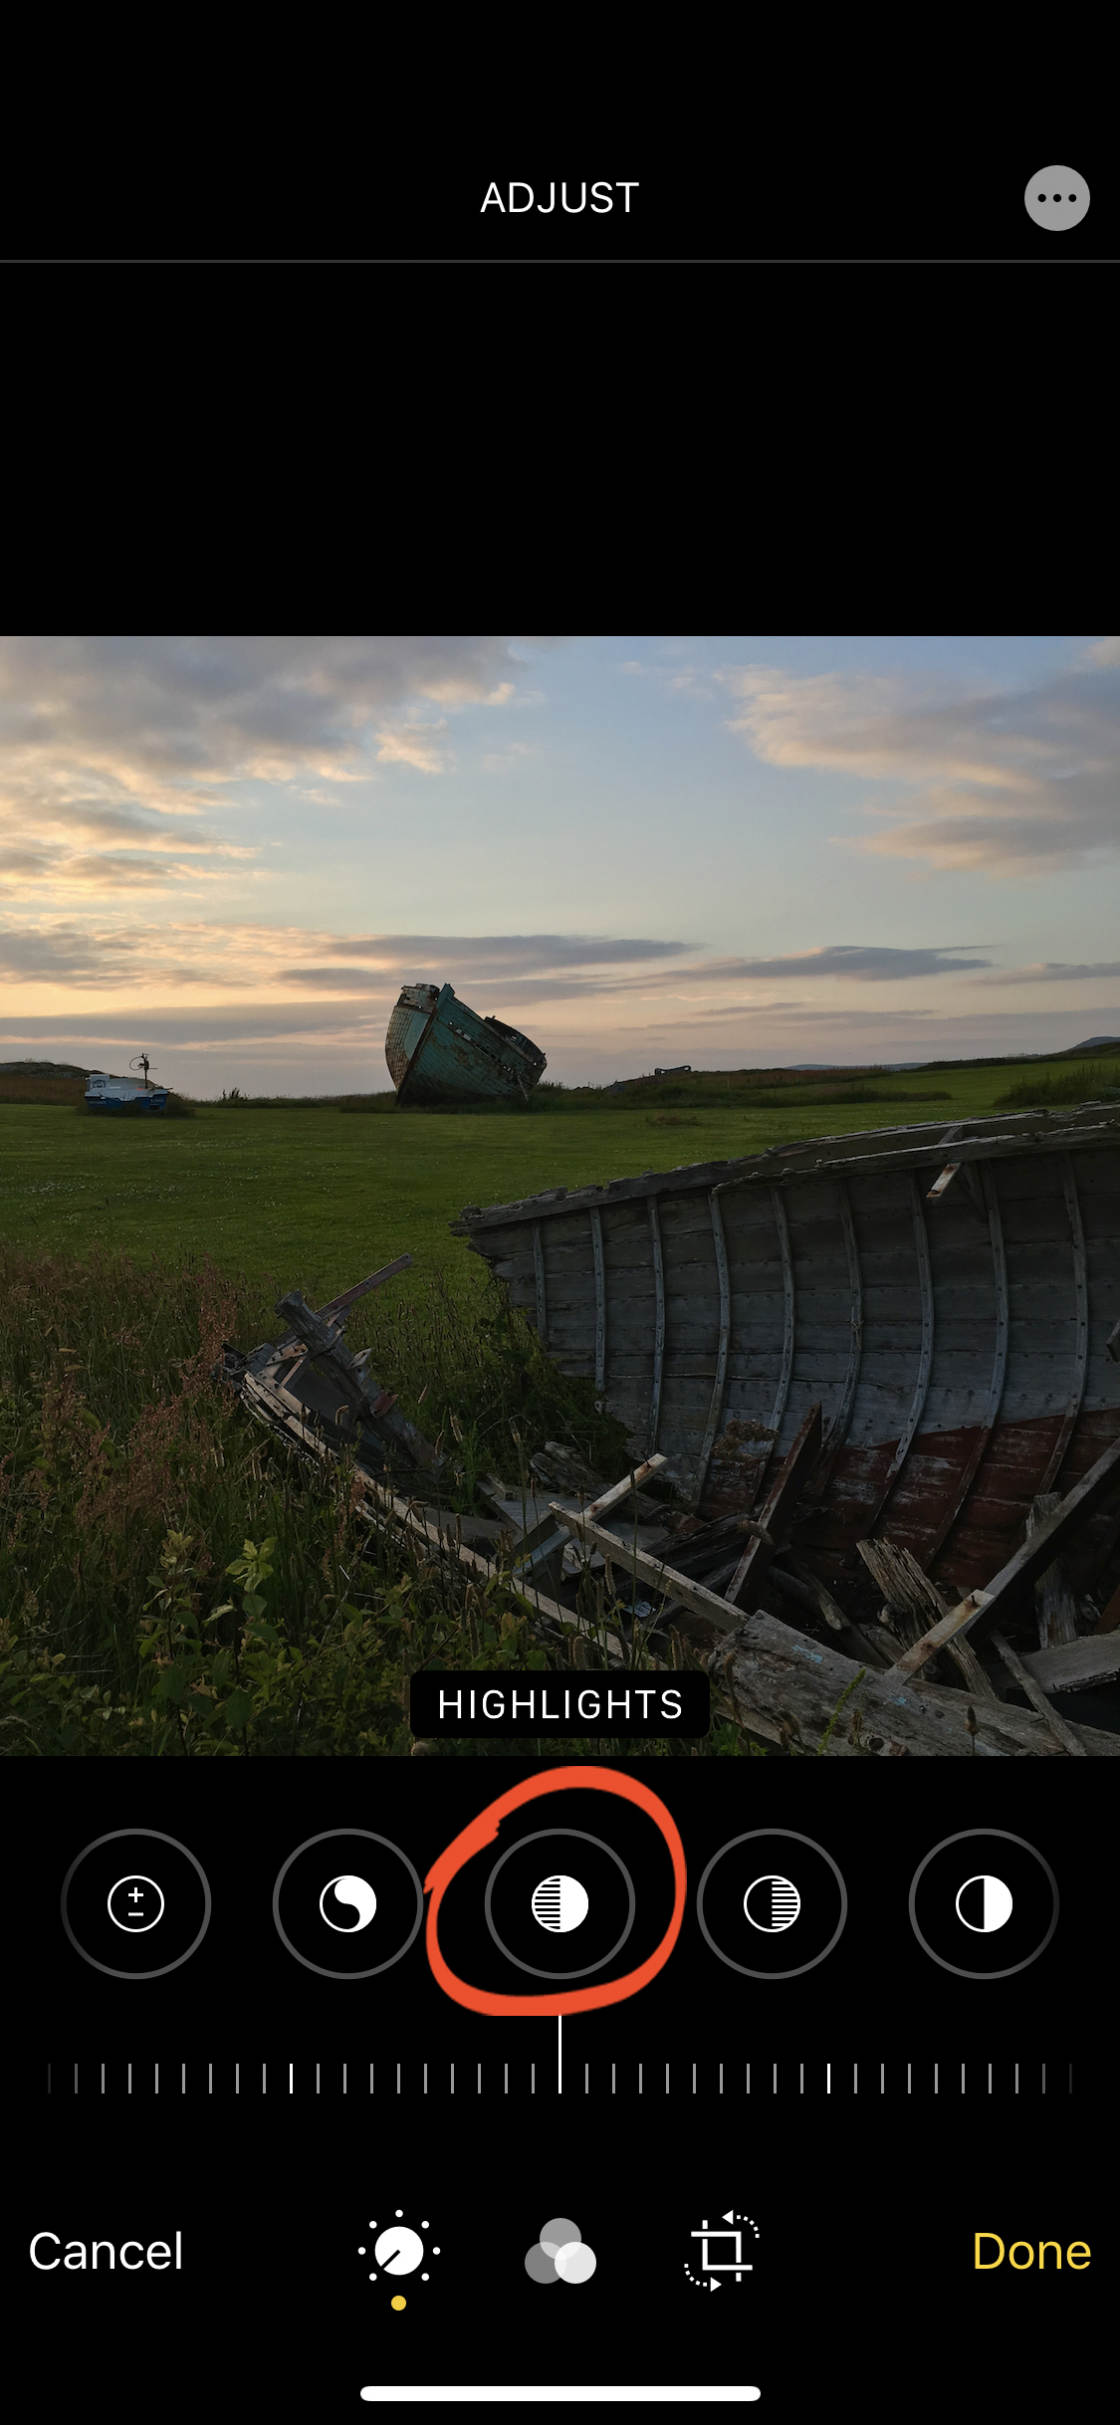
Drag the slider left to make the highlights darker, or right to brand the highlights brighter.
four.v Shadows
The Shadows tool adjusts the brightness of only the dark areas in your photo.
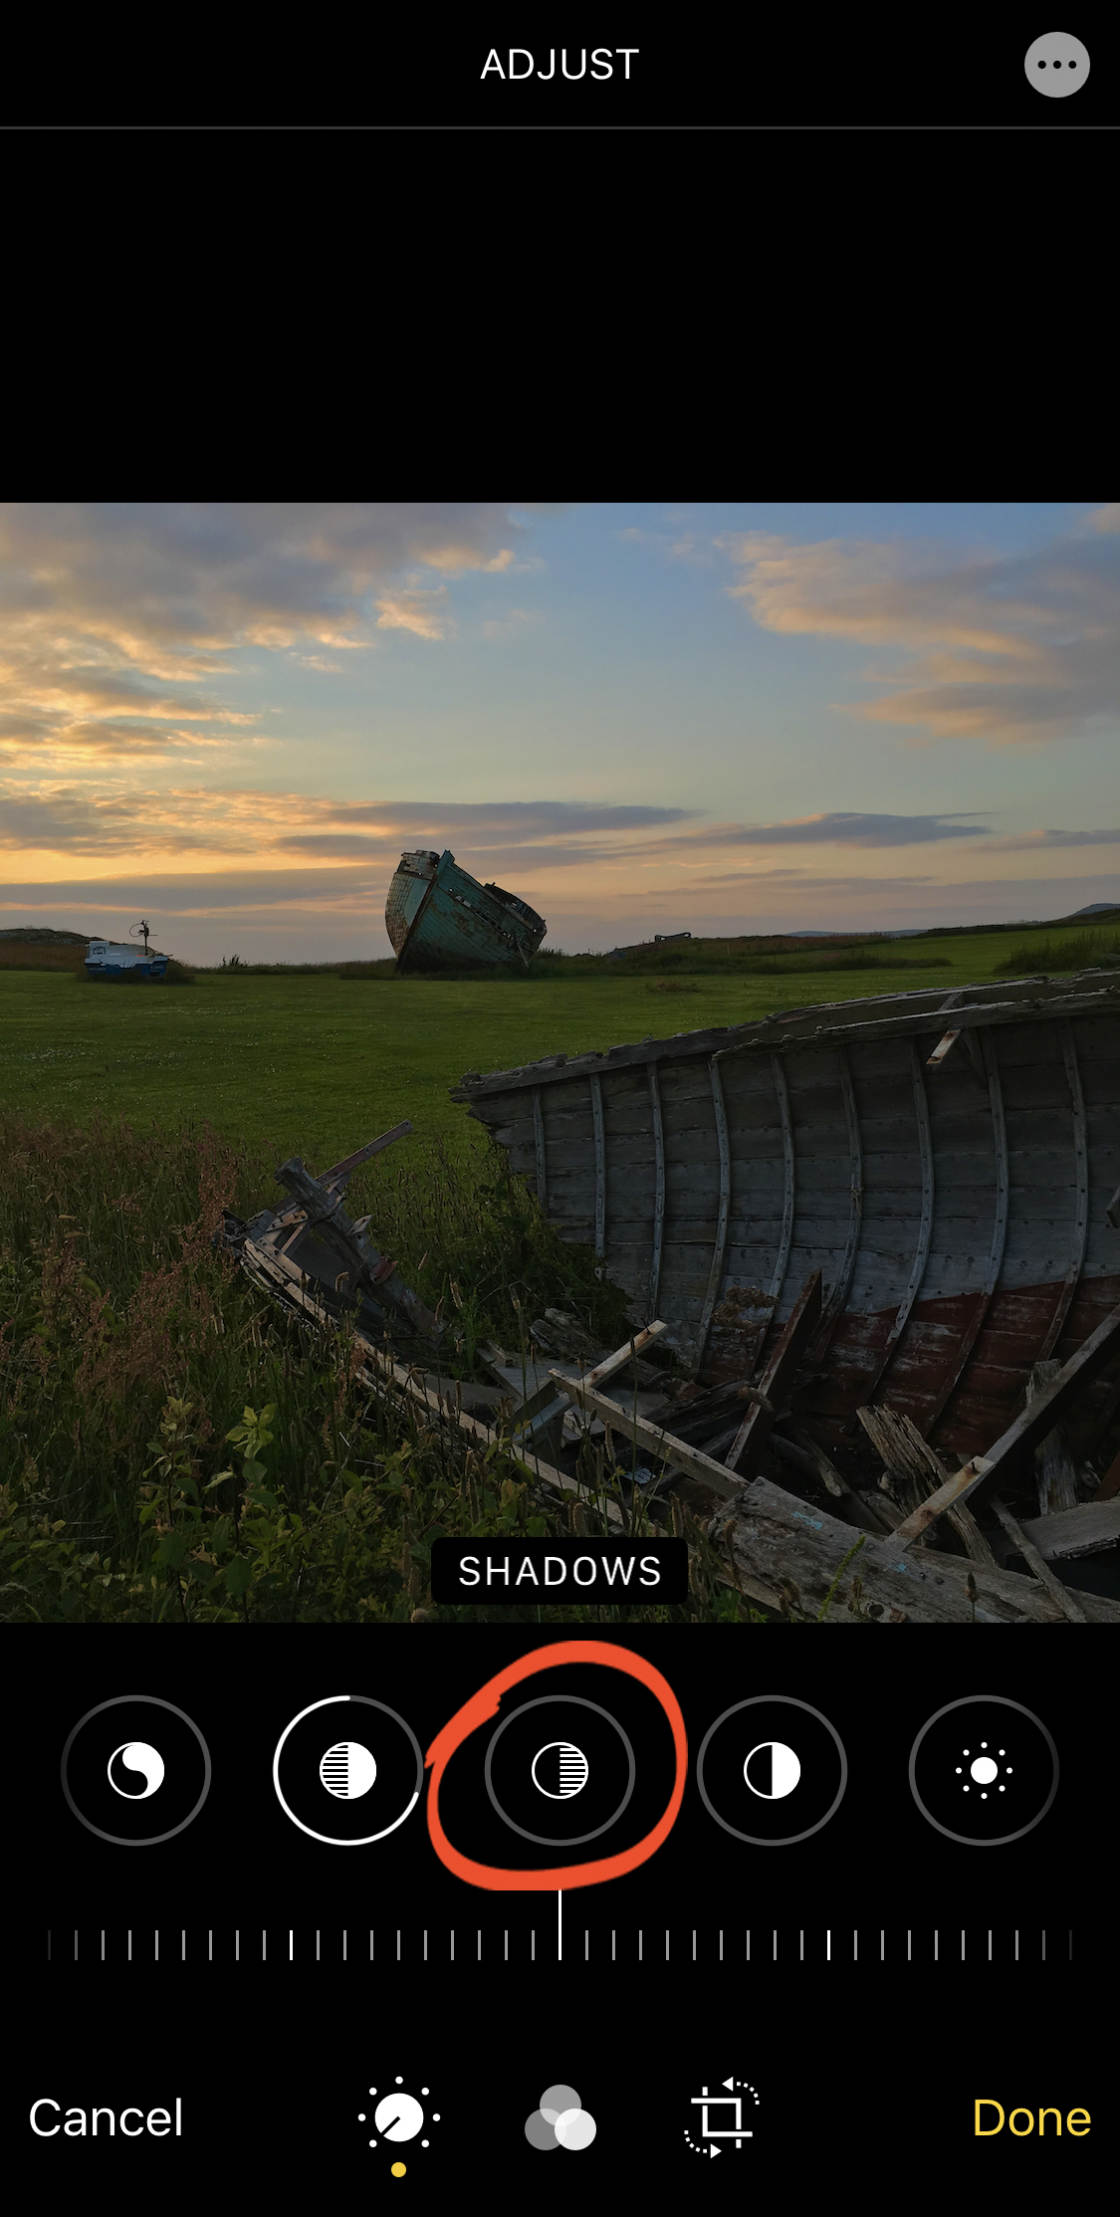
Elevate the slider right to brand the shadows brighter, or left to brand them darker.

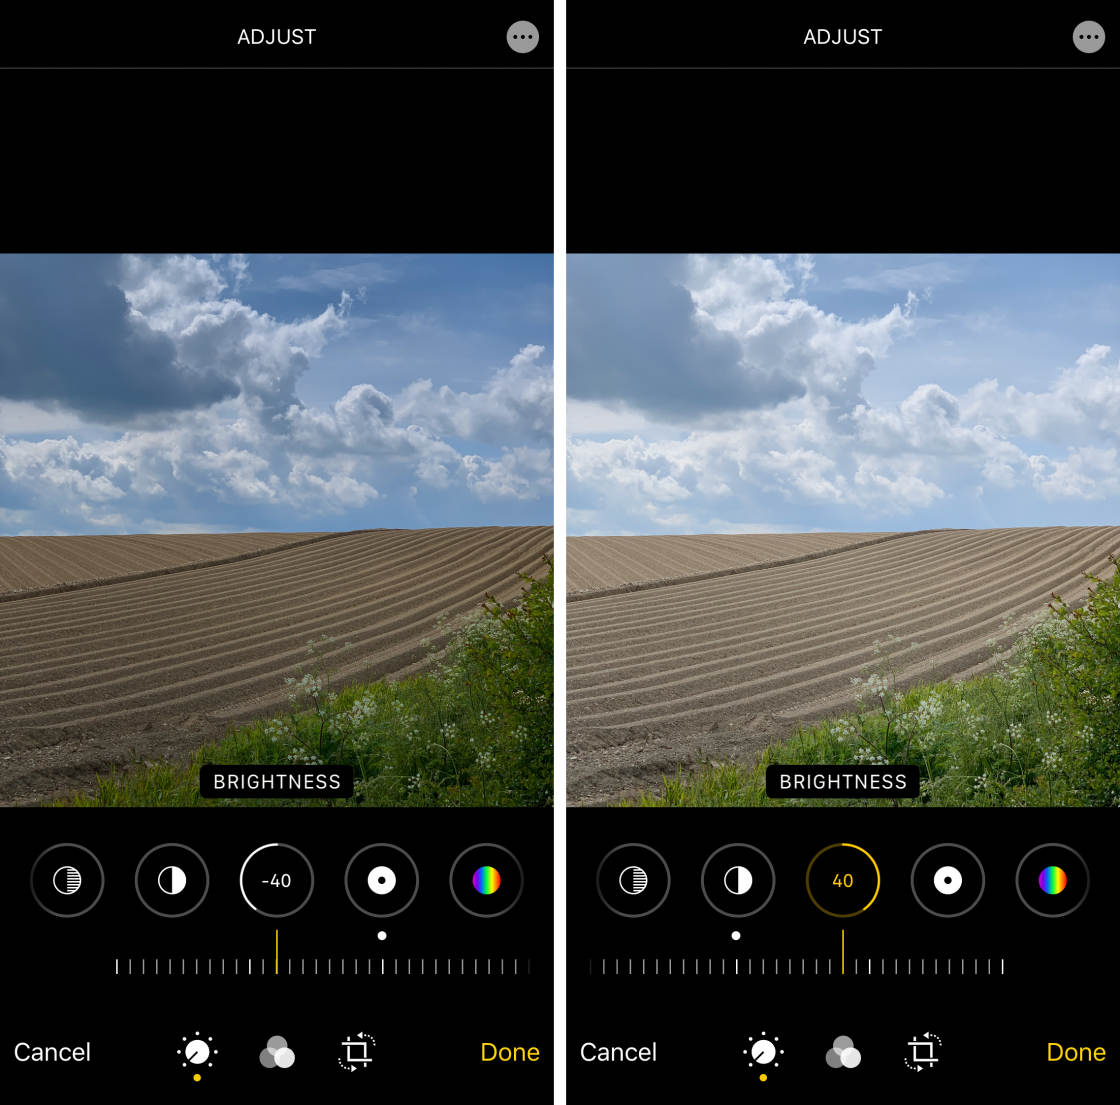
iv.vi Contrast
TheDissimilarity tool adjusts the contrast between the dark and bright tones in your photograph.
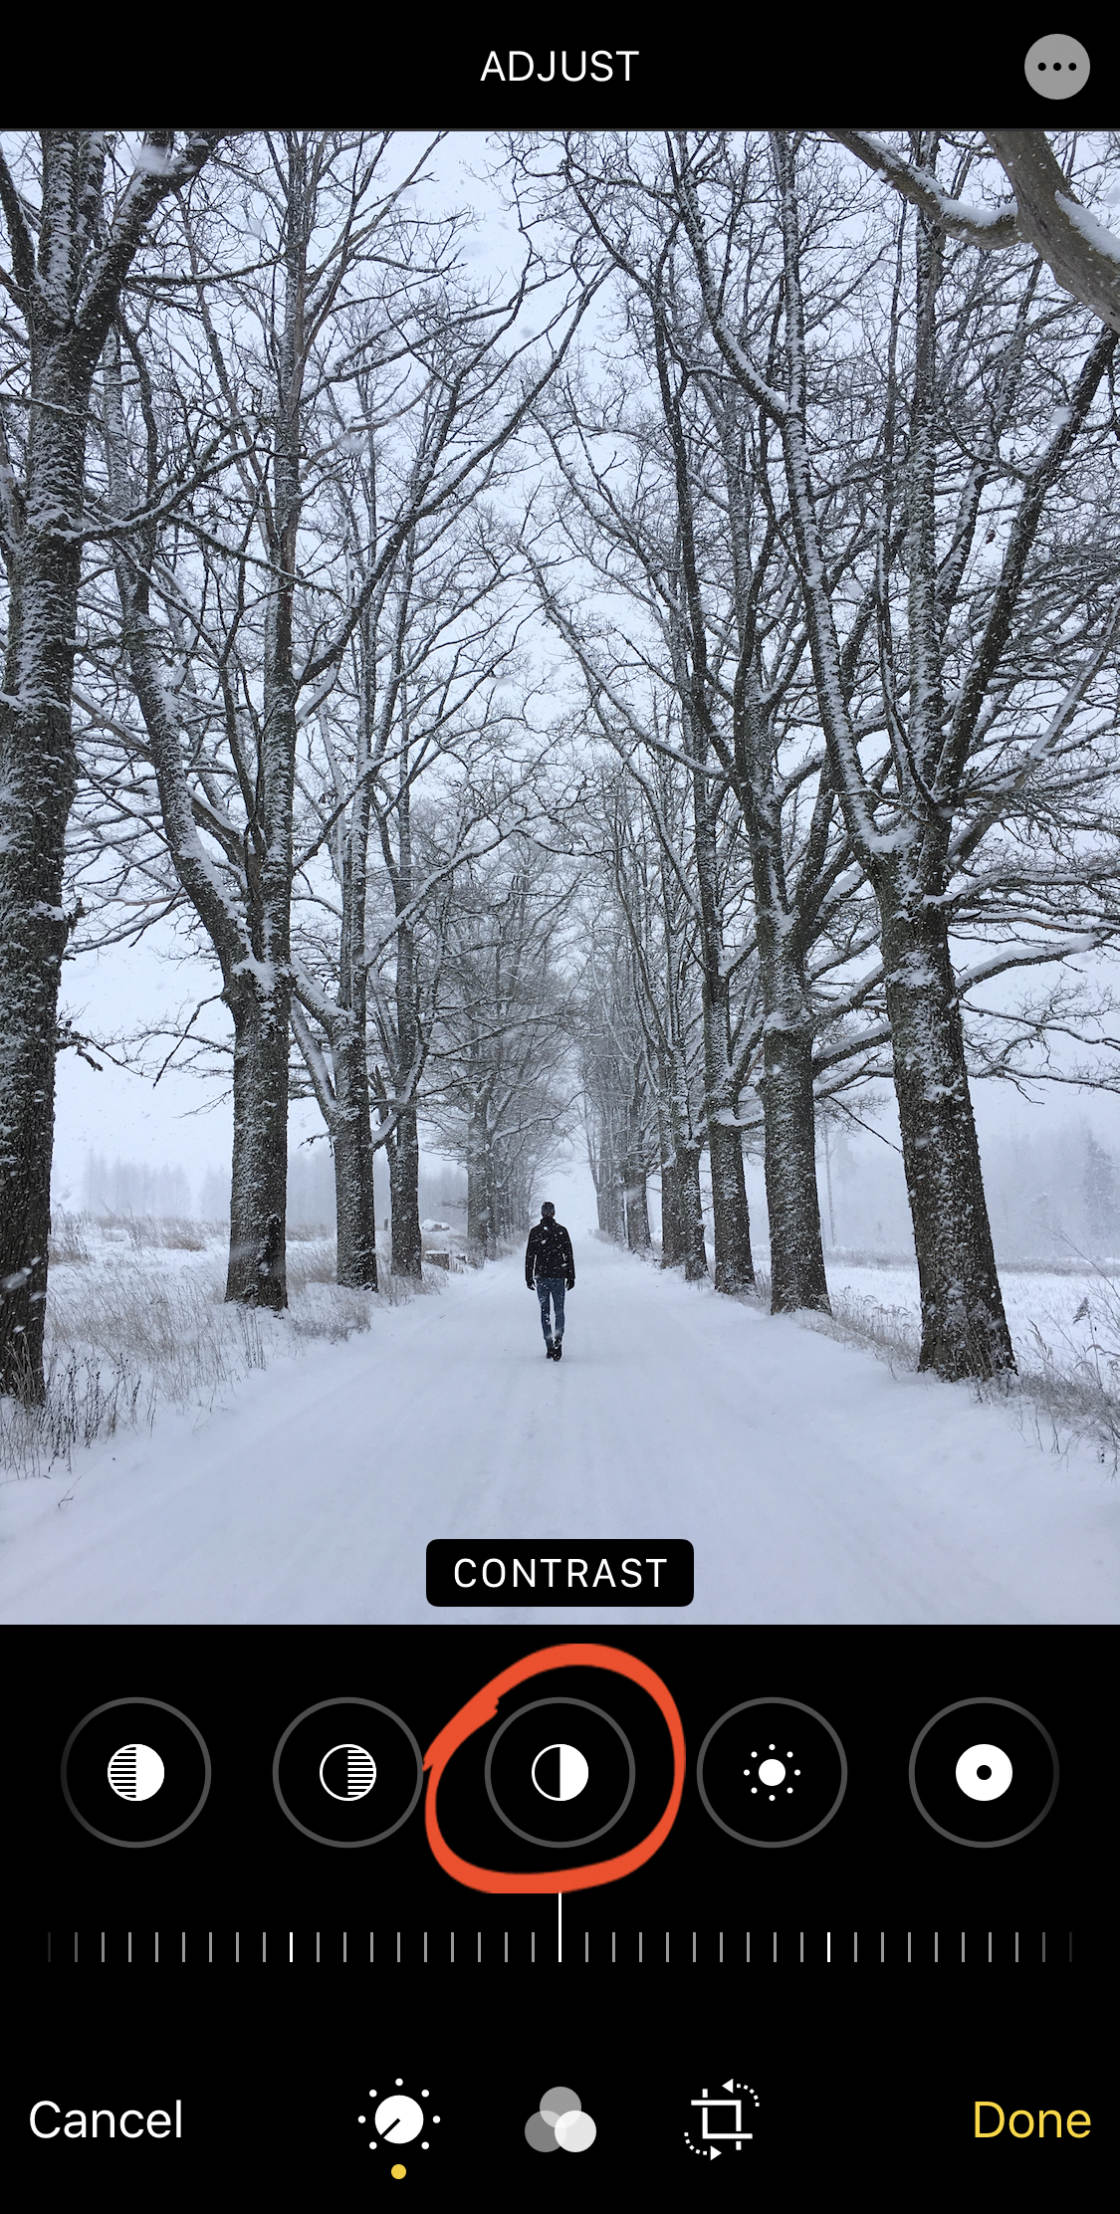
Elevate the slider right to increment contrast, making the shadows darker and the highlights brighter. Or elevate left to reduce contrast, making the shadows and highlights more similar in tone.
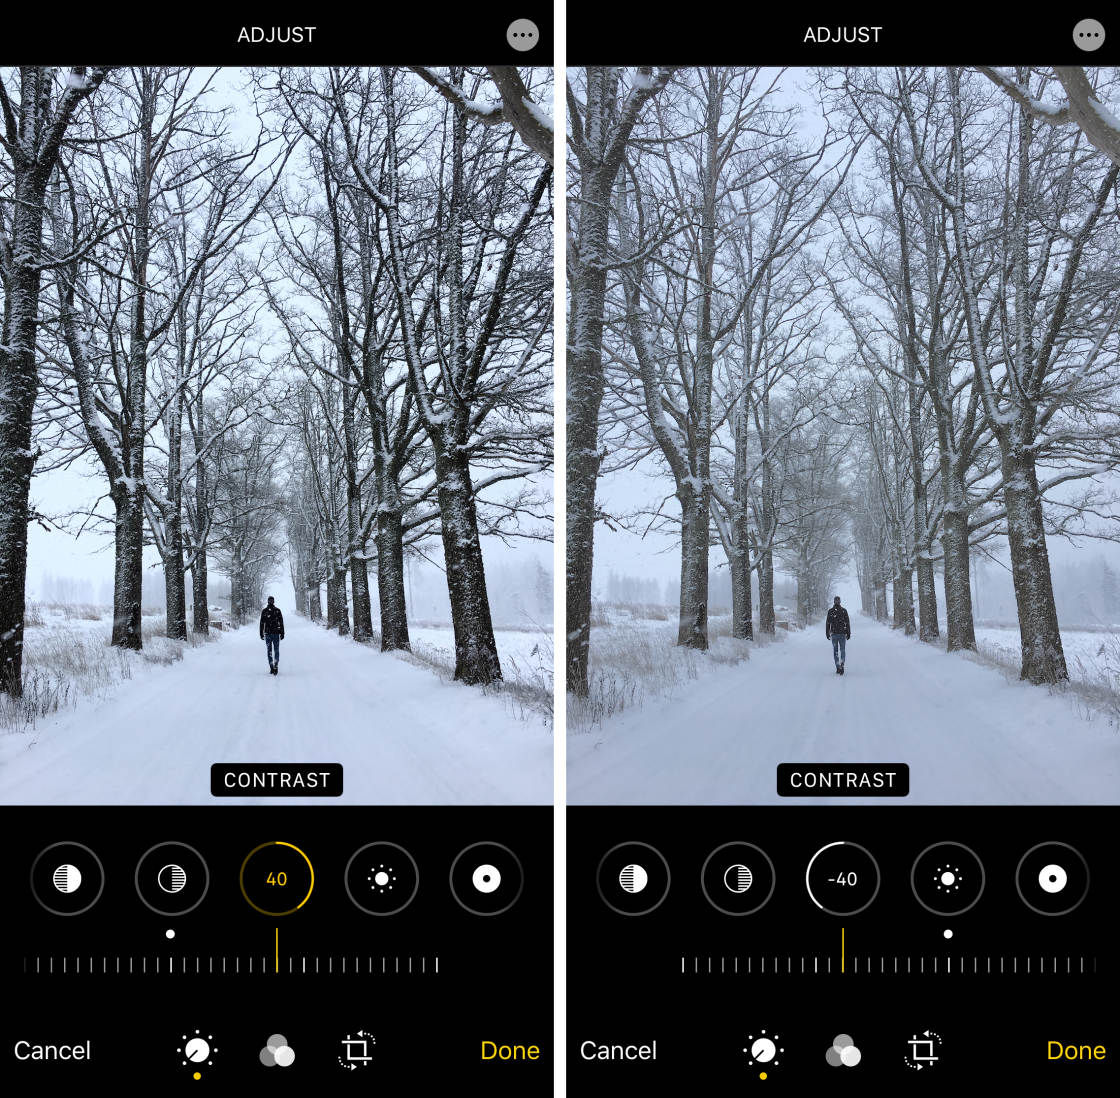
In well-nigh cases, reducing contrast doesn't produce good results. Increasing the contrast a trivial can make your photo await sharper. However, you'll oftentimes go ameliorate results with theLuminescence tool every bit information technology keeps the colors dainty and vibrant.
iv.vii Brightness
The Effulgence tool brightens or darkens your photograph. But information technology does it in a slightly dissimilar (and usually better) way from the Exposure tool.
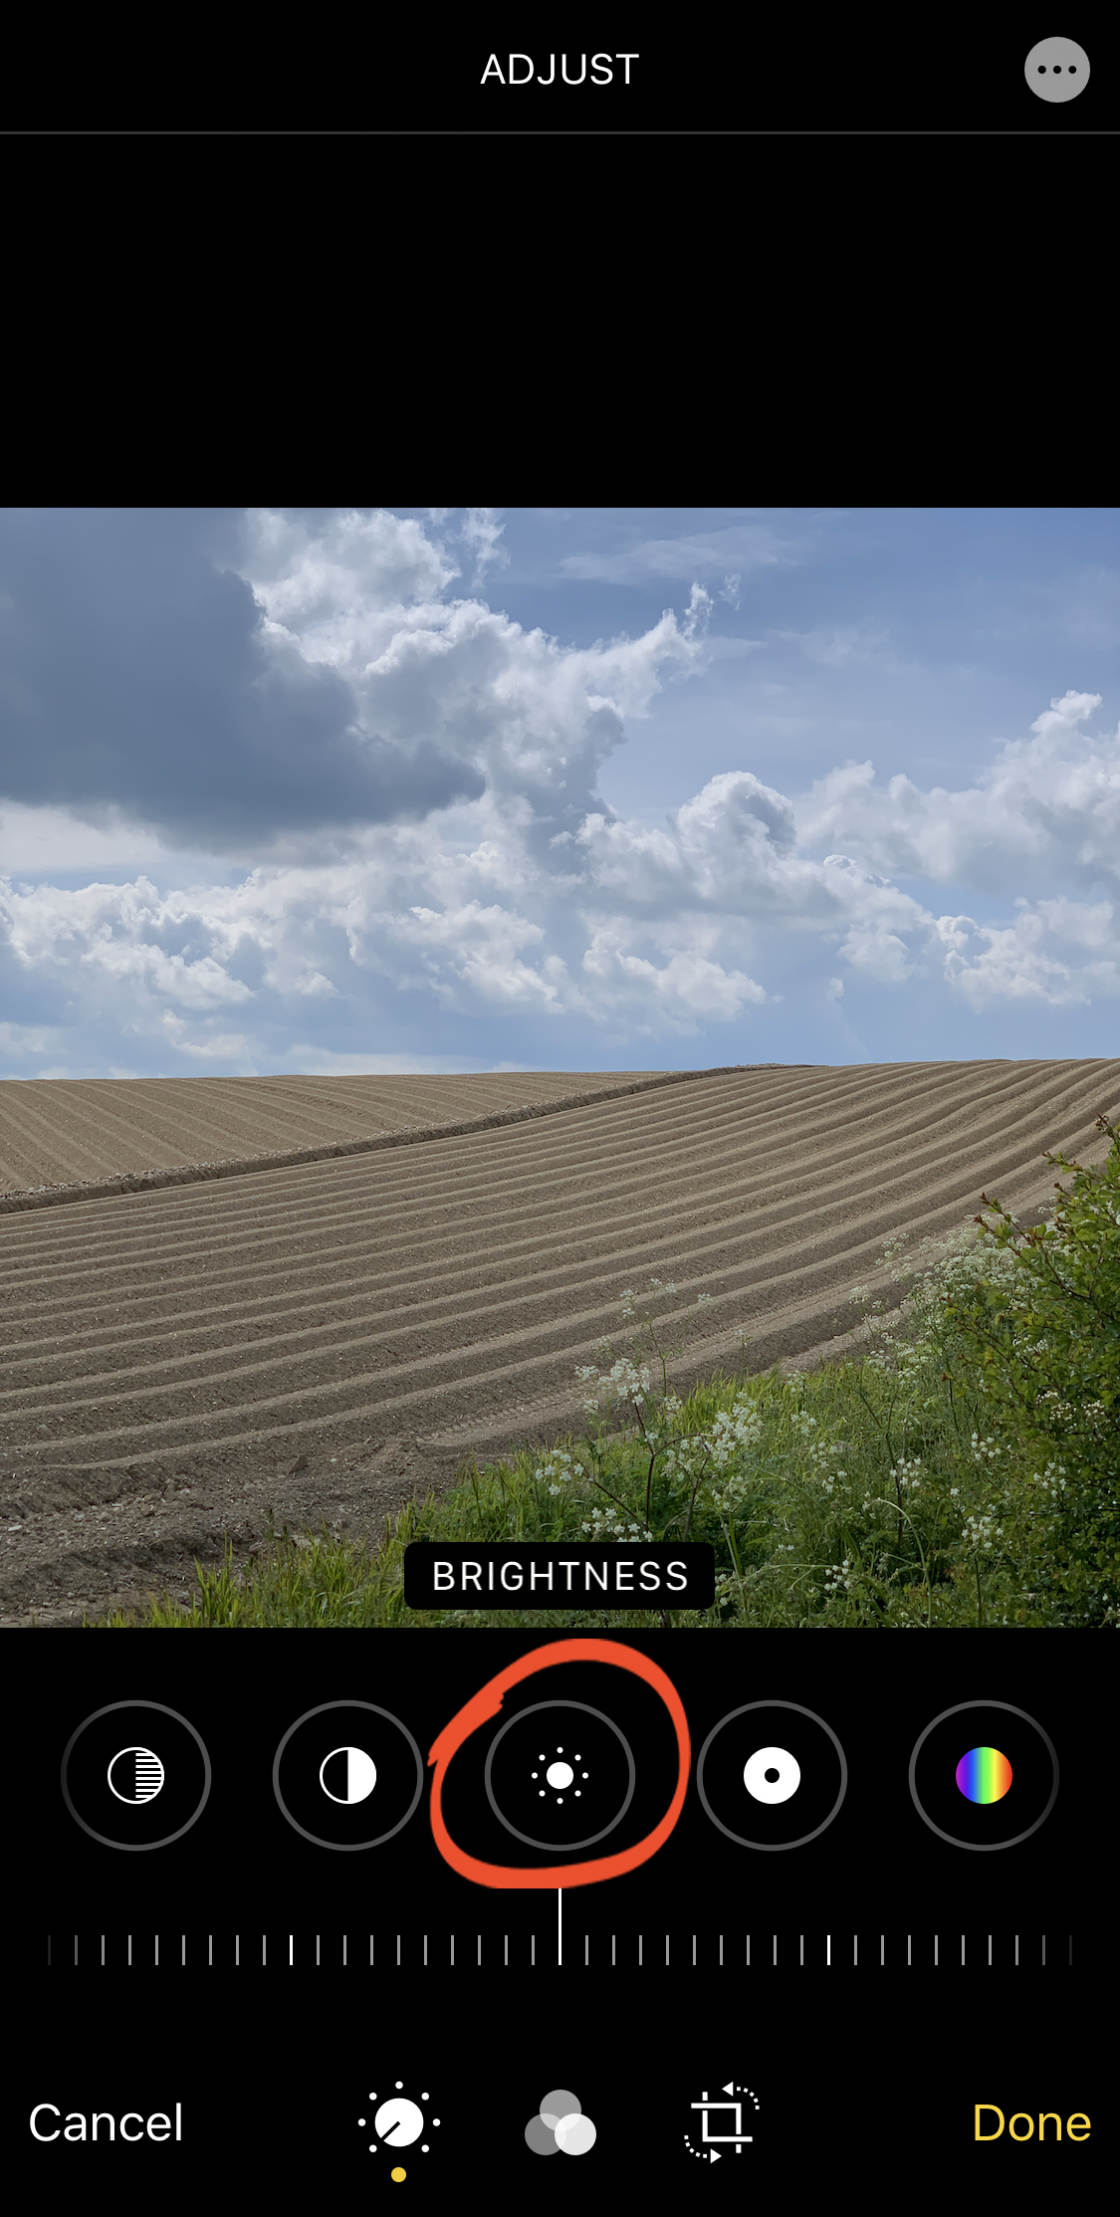
Elevate the slider left to darken your photograph, or right to brighten it.
The Effulgence tool has more effect on the shadows and midtones. This ways the dark and medium tones become adjusted more than the bright tones.
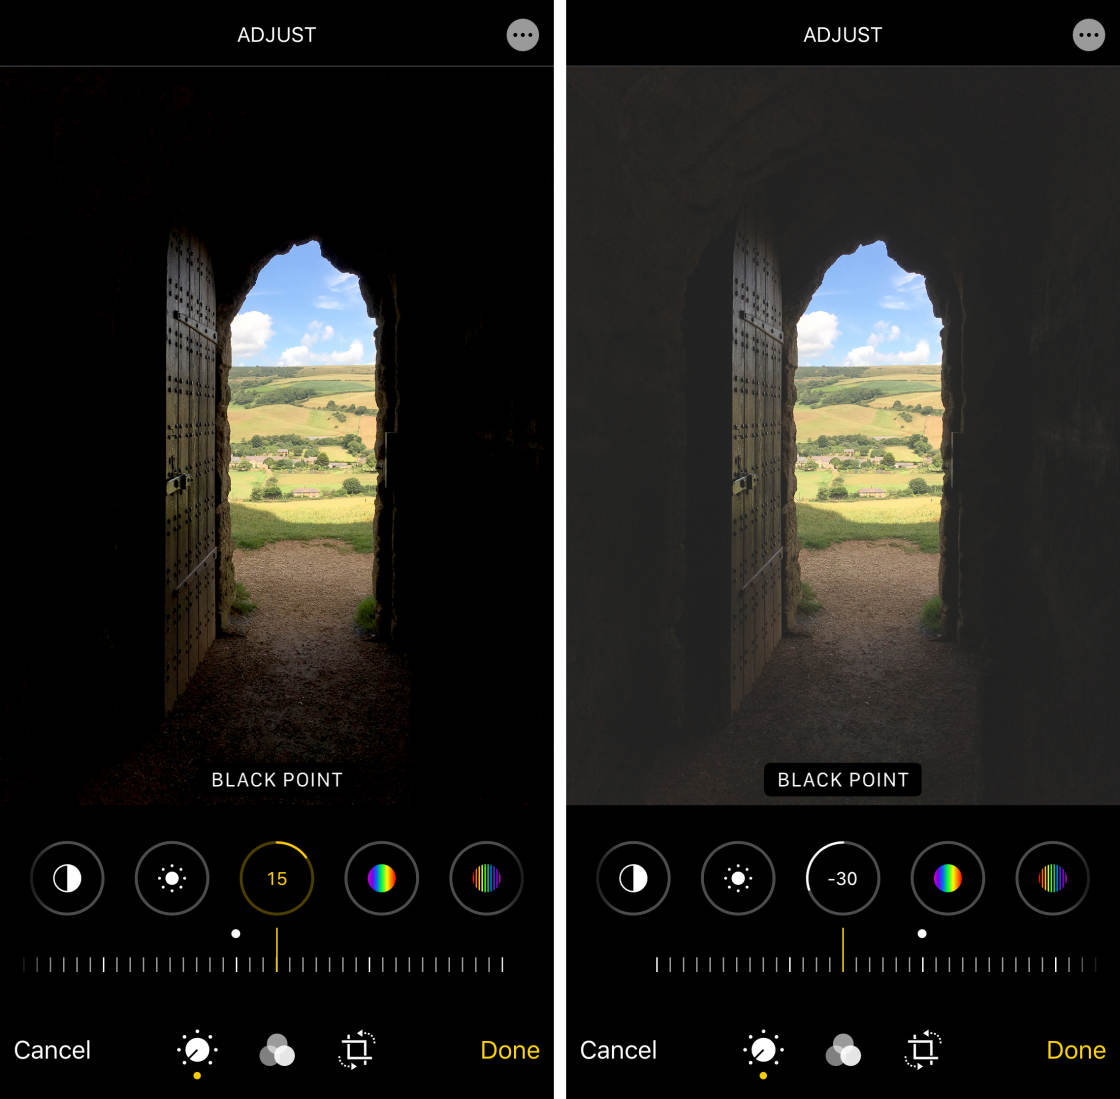
four.viii Blackness Point
TheBlack Betoken tool affects the brightness of only the darkest tones in your photo.
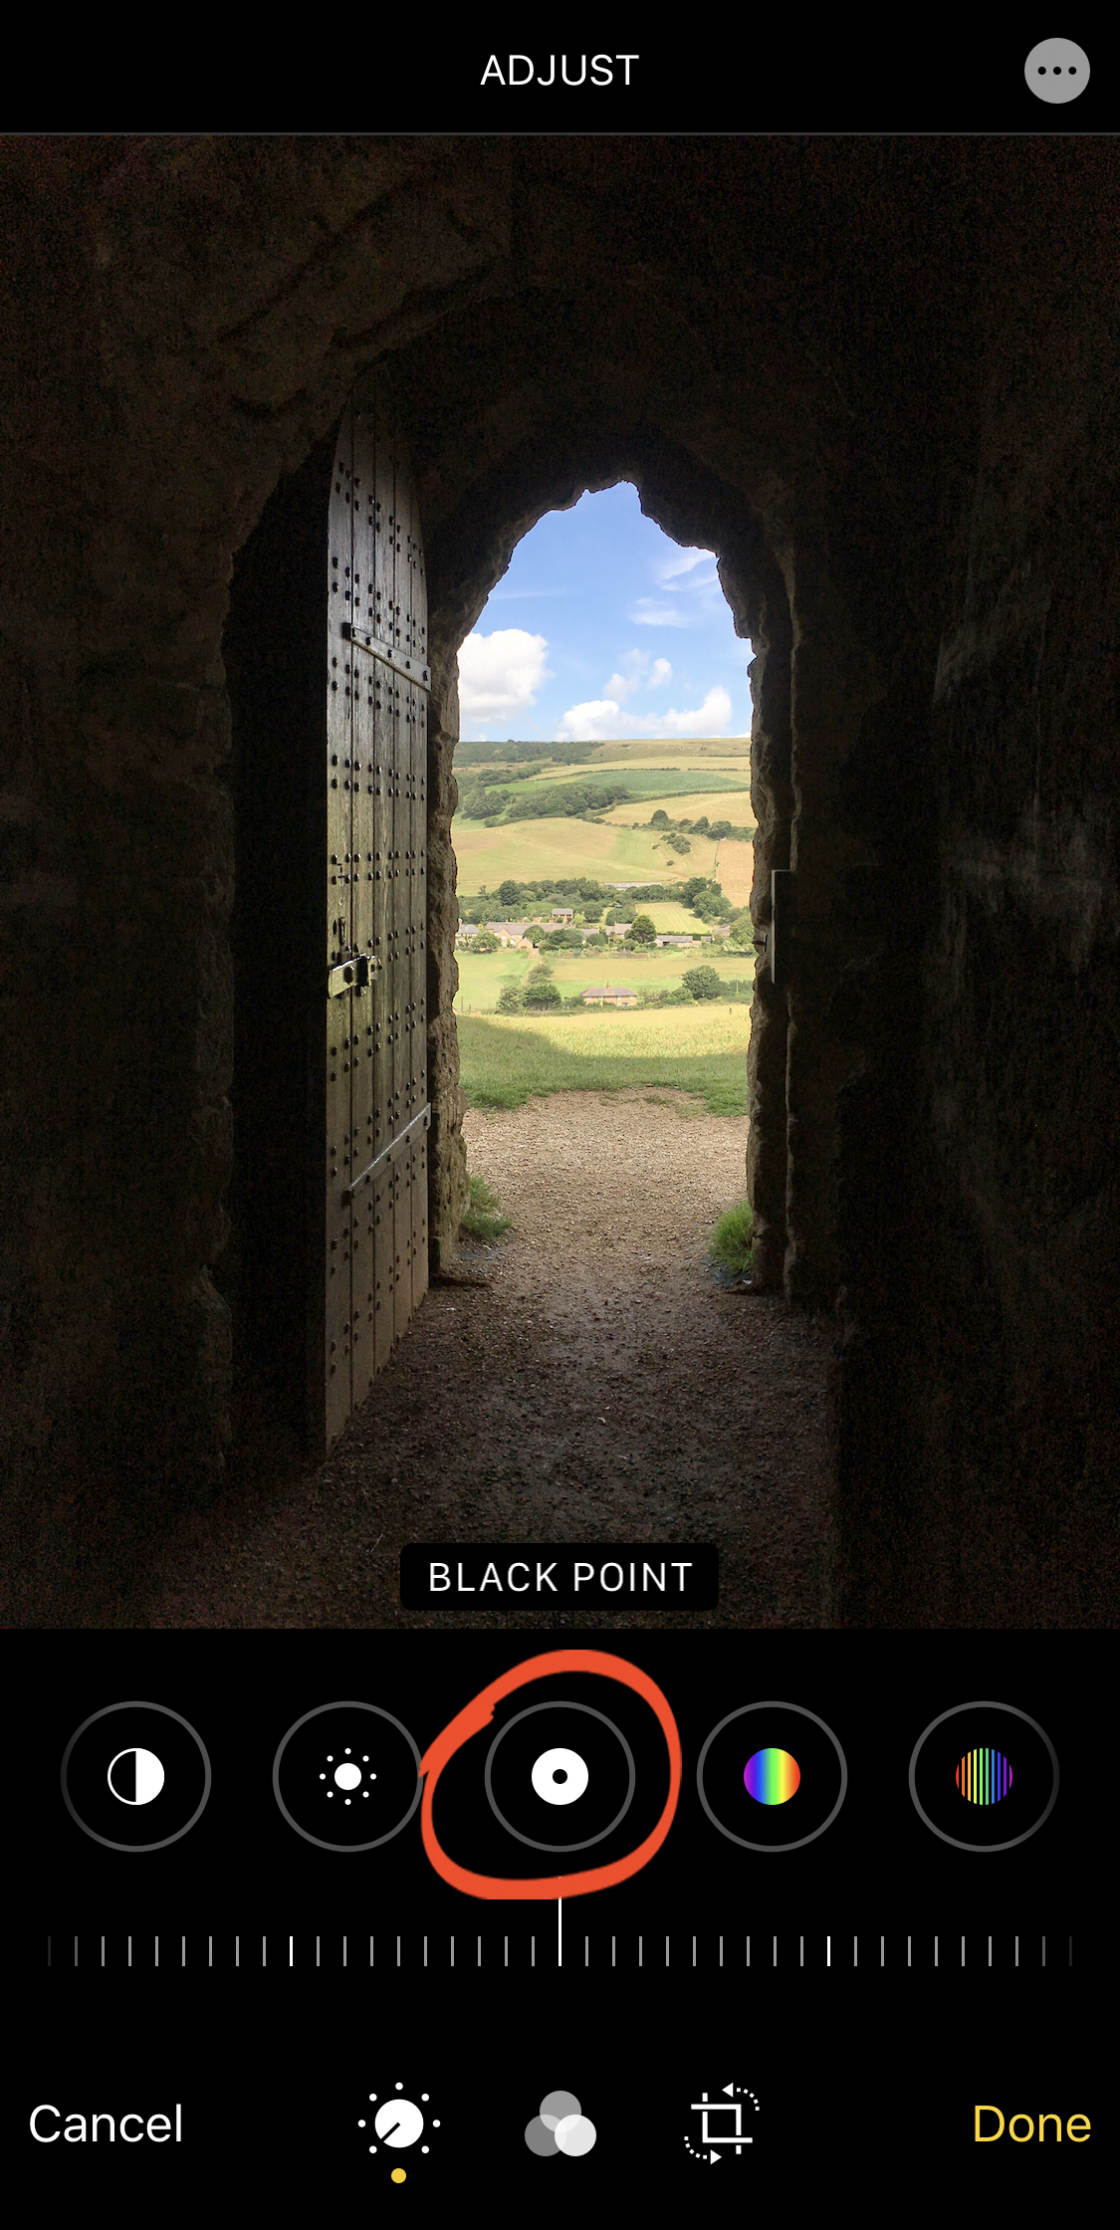
If your photo lacks rich black tones, elevate the slider to the right to make the darkest areas announced black. Dragging to the left will make the dark areas appear faded.
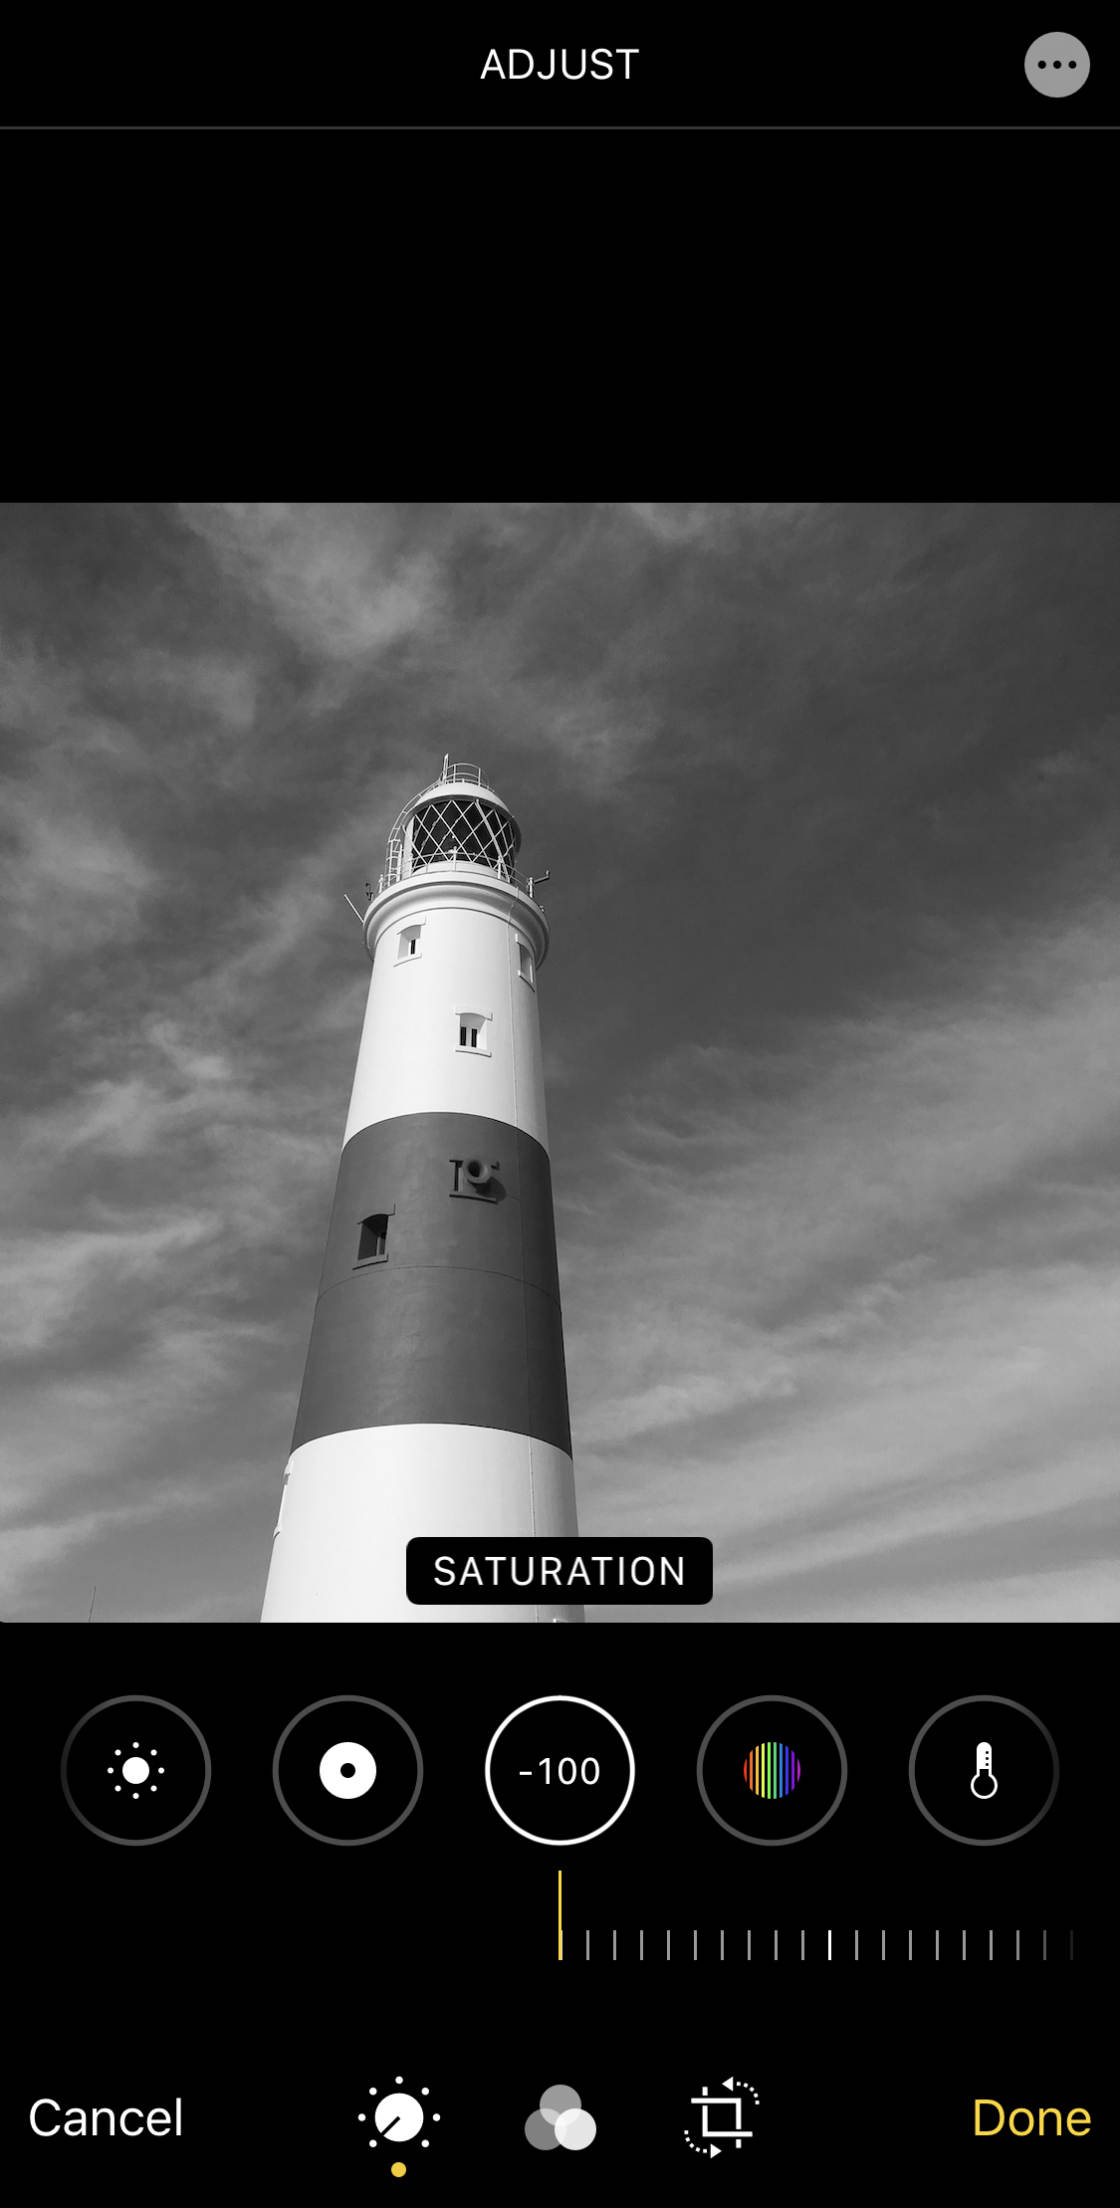
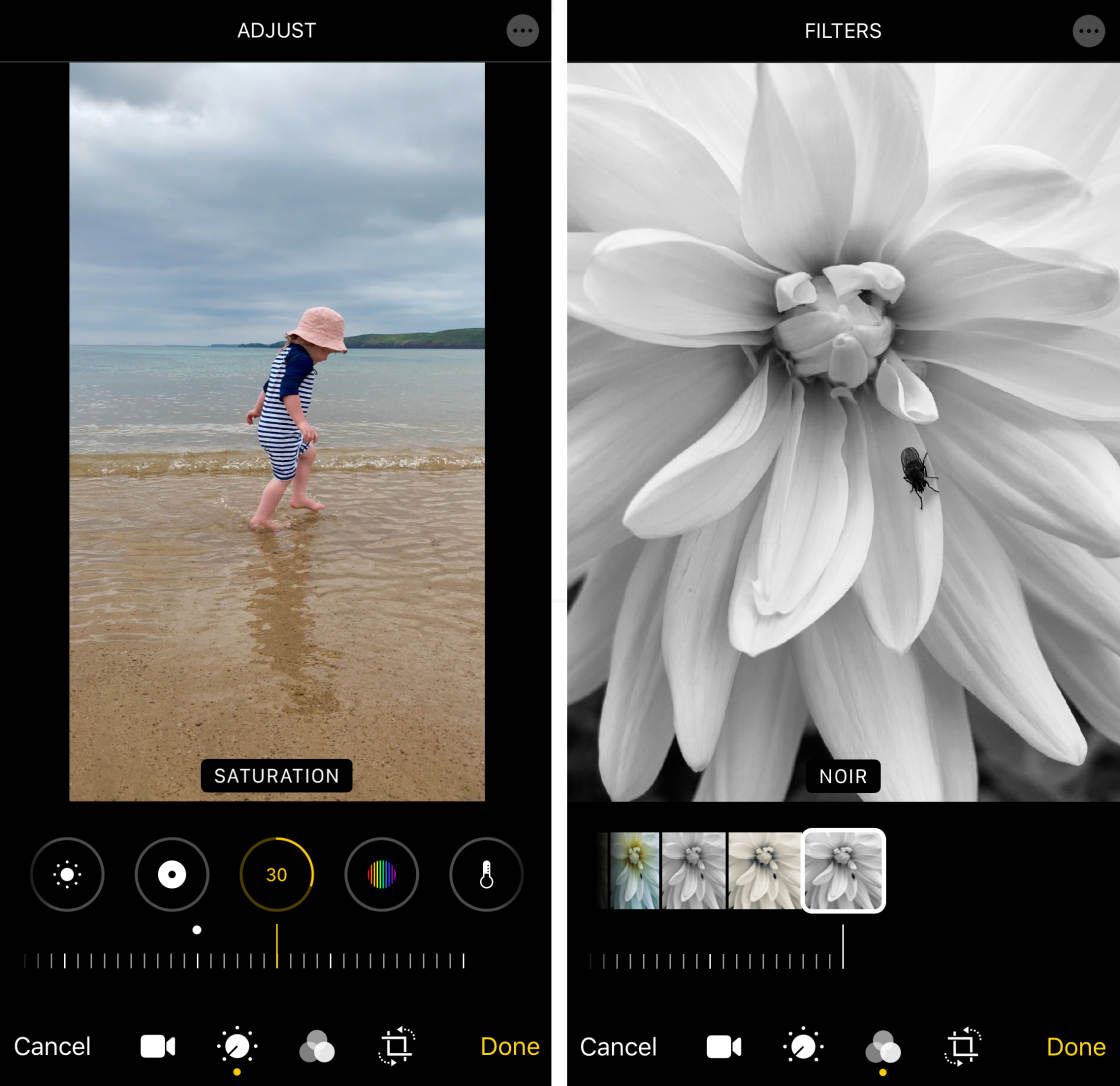
4.9 Saturation
TheSaturation tool makes the colors more vibrant or less vibrant.
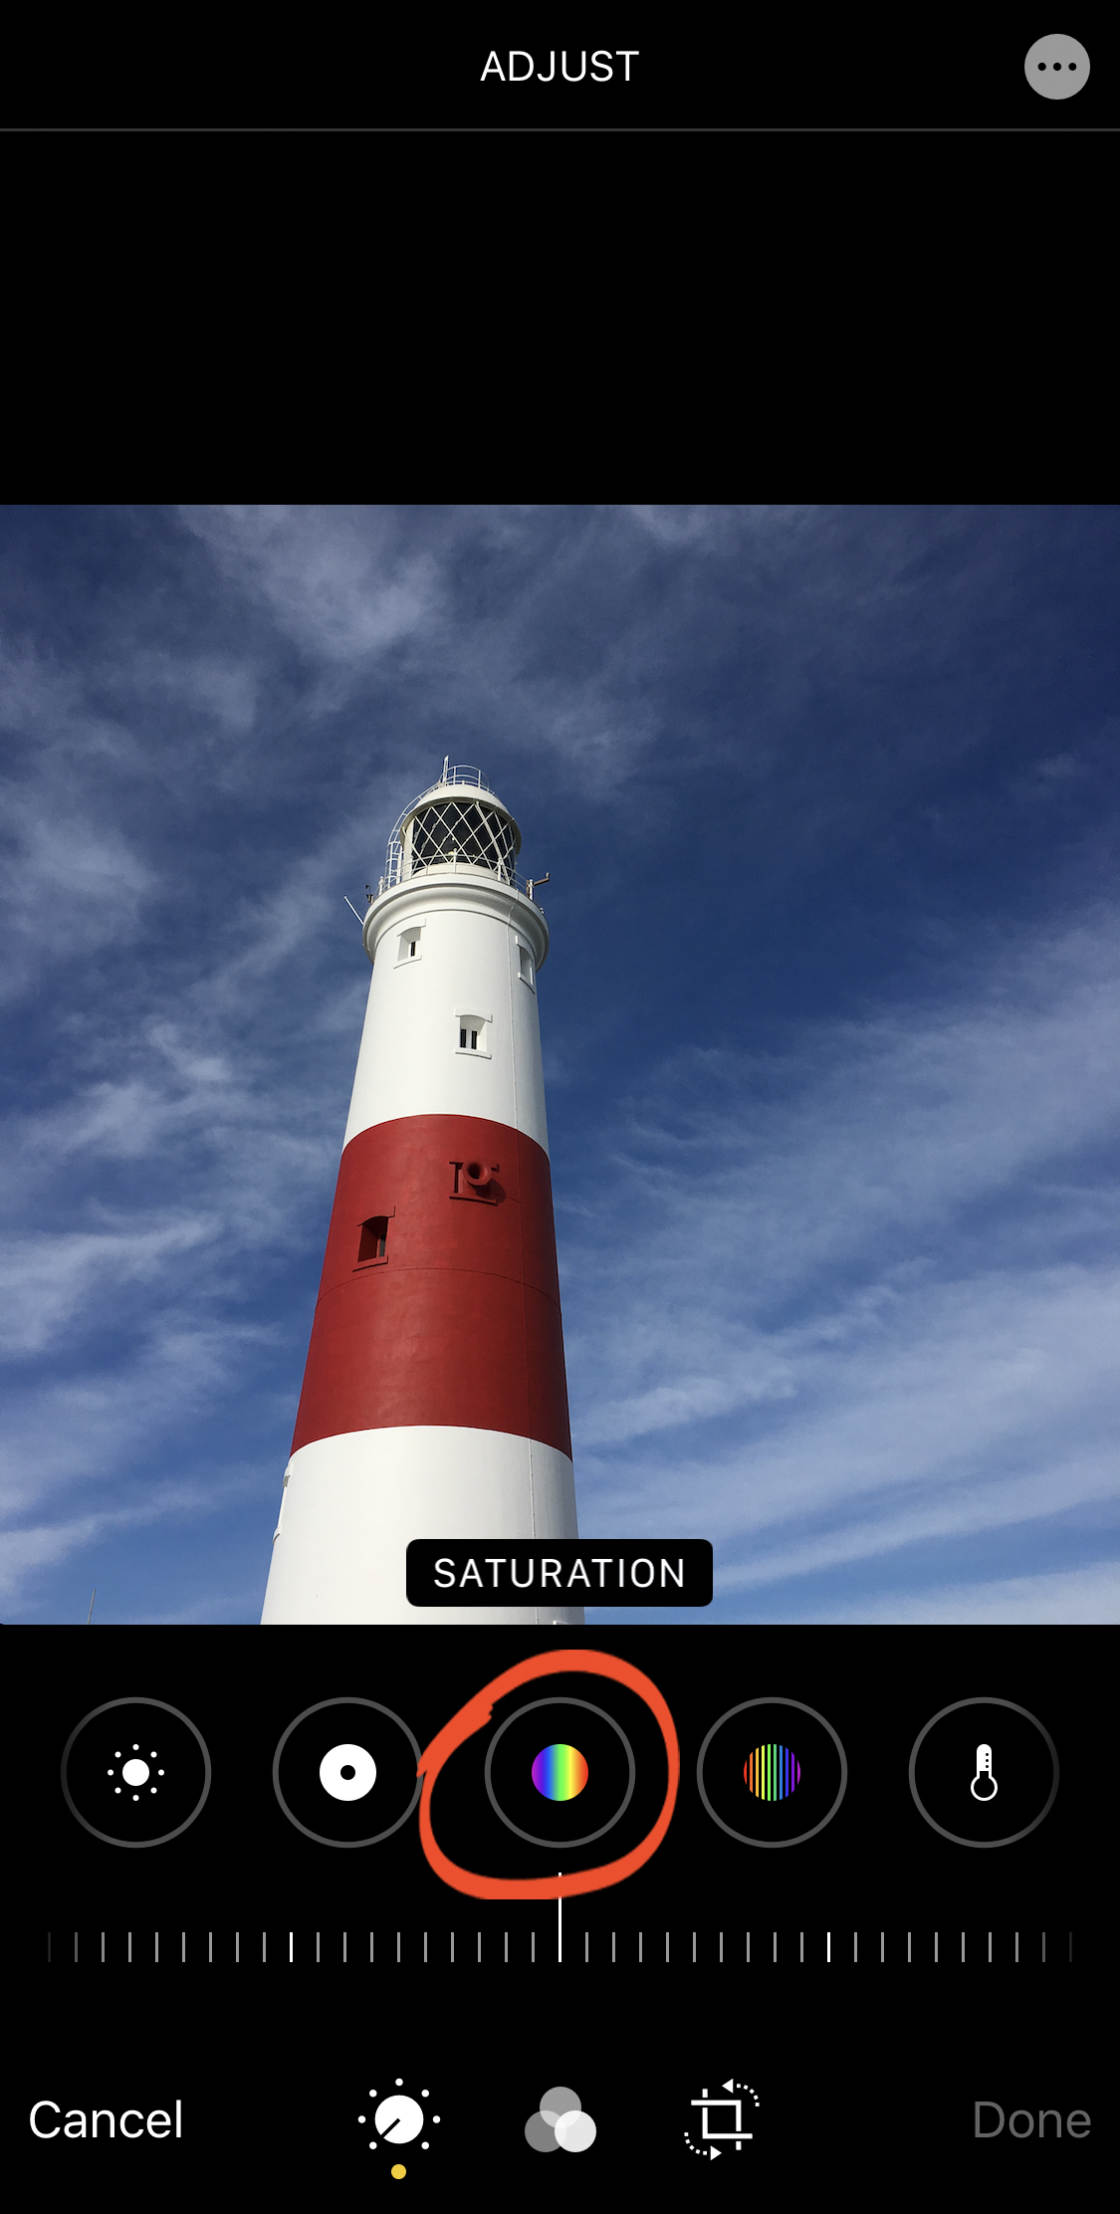
Drag the slider right to make the colors more vibrant, or left to brand the colors more muted.
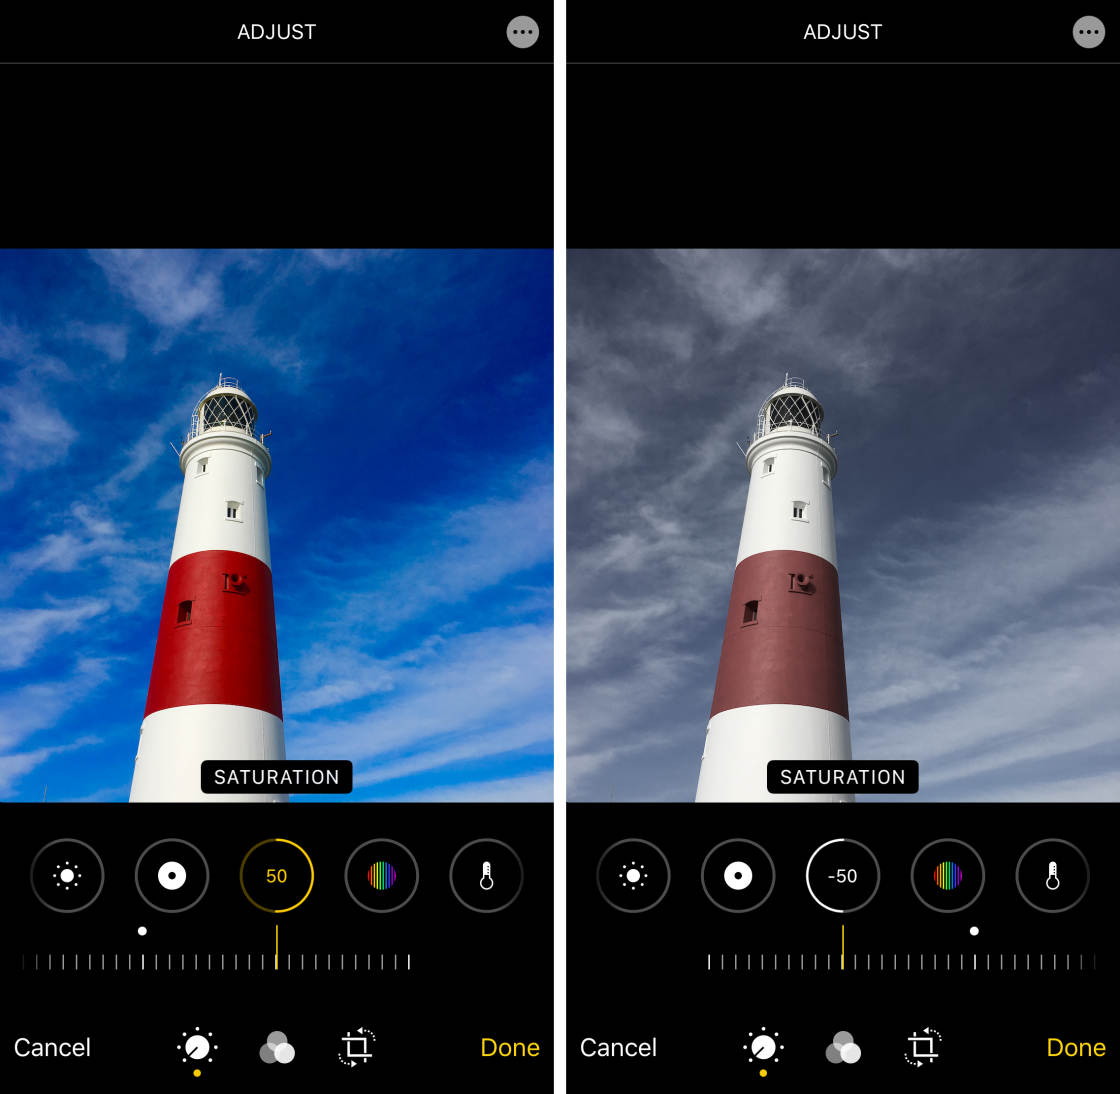
In virtually cases, increasing the saturation a trivial scrap will make your image "pop." But exist careful non to over-saturate the colors. If you make the colors as well vibrant, they won't expect natural.
To create a black and white photo, set the Saturation to -100.
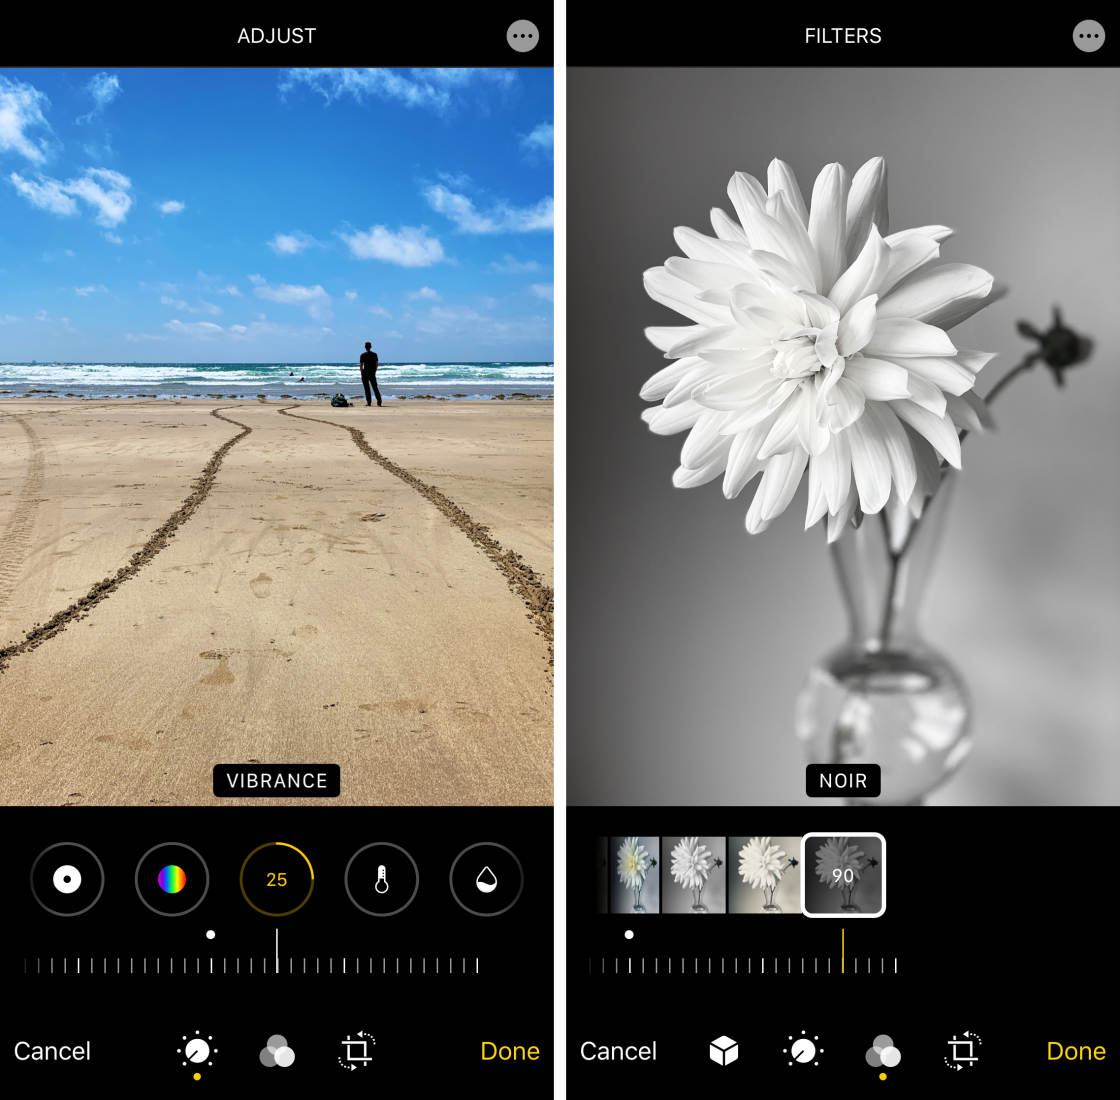
4.10 Vibrance
TheVibrance tool makes muted colors more vibrant without affecting skin tones or saturated colors likewise much.
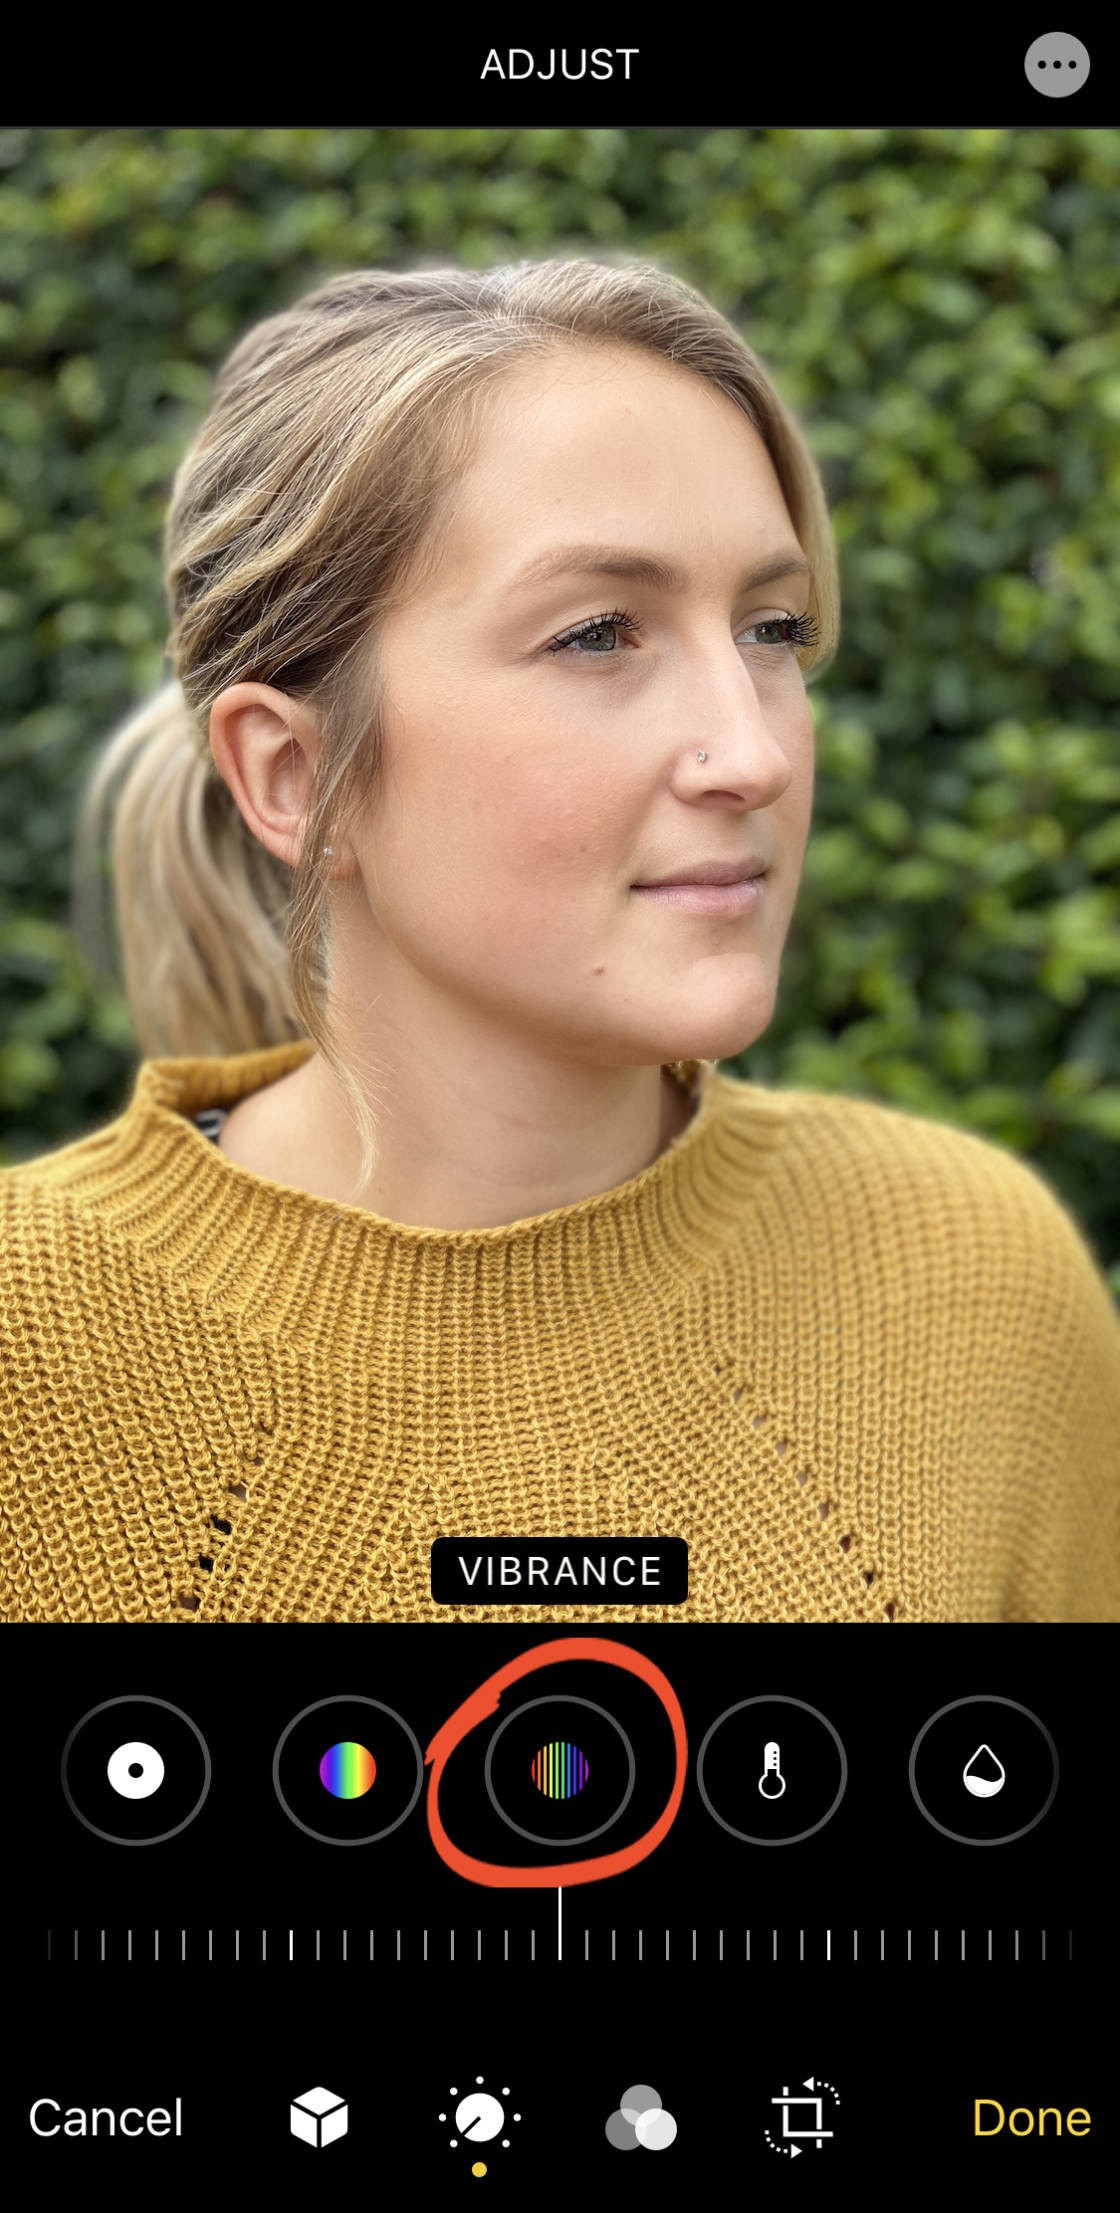
Drag the slider right to boost the vibrancy of muted colors. Or drag information technology left to reduce the vibrancy.
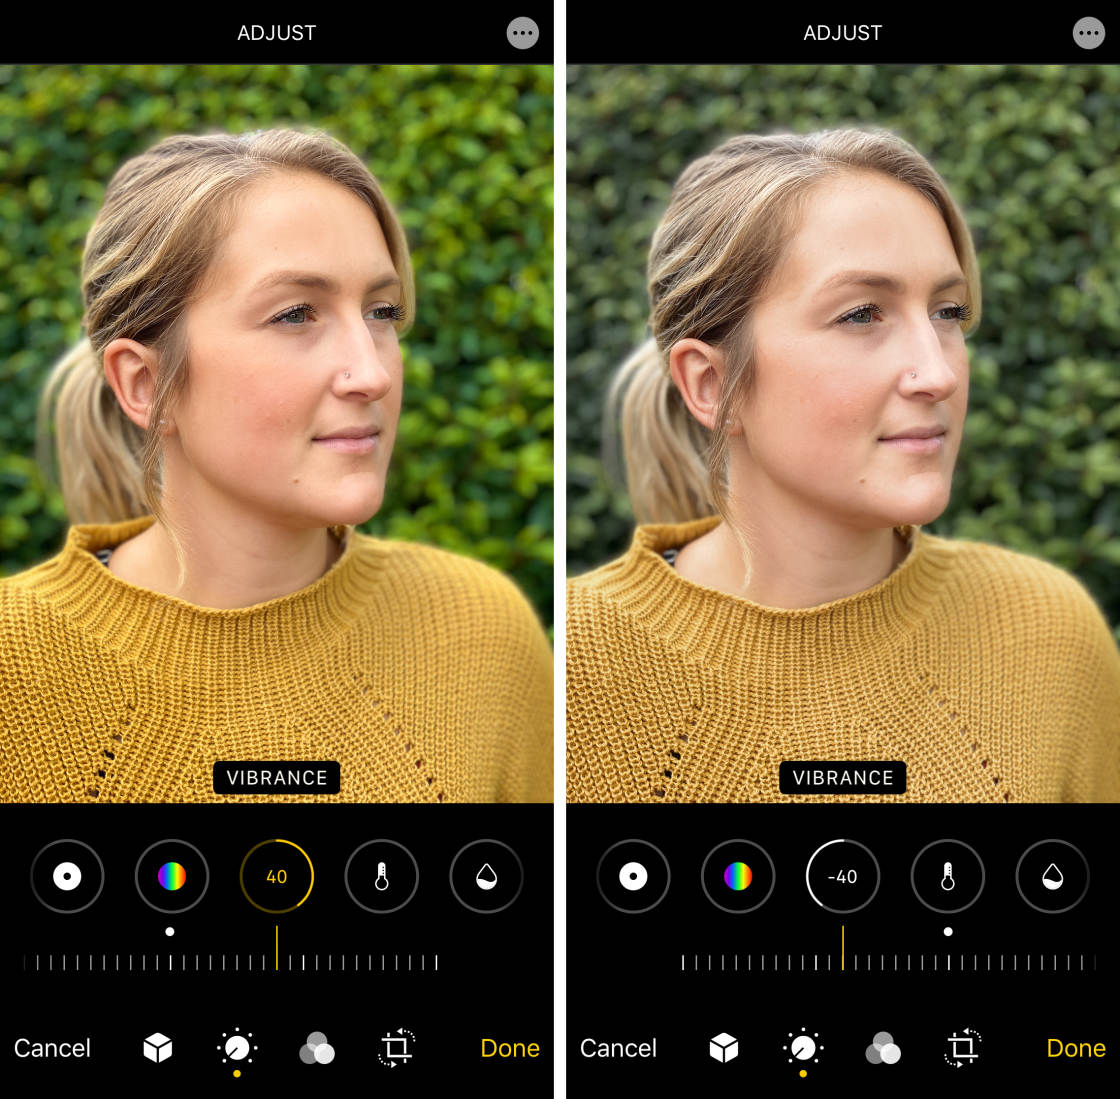
The Vibrance tool unremarkably produces more natural-looking colors than the Saturation tool. This is because it doesn't over-saturate peel tones or colors that are already vibrant.
4.11 Warmth
TheWarmth tool makes the colors in your photo warmer or cooler.
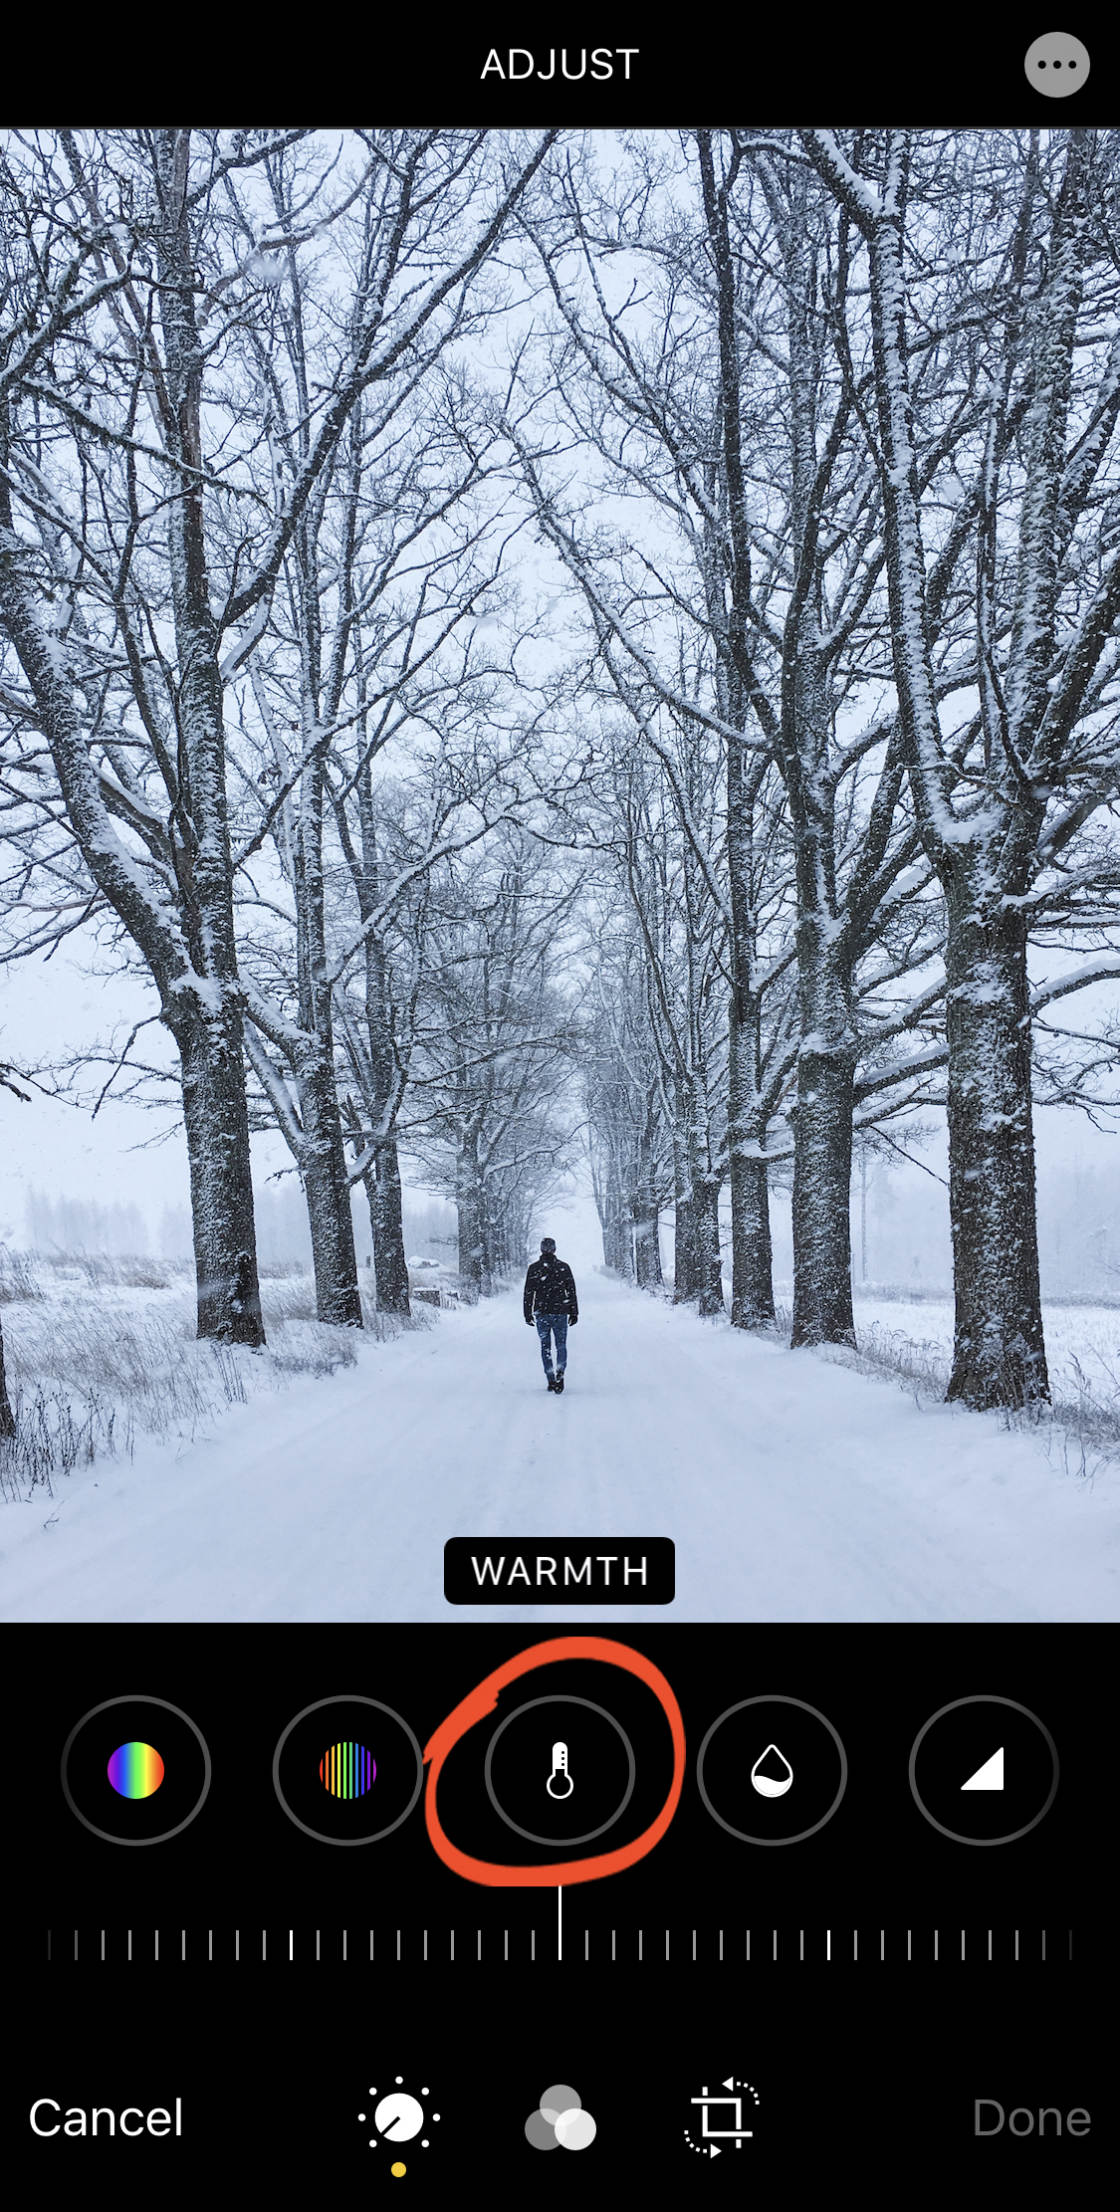
Drag the slider correct to make the colors warmer (more than orangish). Or drag it left to brand them libation (more blueish).
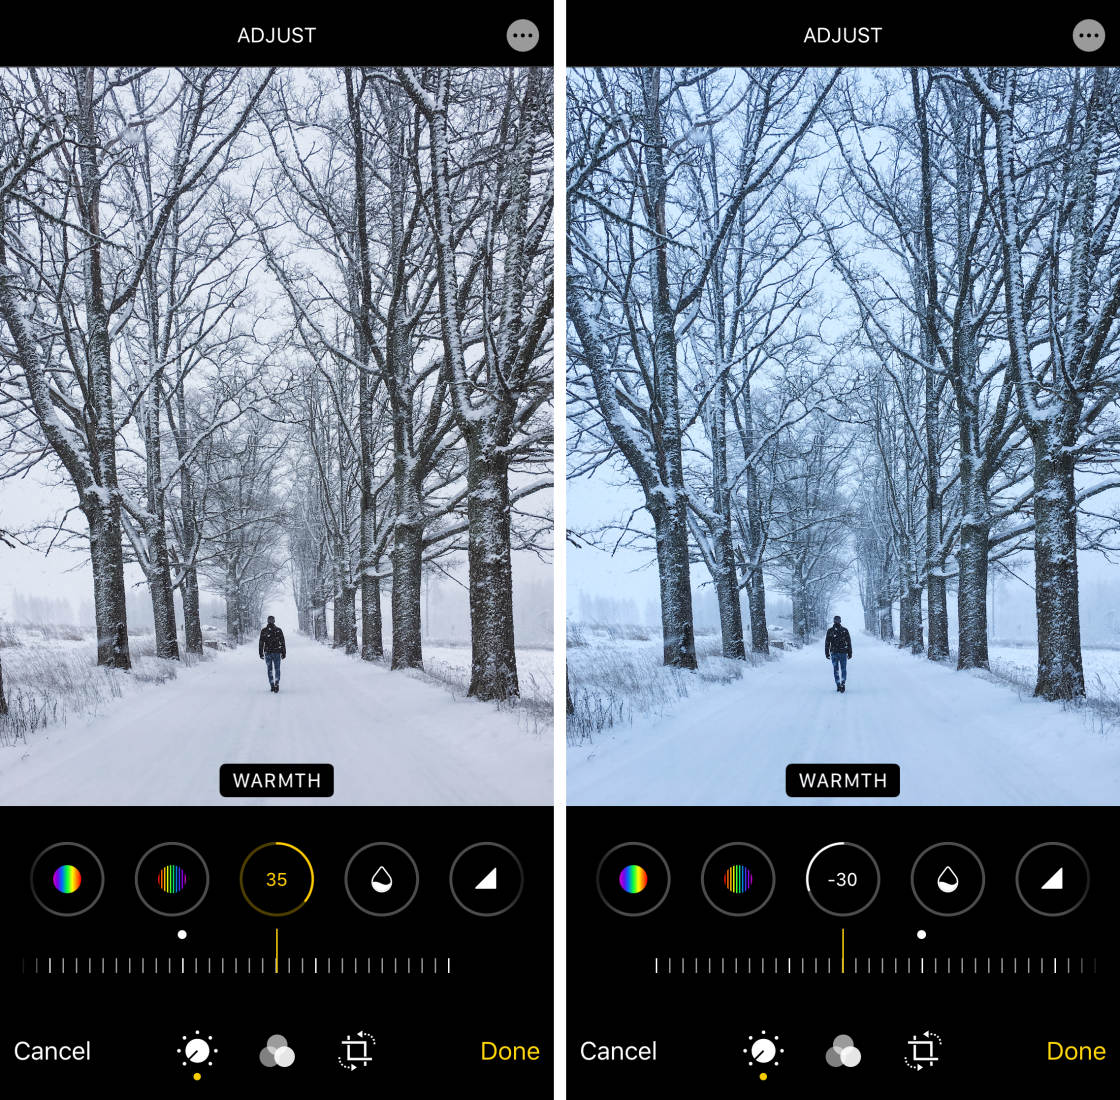
You tin can use theWarmth tool to correct the color rest of a photo. Or use information technology to change the overall mood of an image.
iv.12 Tint
TheTint tool allows you to add a green or magenta color tint to your photograph.
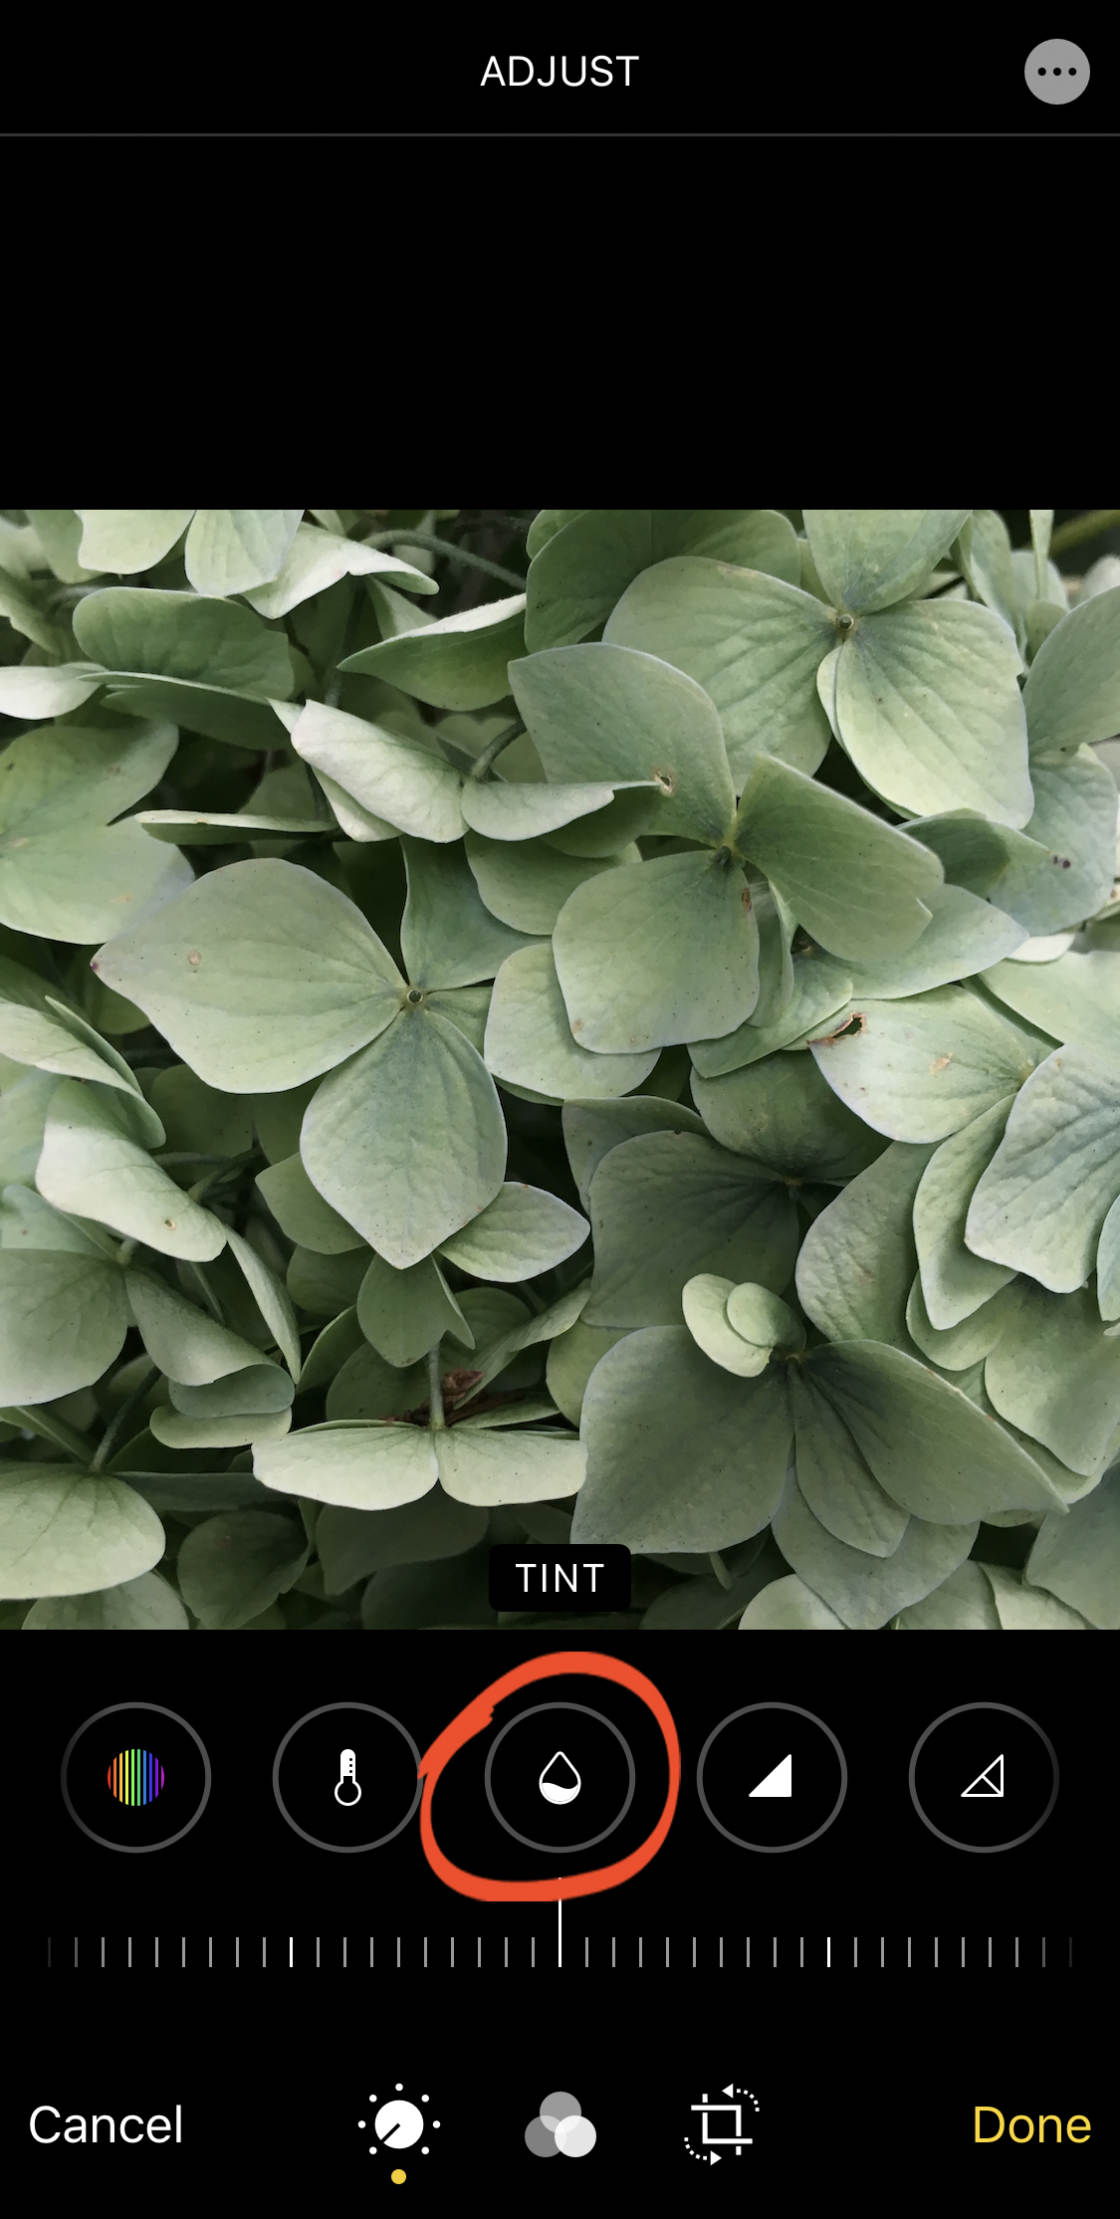
Drag the slider left to add a greenish tint, or right to add a magenta tint.
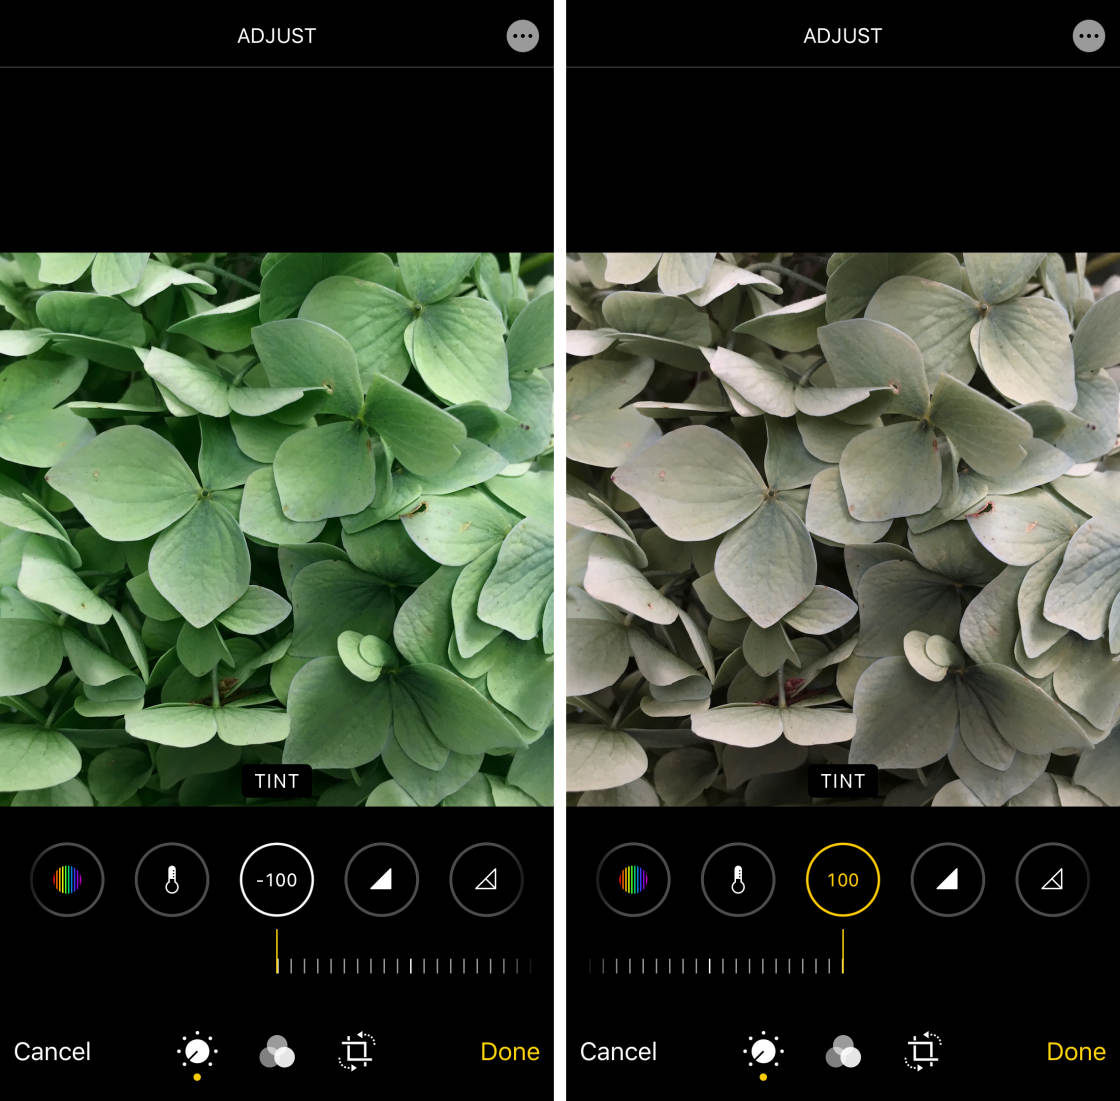
The green tint is great for increasing the vibrancy of green leaves or fields. Only be enlightened that information technology tints the entire photo, then all colors volition exist afflicted.
4.13 Sharpness
TheSharpness tool sharpens detail in your photograph by making edges crisper and more defined.

Elevate the slider right to make the image sharper.

Be careful non to increment sharpness too much. Over-sharpening will reduce the prototype quality.
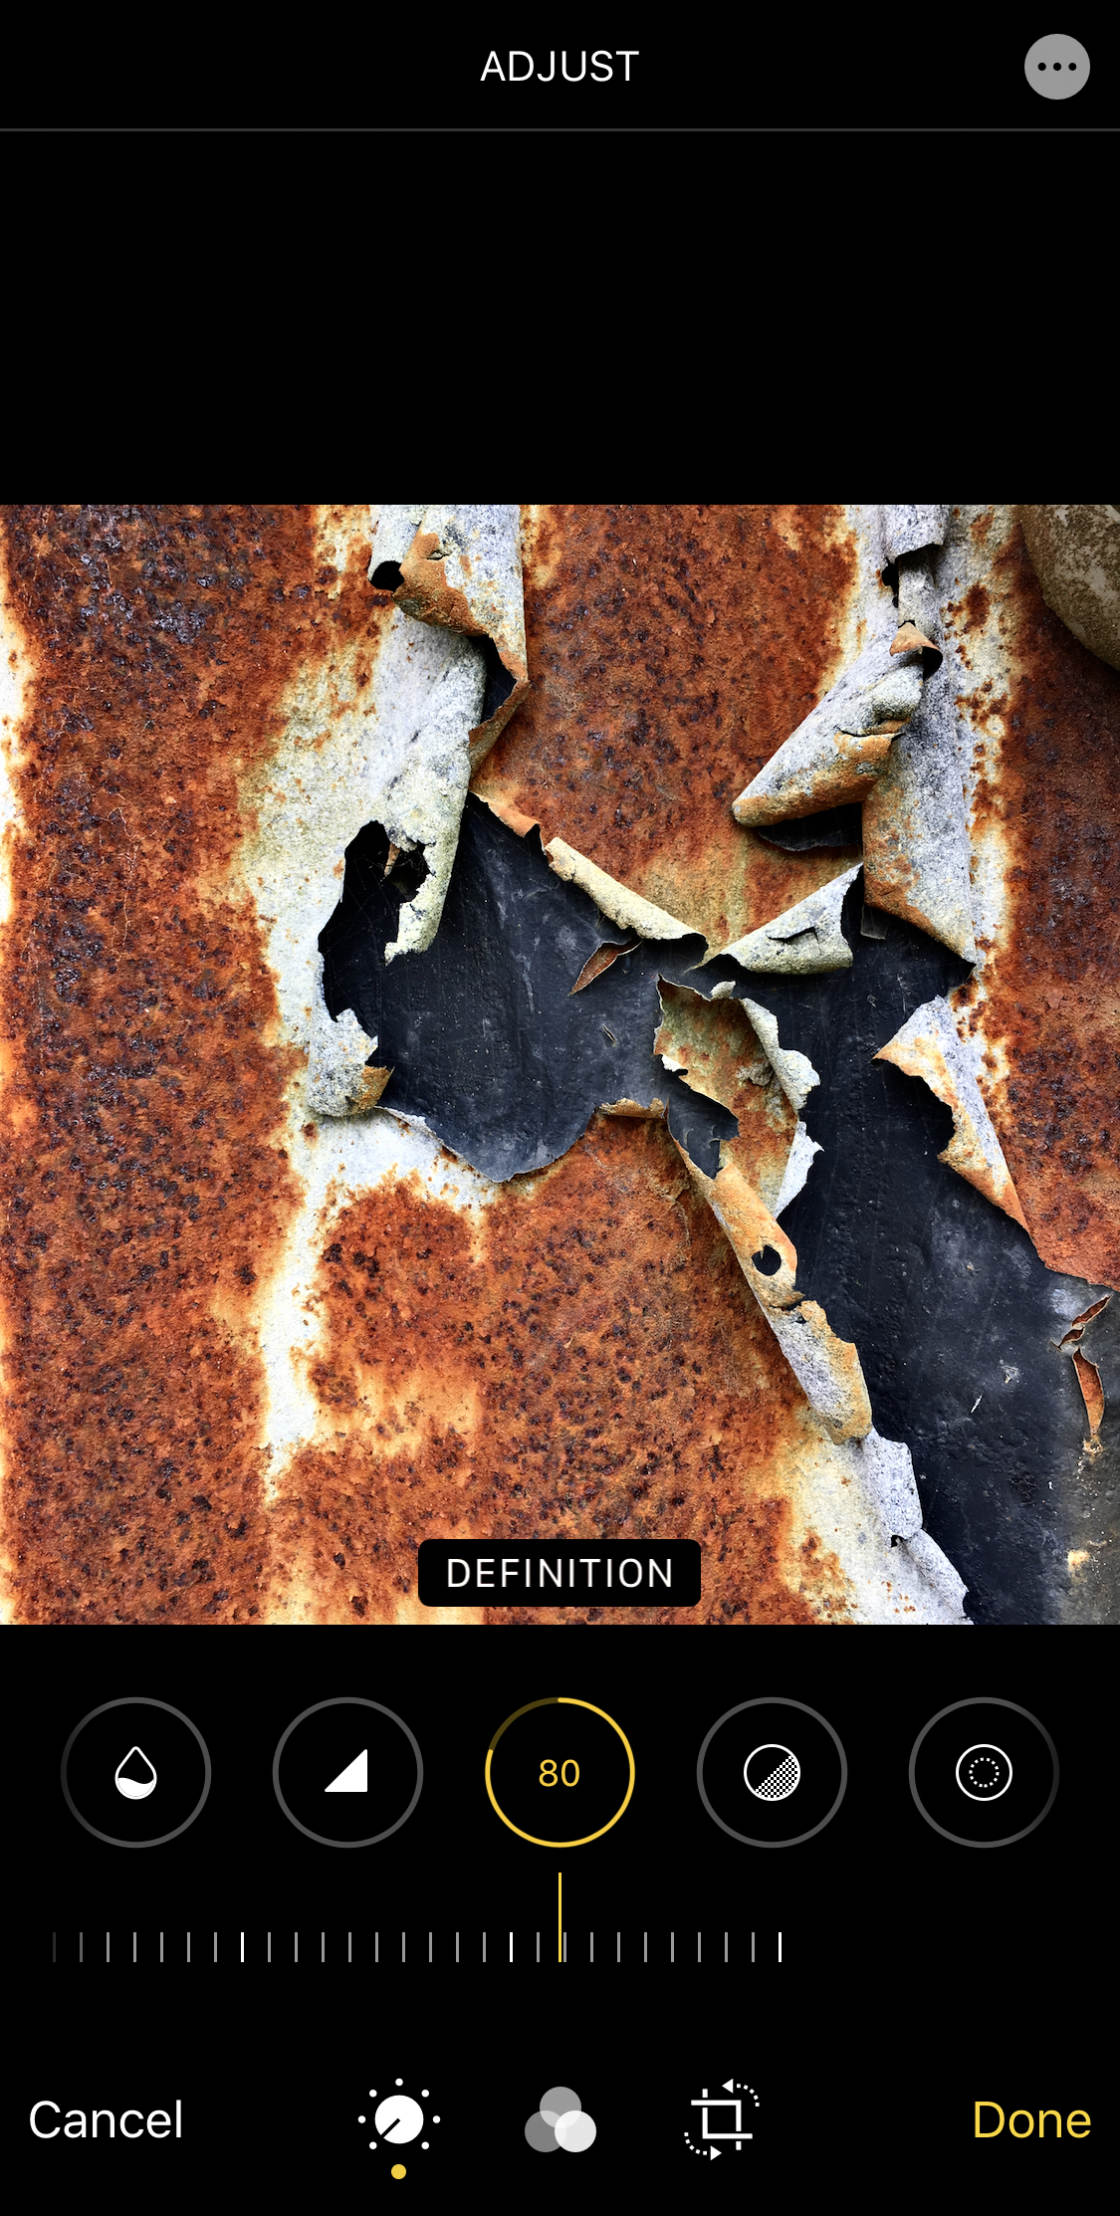
4.14 Definition
TheDefinition tool adjusts contrast to ameliorate the clarity of detail in your photo.
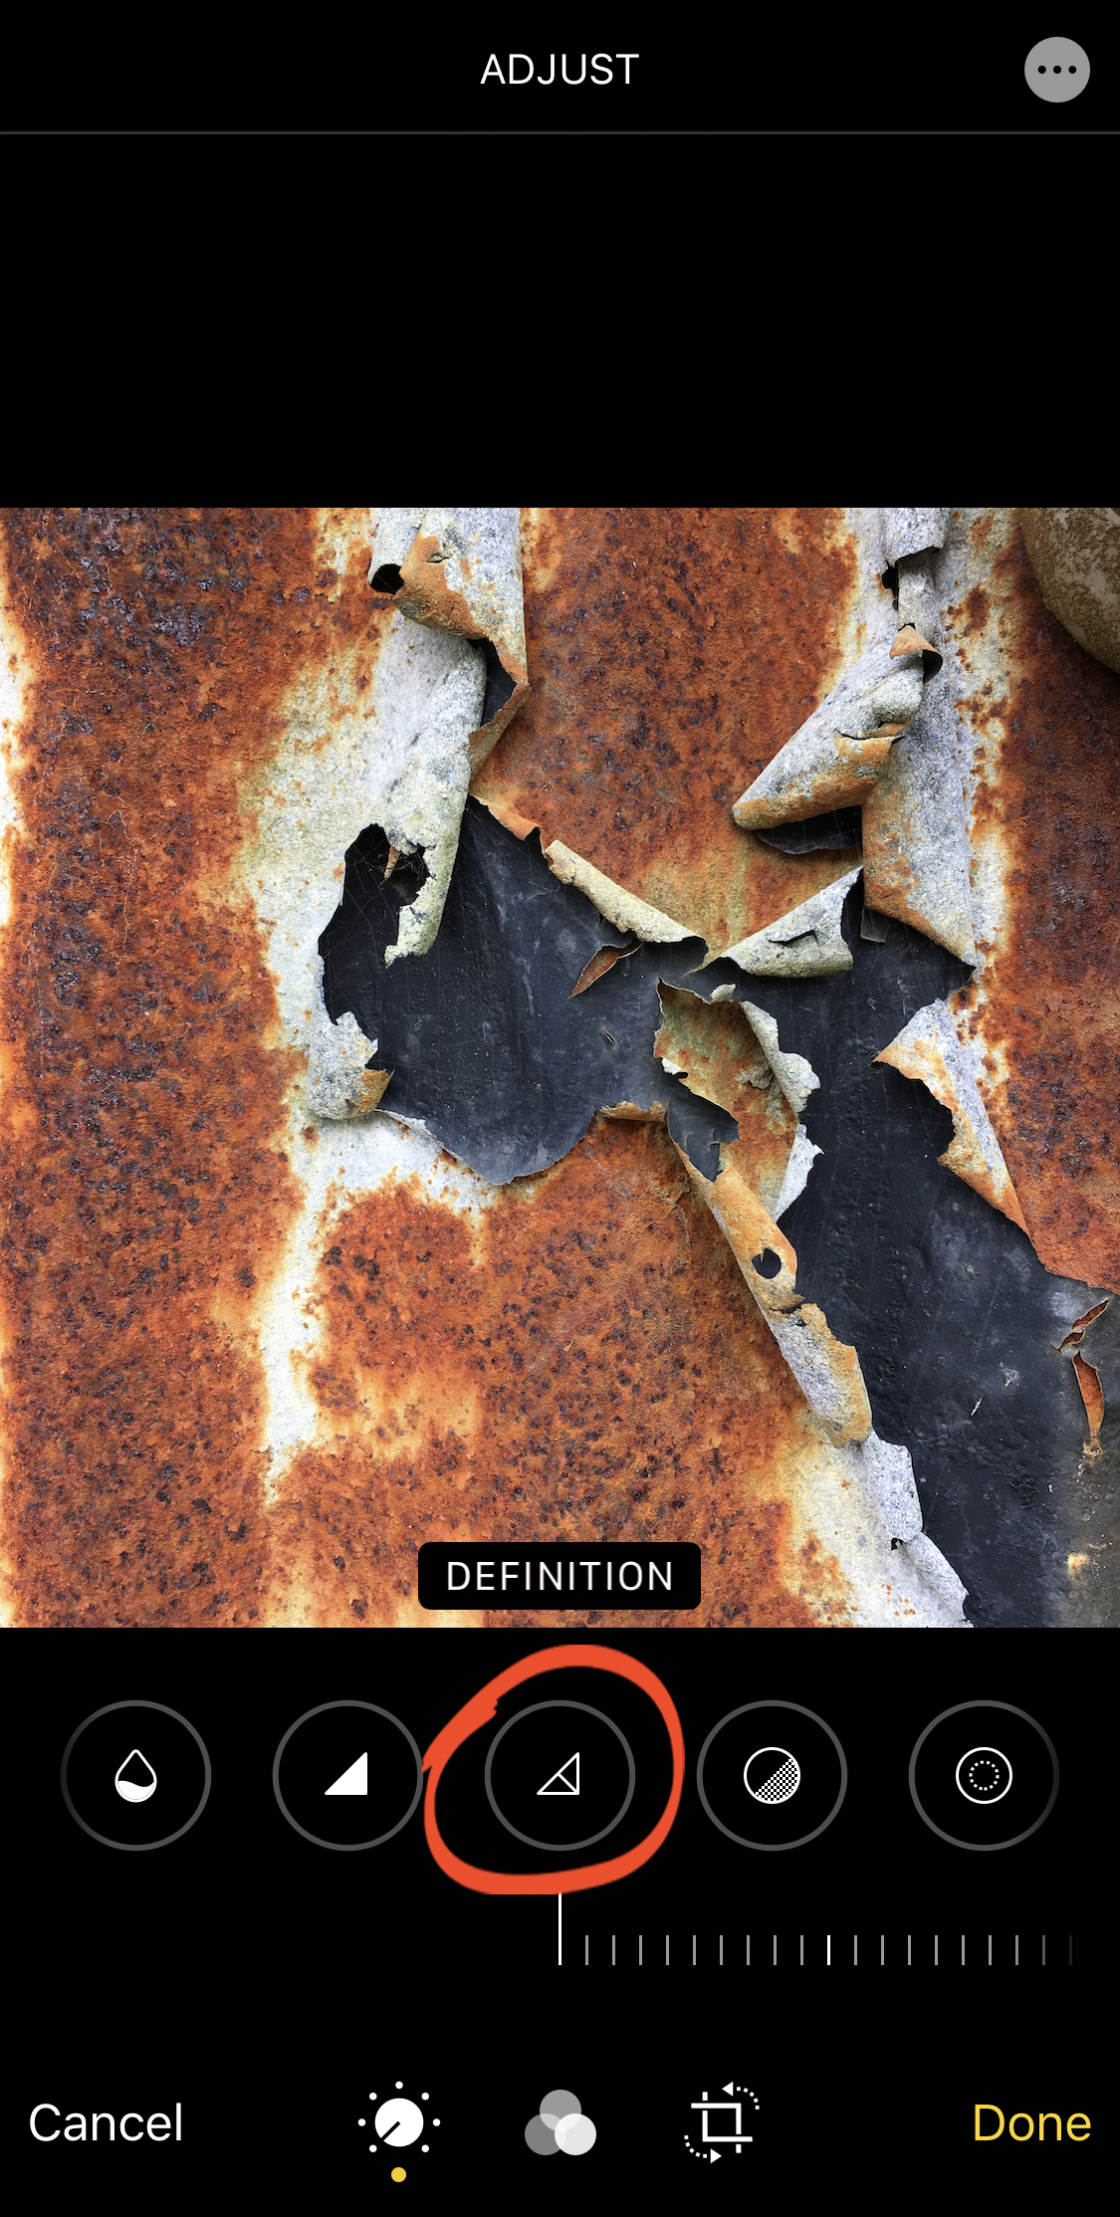
Drag the slider correct to increase clarity and definition in your epitome.
iv.xv Noise Reduction
TheNoise Reduction tool reduces "digital dissonance" – such every bit grain caused by shooting in depression light. You can besides get grain in your photos when editing, e.1000., if you burnish the shadows likewise much.
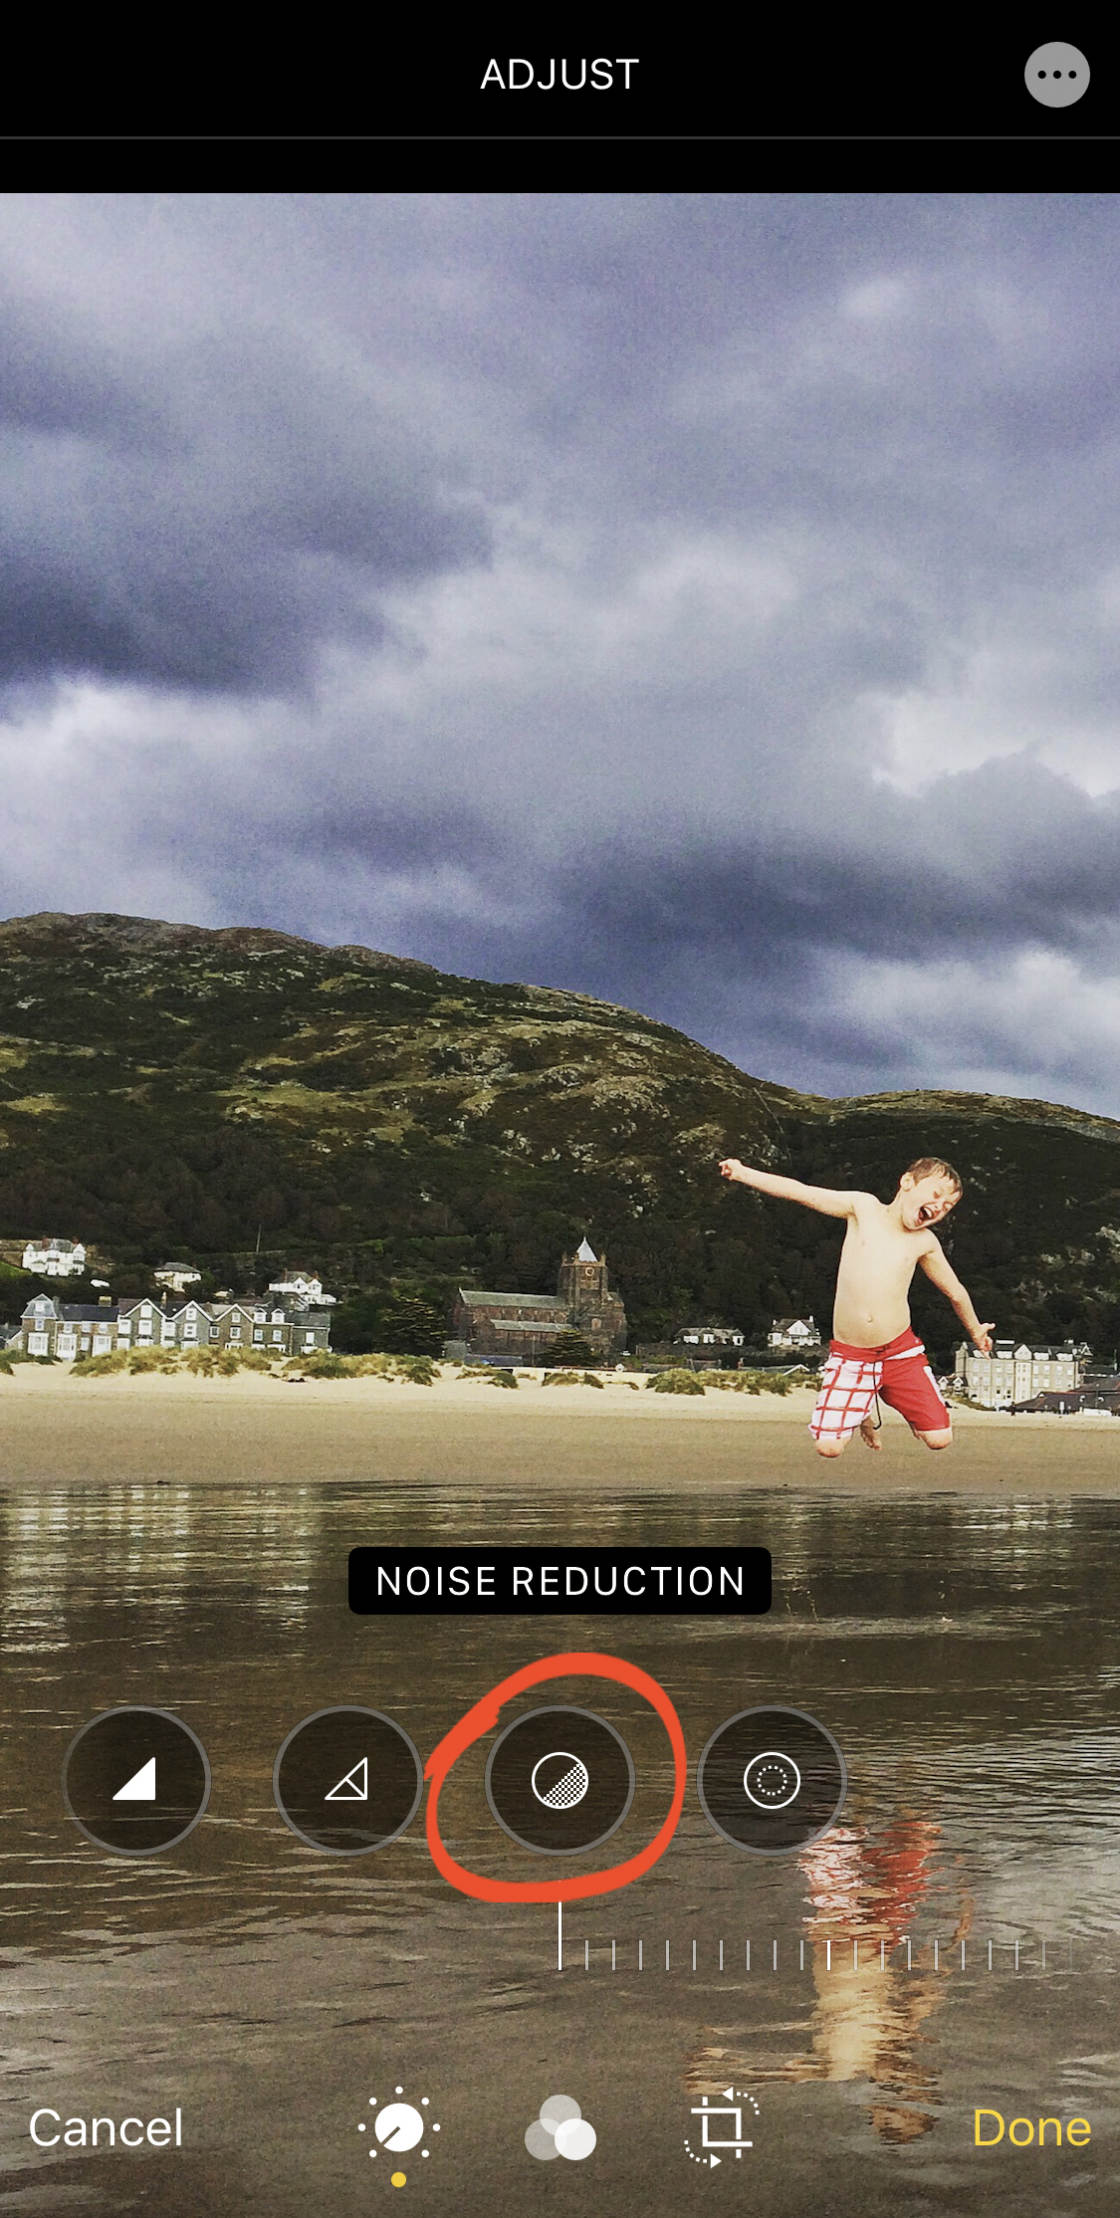
If you take a grainy or "noisy" photo, drag the slider right to reduce the noise.
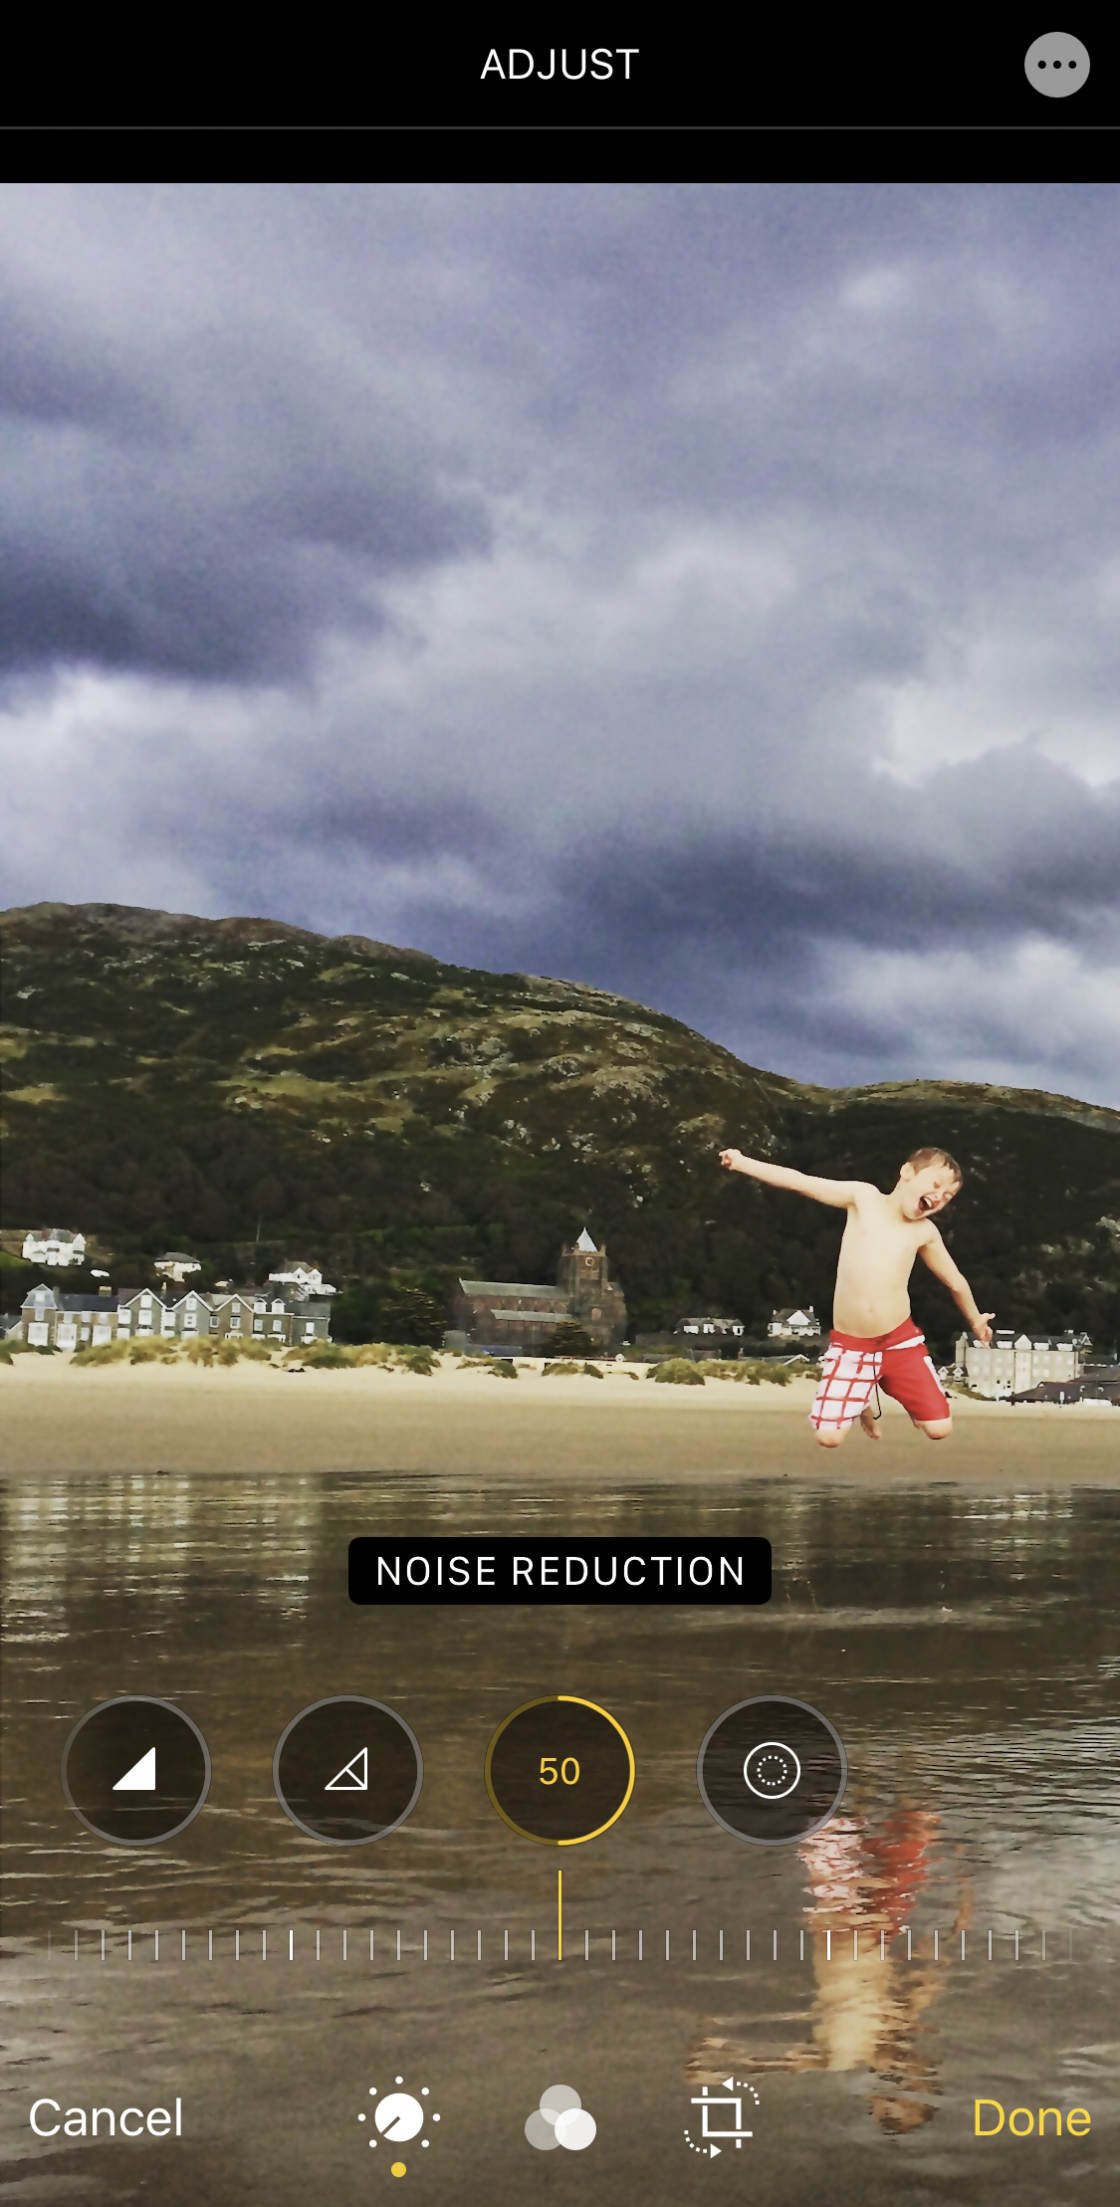
Use this tool sparingly as as well much noise reduction will soften the detail in your photo.
4.xvi Vignette
TheVignette tool darkens or brightens the edges of your photo.
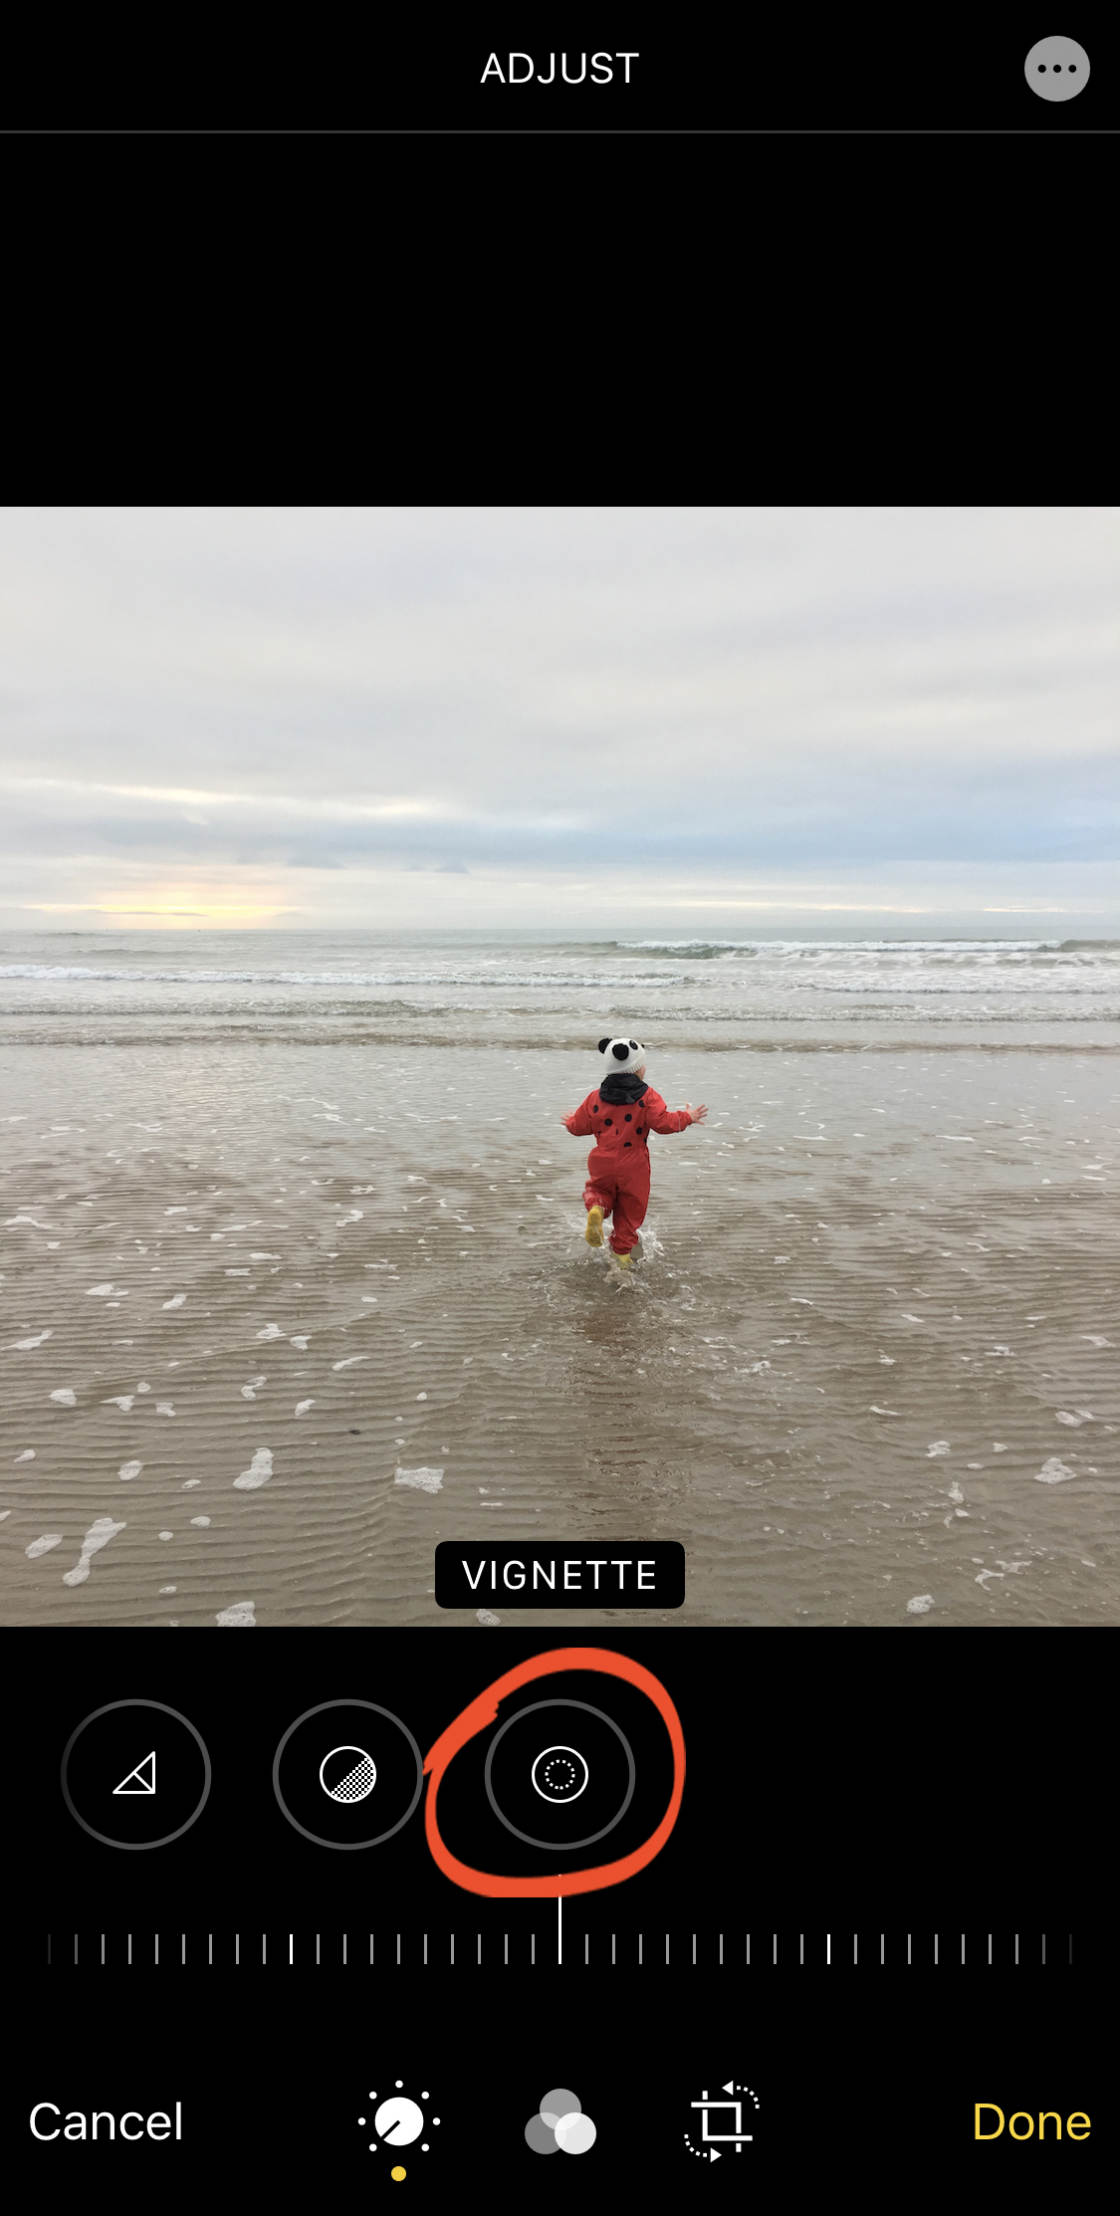
Drag the slider right to add a nighttime vignette, or left to add together a bright vignette. A nighttime vignette usually looks better than a bright one.
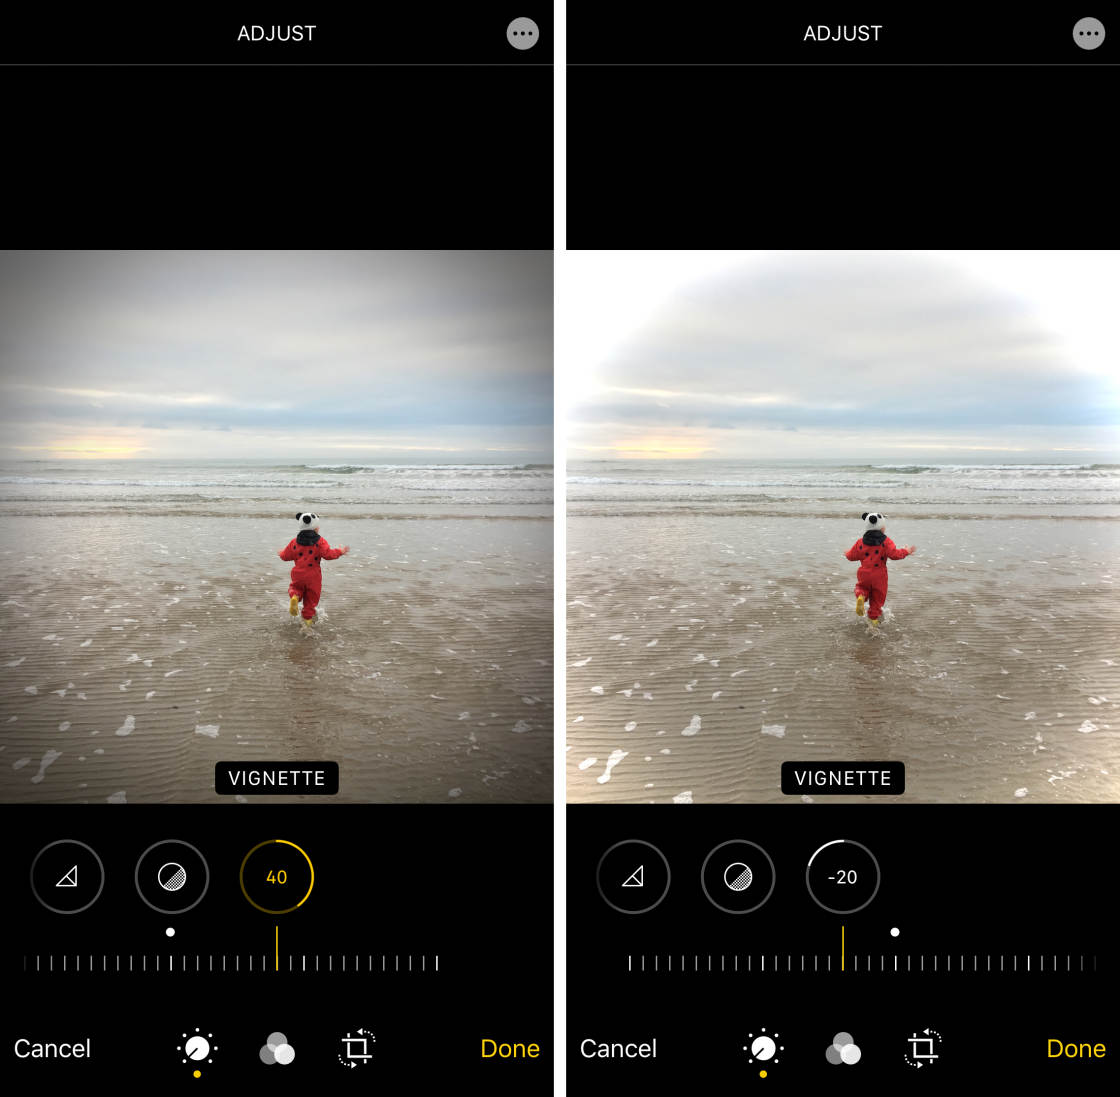
A dark vignette can help describe attention to the center of the prototype. It's likewise great for adding a sense of drama to your photos.
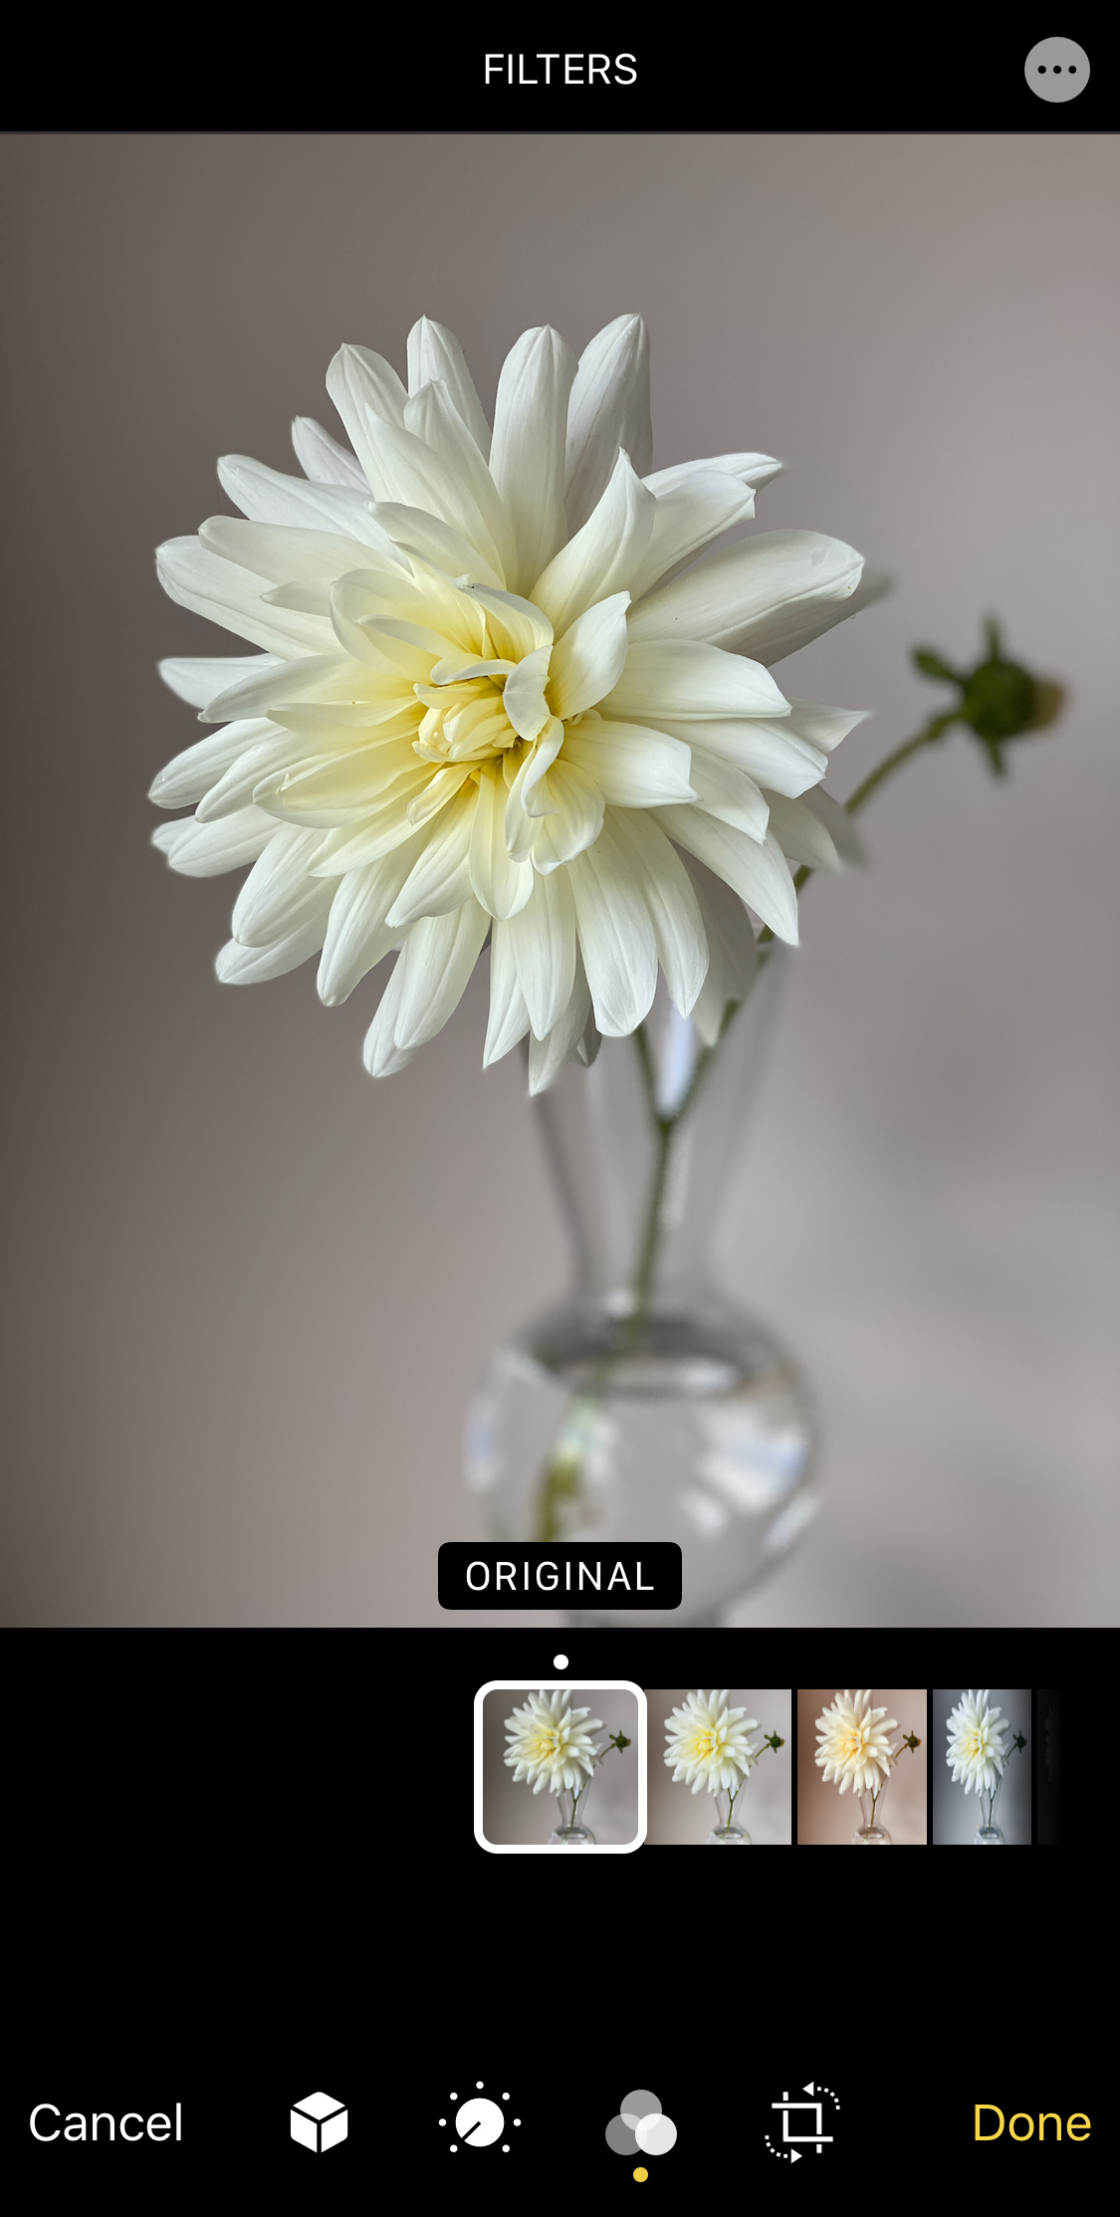
v. Use A Filter To Adjust The Color Tone
Filters offer a quick and easy way to change the await and feel of your photo.
With a single tap, you tin can adjust the colour tone of your image using a range of color and black and white filters.
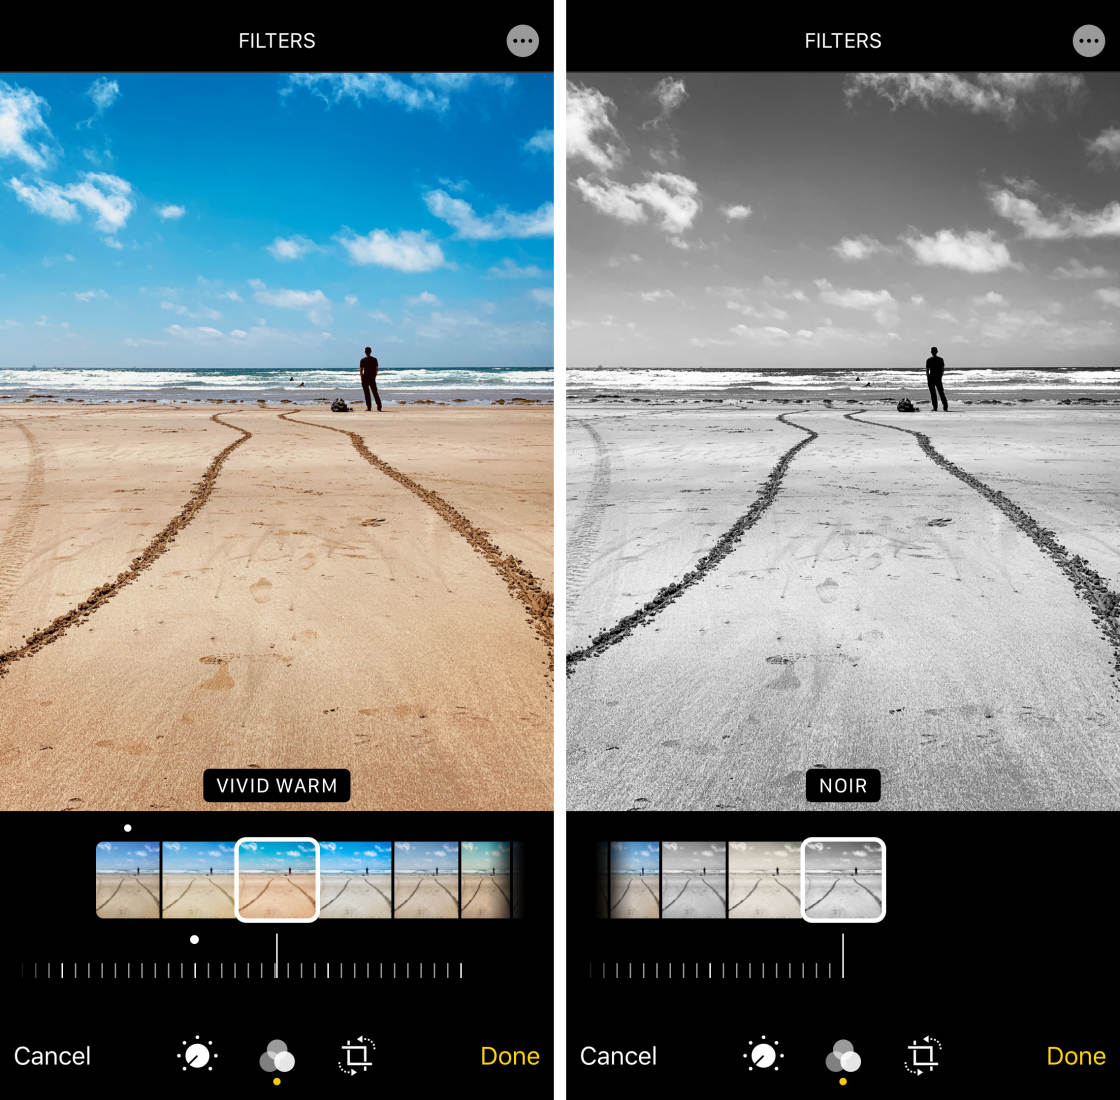
Read on to discover how to edit photos on iPhone using the born filters in the Photos app.
In the Photos app Edit mode, tap the Filters icon (three circles) at the lesser of the screen.
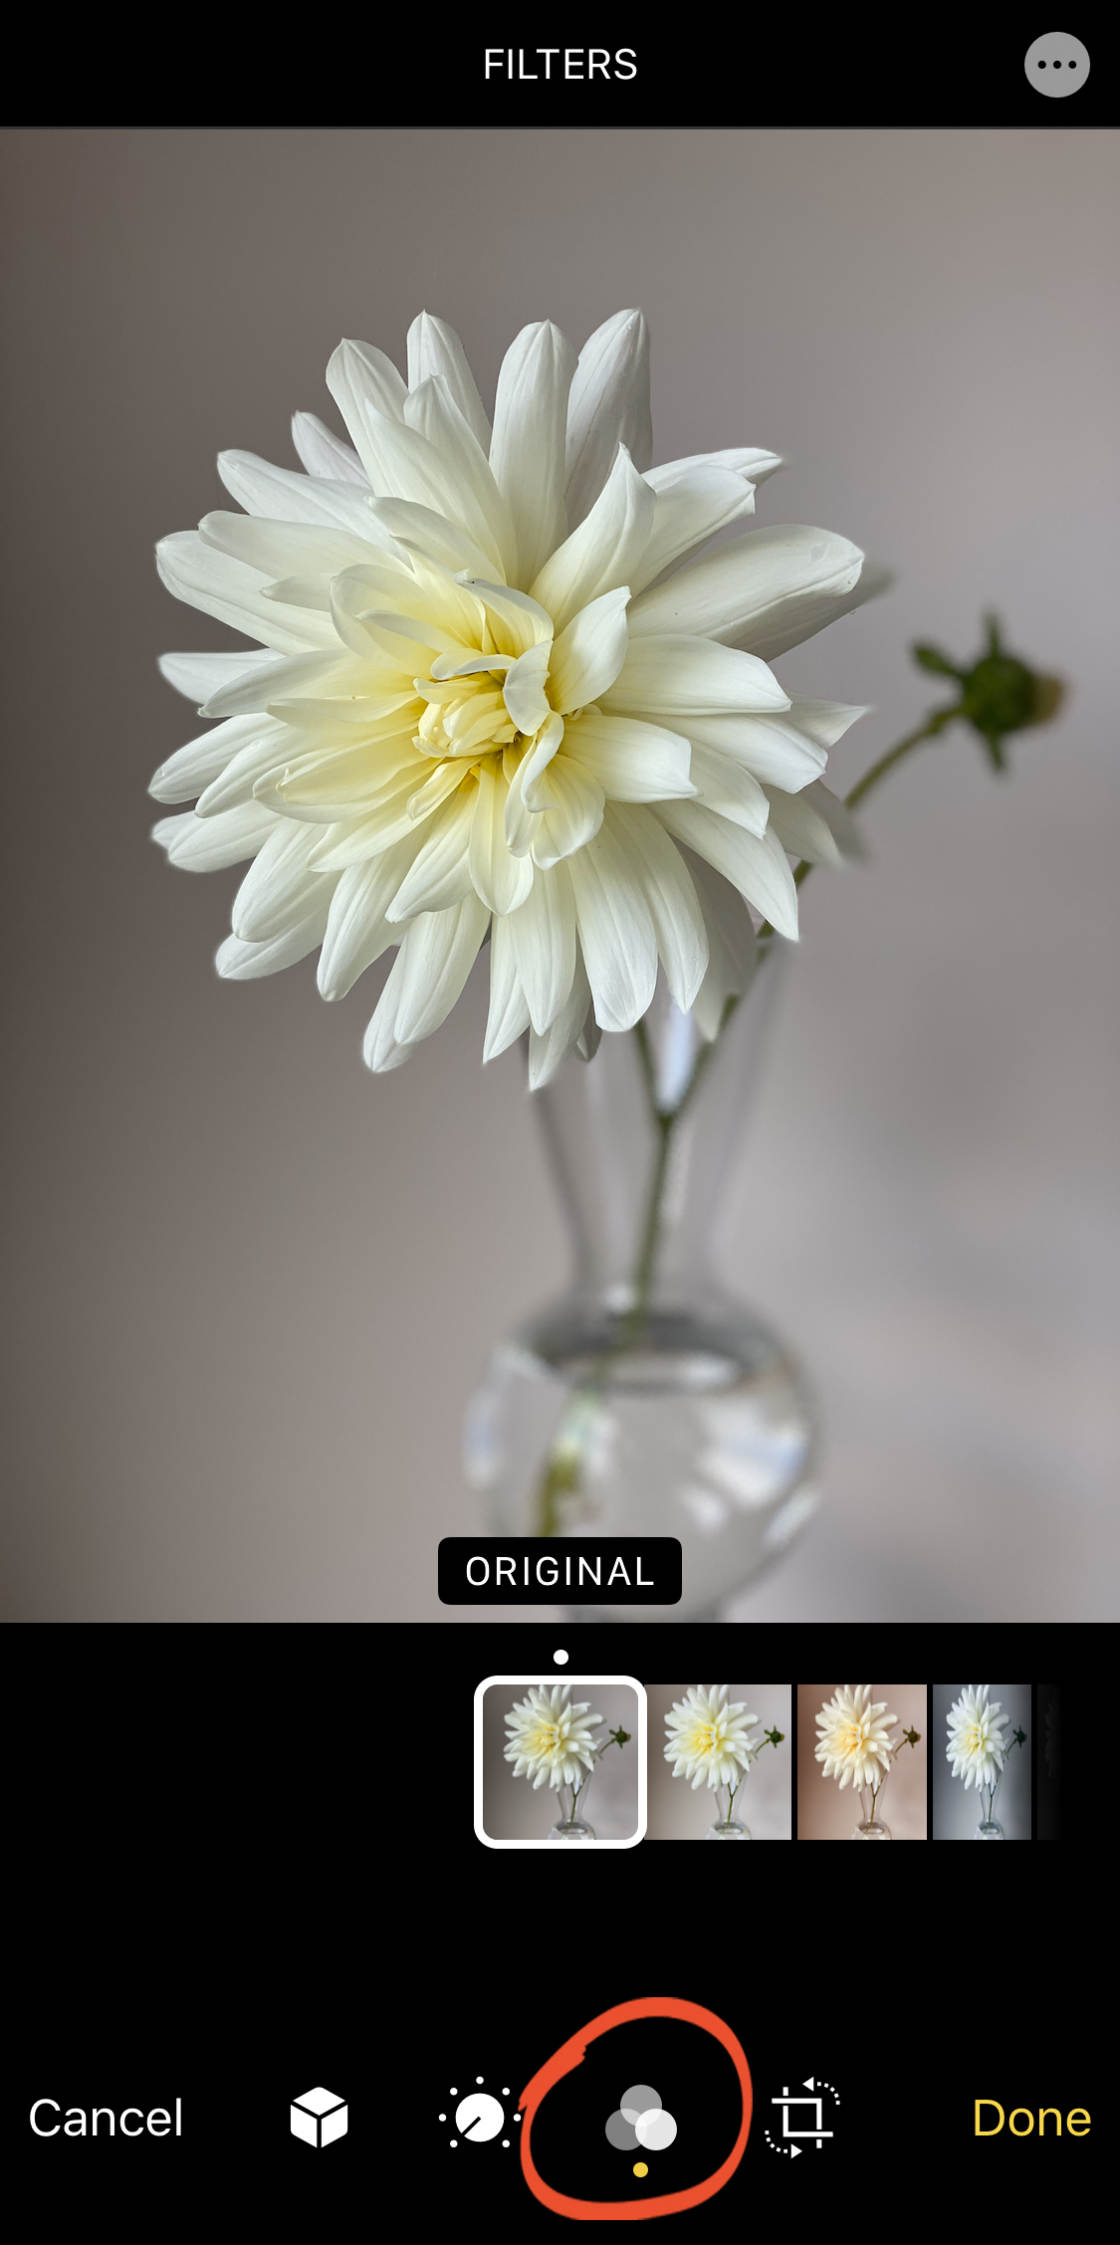
Swipe across the filter thumbnails beneath your image. Lookout how the colors change as y'all select different filters.
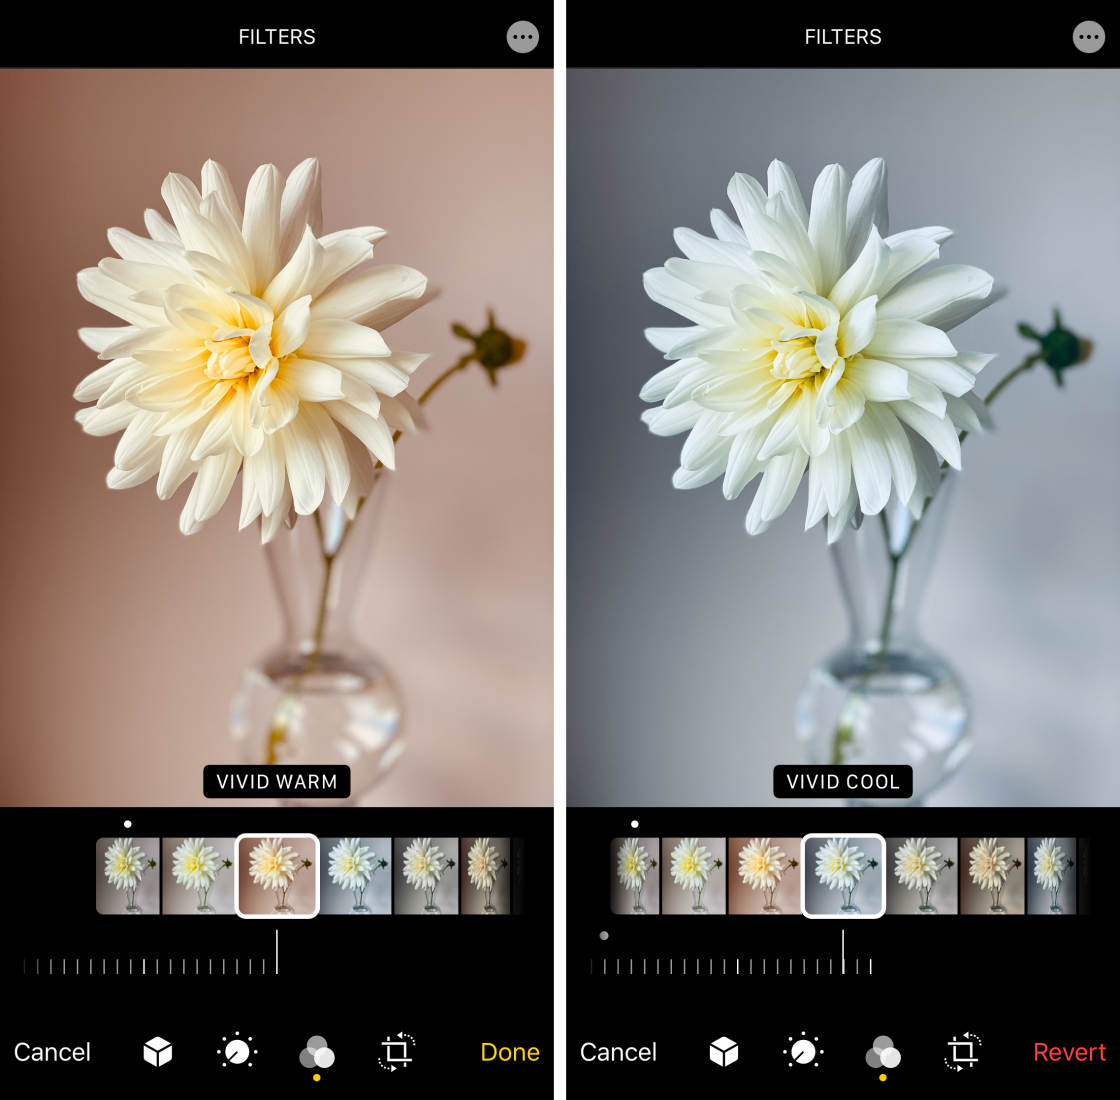
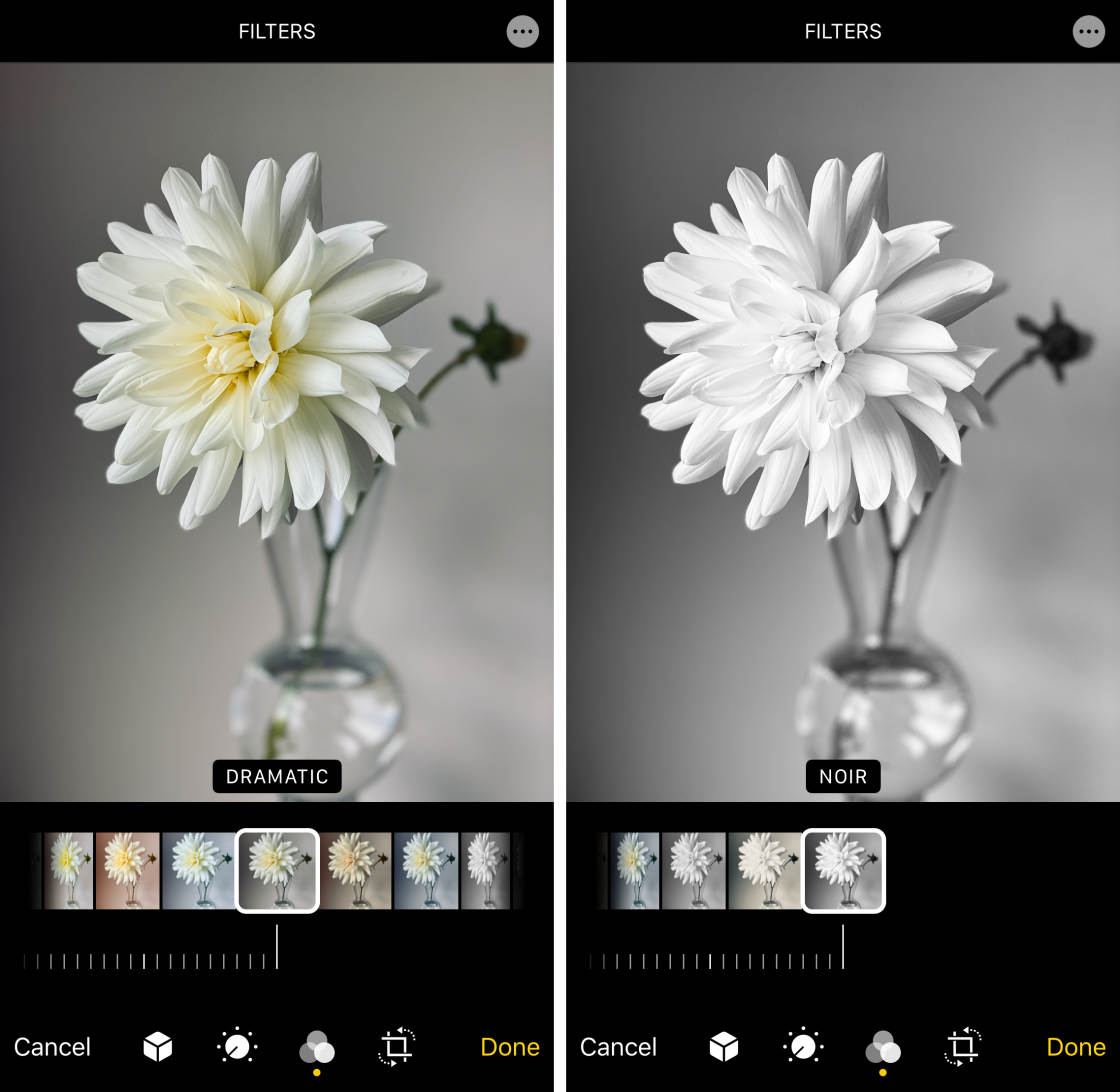
When you've called a filter, elevate the slider at the bottom of the screen to adjust the filter forcefulness.
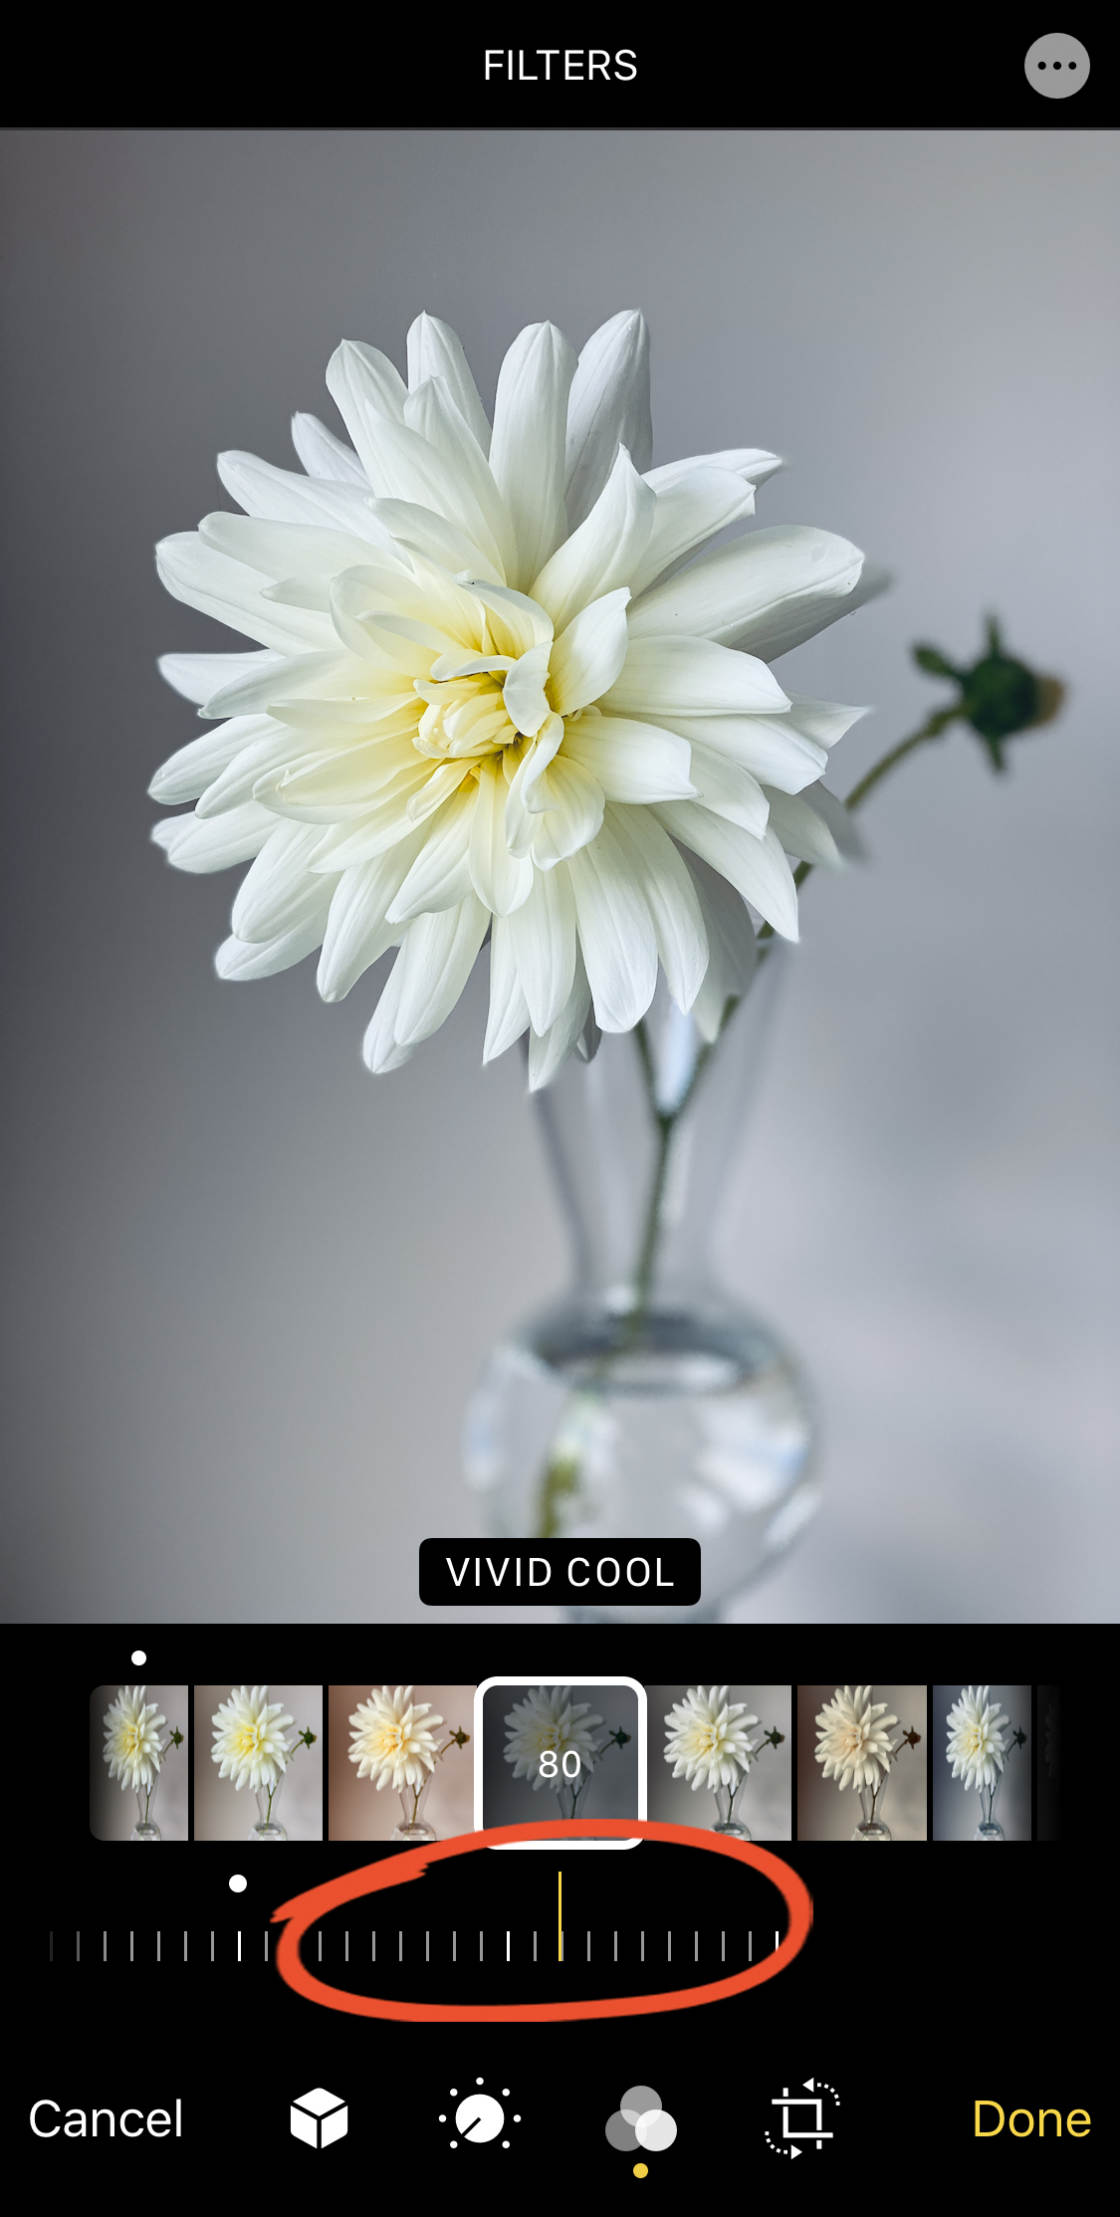
To remove a filter, select the Original filter.
6. Ingather, Rotate, Straighten & Accommodate Perspective
The Photos app has a range of tools for cropping, rotating, straightening, and adjusting perspective.
To access these tools, tap the Crop icon at the bottom of the screen.
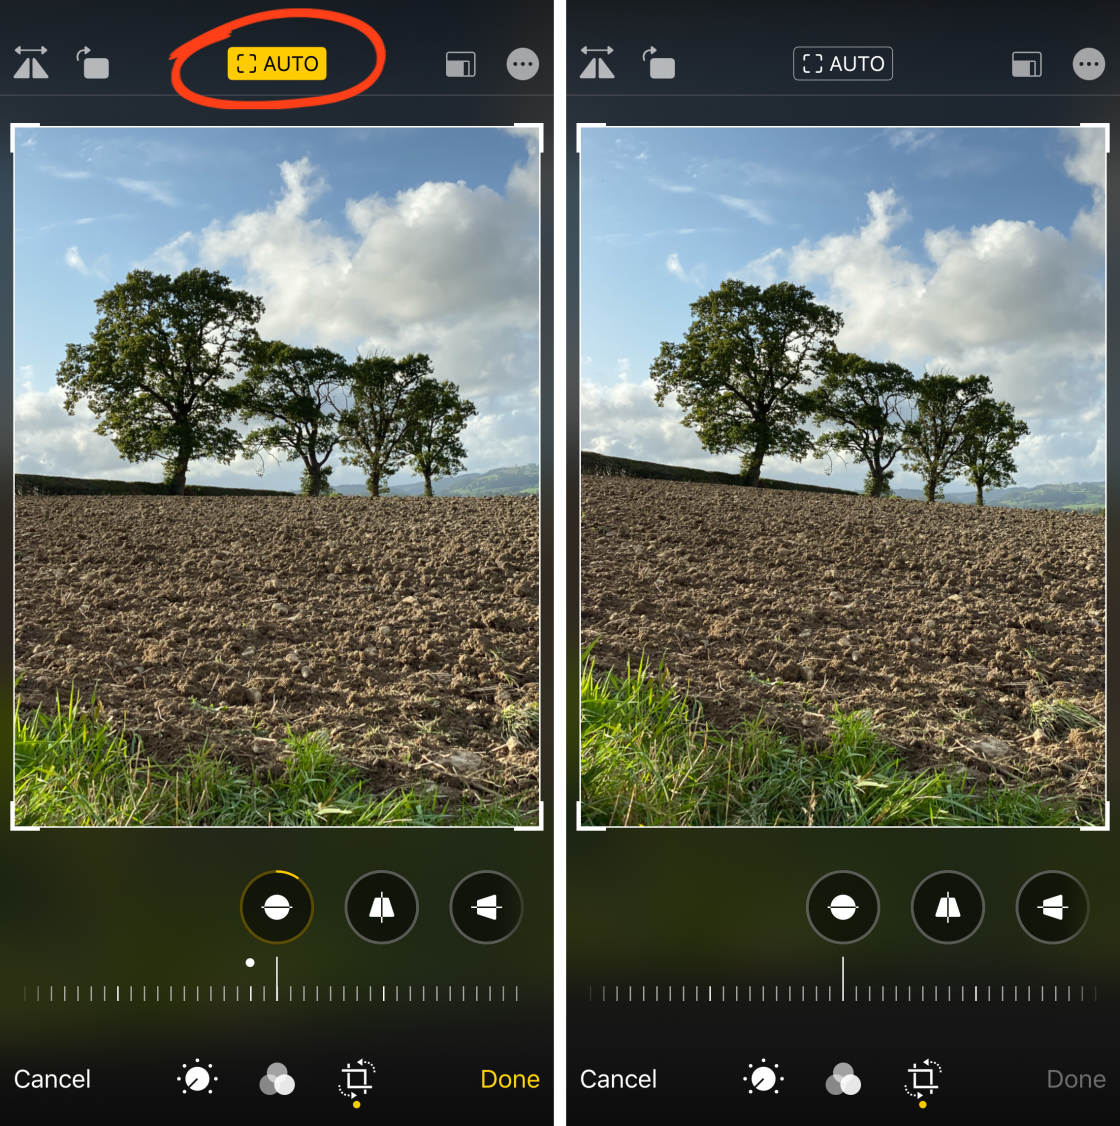
half-dozen.one Auto Crop & Straighten
When y'all first open the Ingather options, you might observe that your paradigm is automatically straightened and/or cropped.
If your iPhone has applied Machine cropping or straightening, you'll seeAUTO in yellow at the top of the screen. If you lot don't want to accept these automated adjustments, tap the yellowMachine icon.
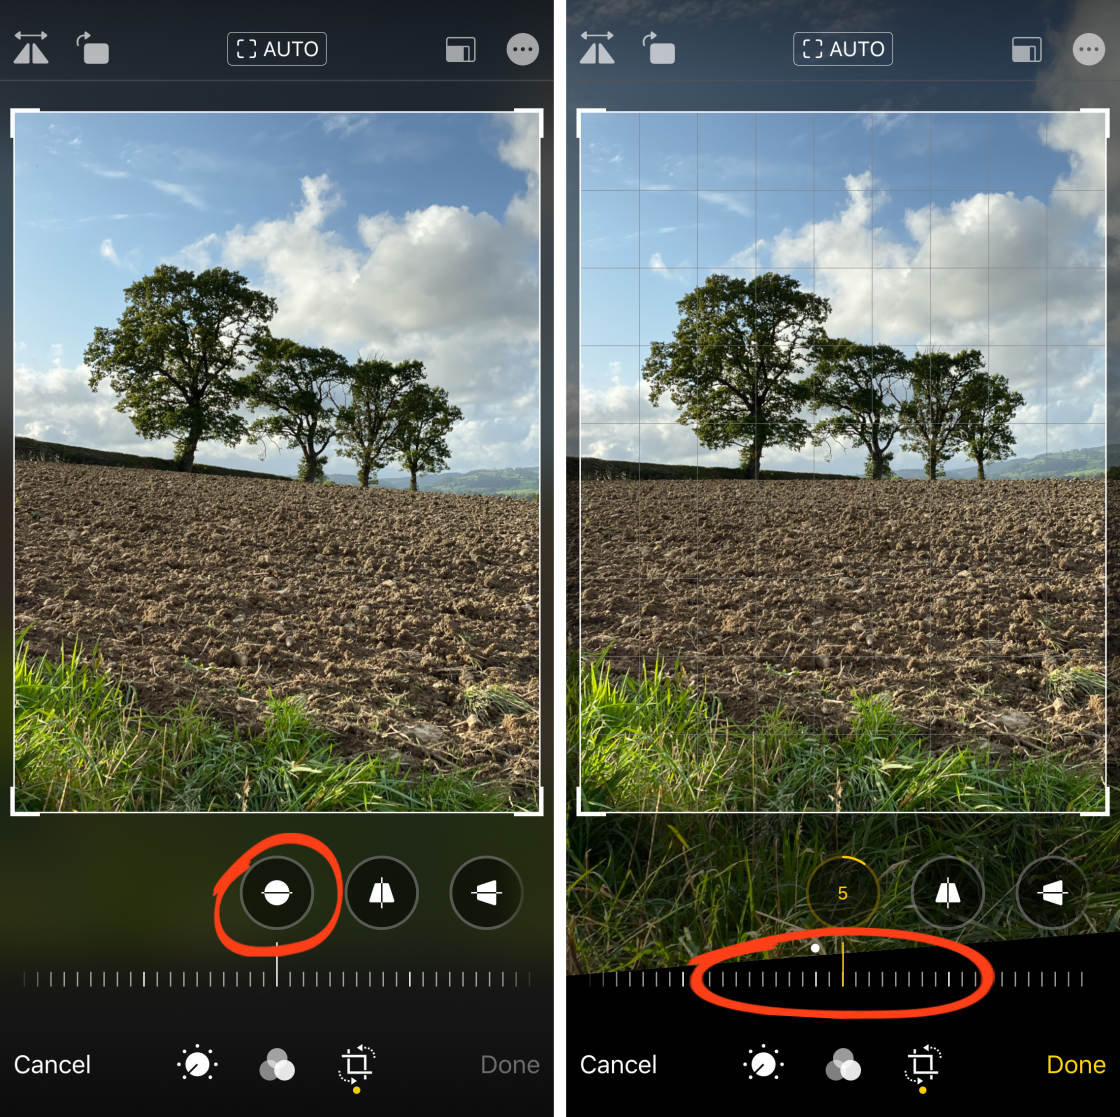
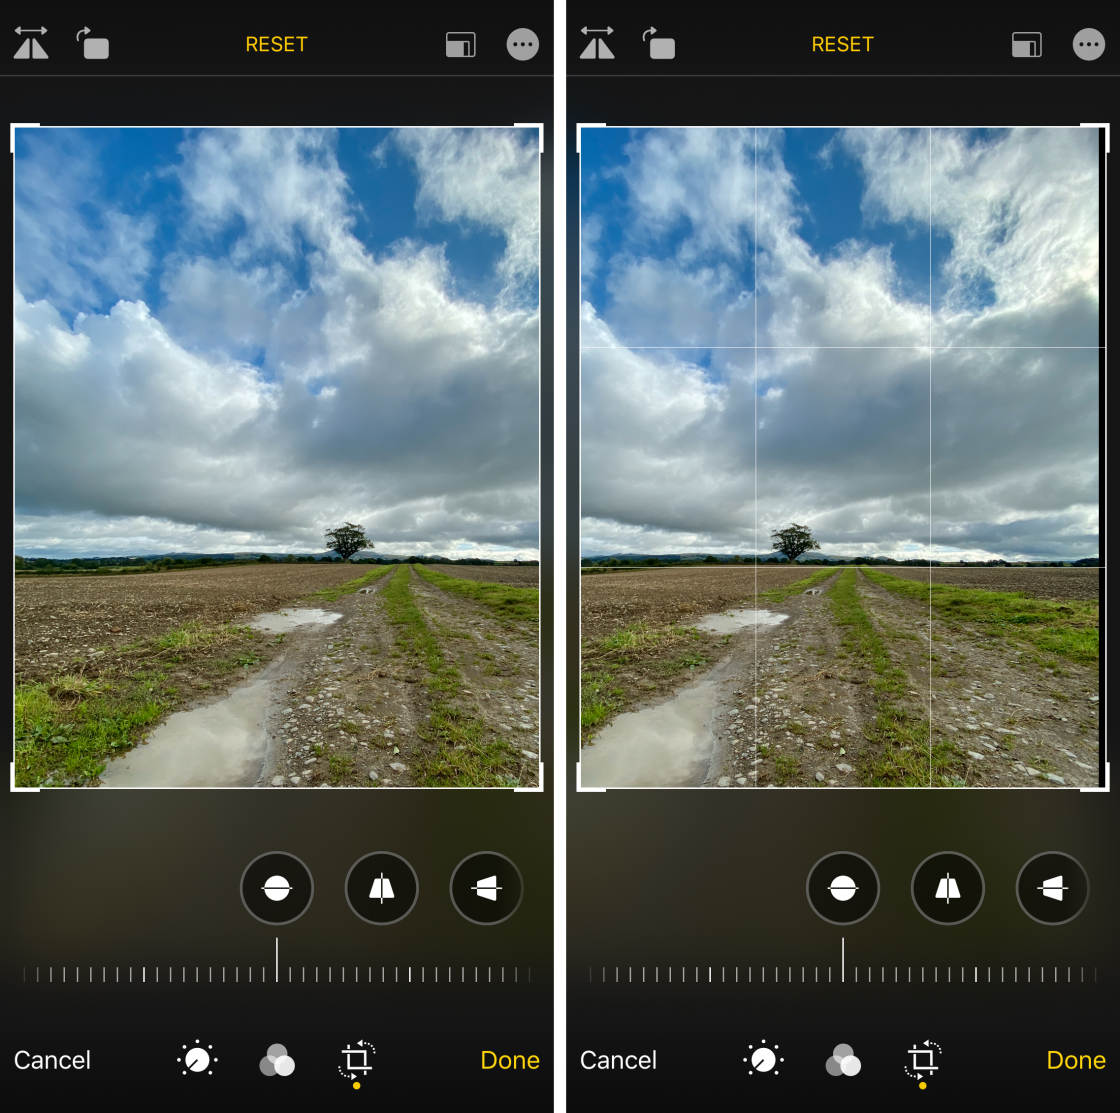
6.ii Straighten
If your photograph doesn't look level, you can easily straighten it in the Photos app.
Tap theStraighten tool beneath the image. And then drag the slider to rotate and straighten the photo. Use the gridlines to assist you become the photo perfectly level.
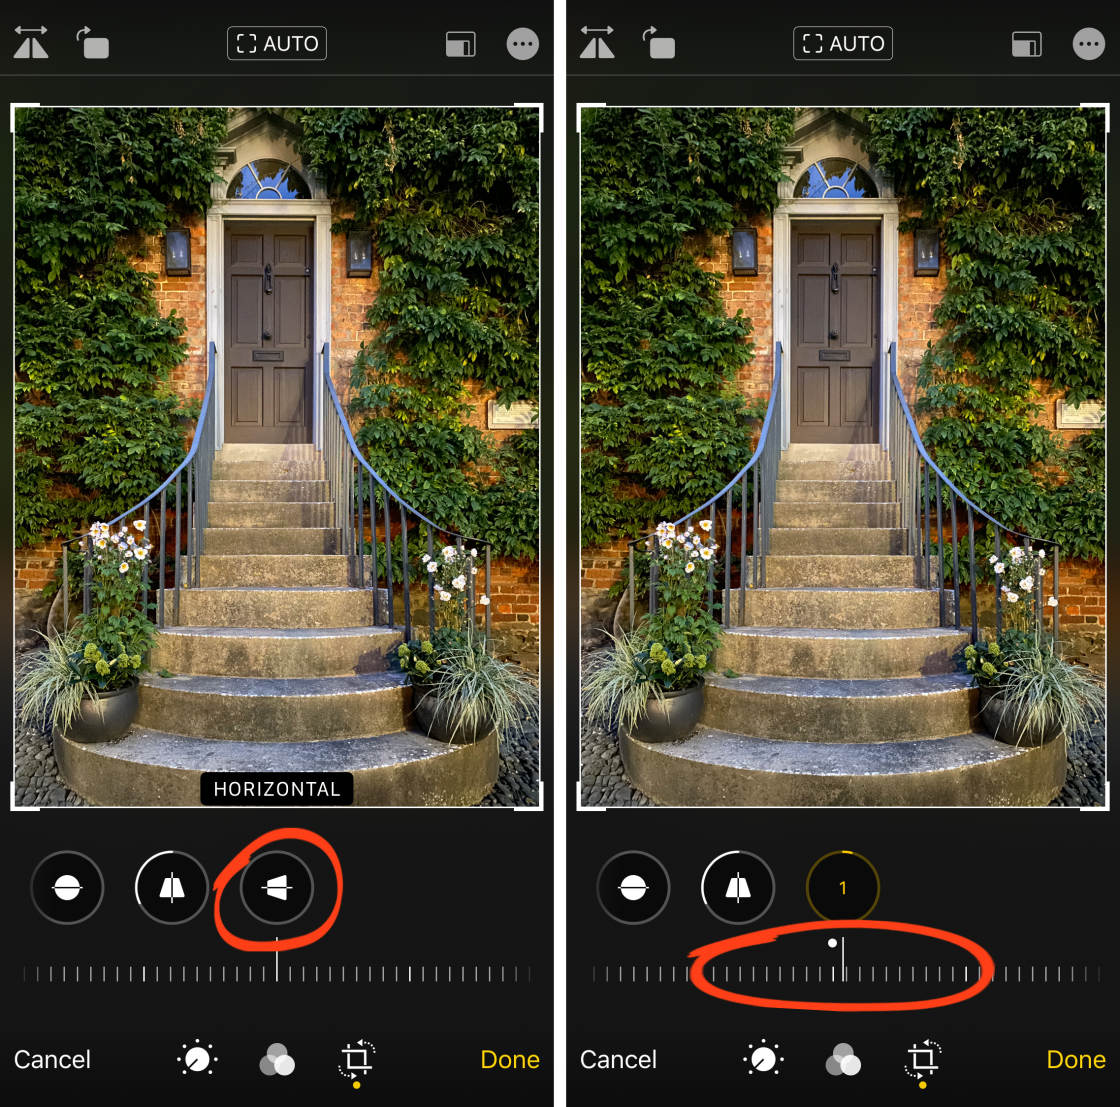
half-dozen.3 Perspective
Sometimes, you might want to suit the vertical or horizontal perspective in your photo.
To adjust the vertical perspective, tap the Vertical Perspective tool beneath the image. Drag the slider to accommodate the vertical perspective.
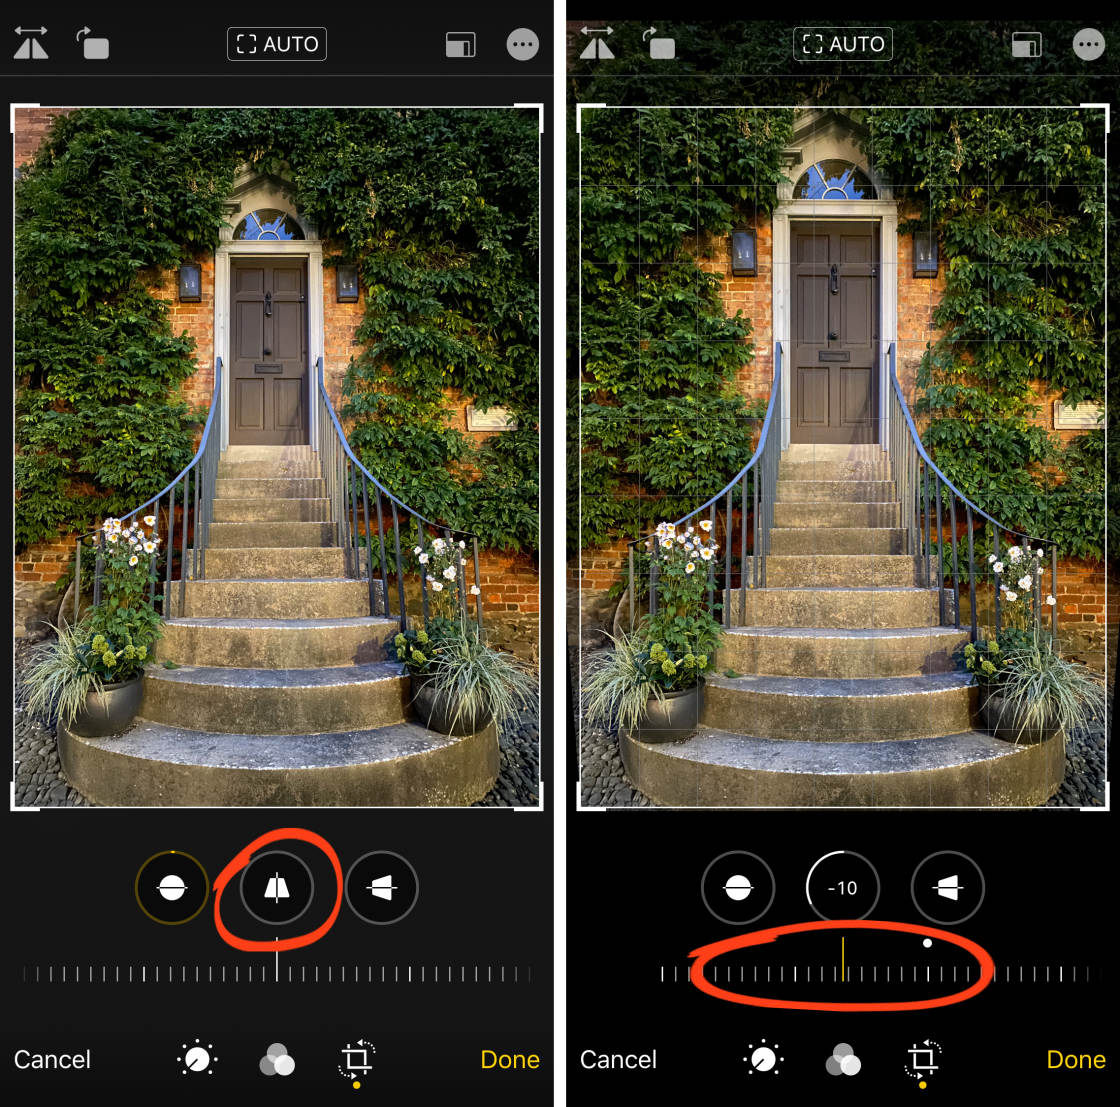
This tool is great for architecture photography. If you took a photo of a edifice from a low bending, the edifice may appear to converge towards the height. Adjusting the vertical perspective allows yous to straighten up the vertical lines on the building.
To adjust horizontal perspective, use the Horizontal Perspective tool.
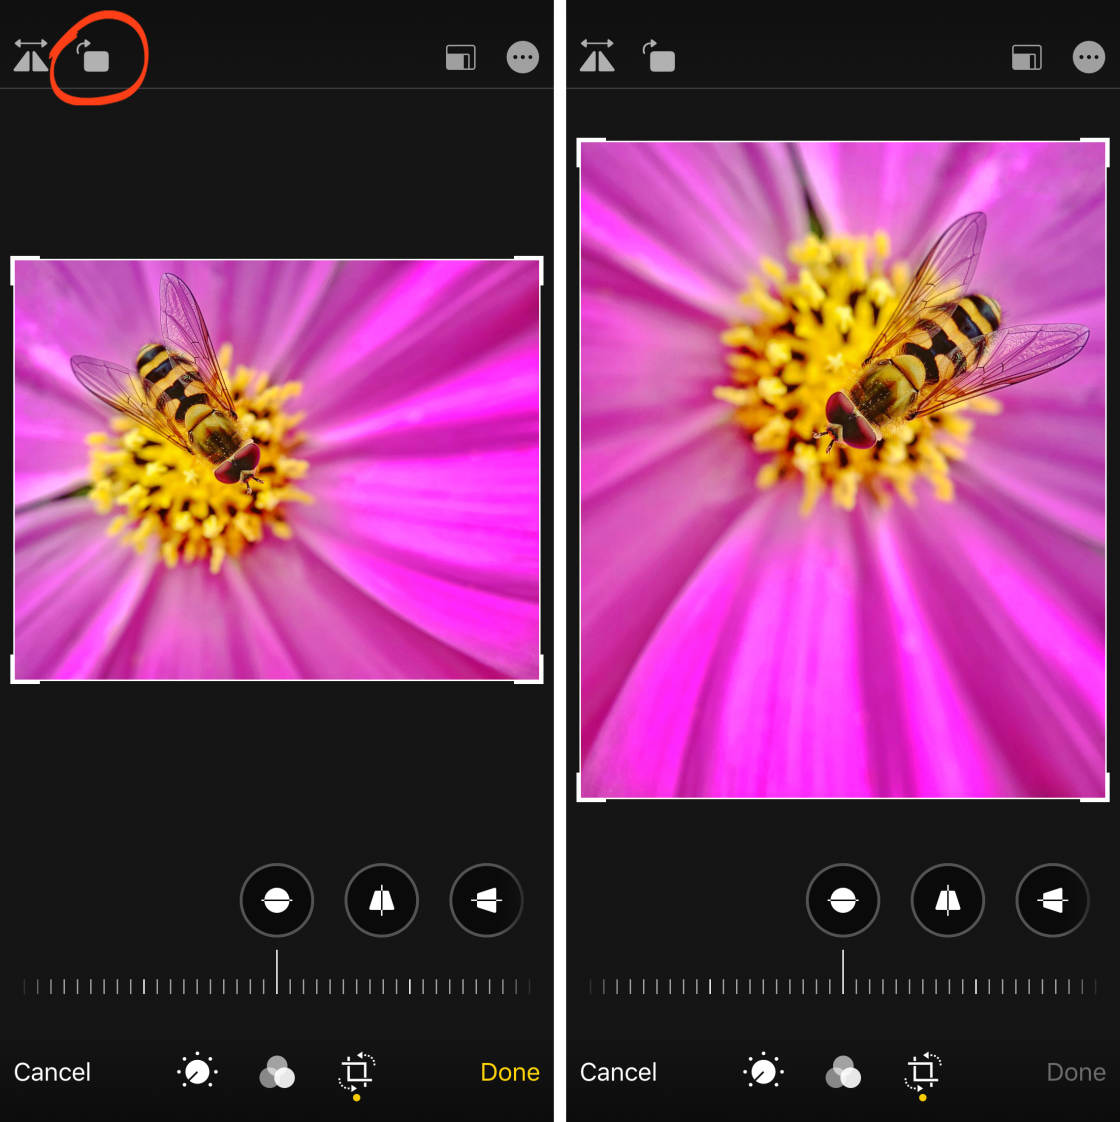
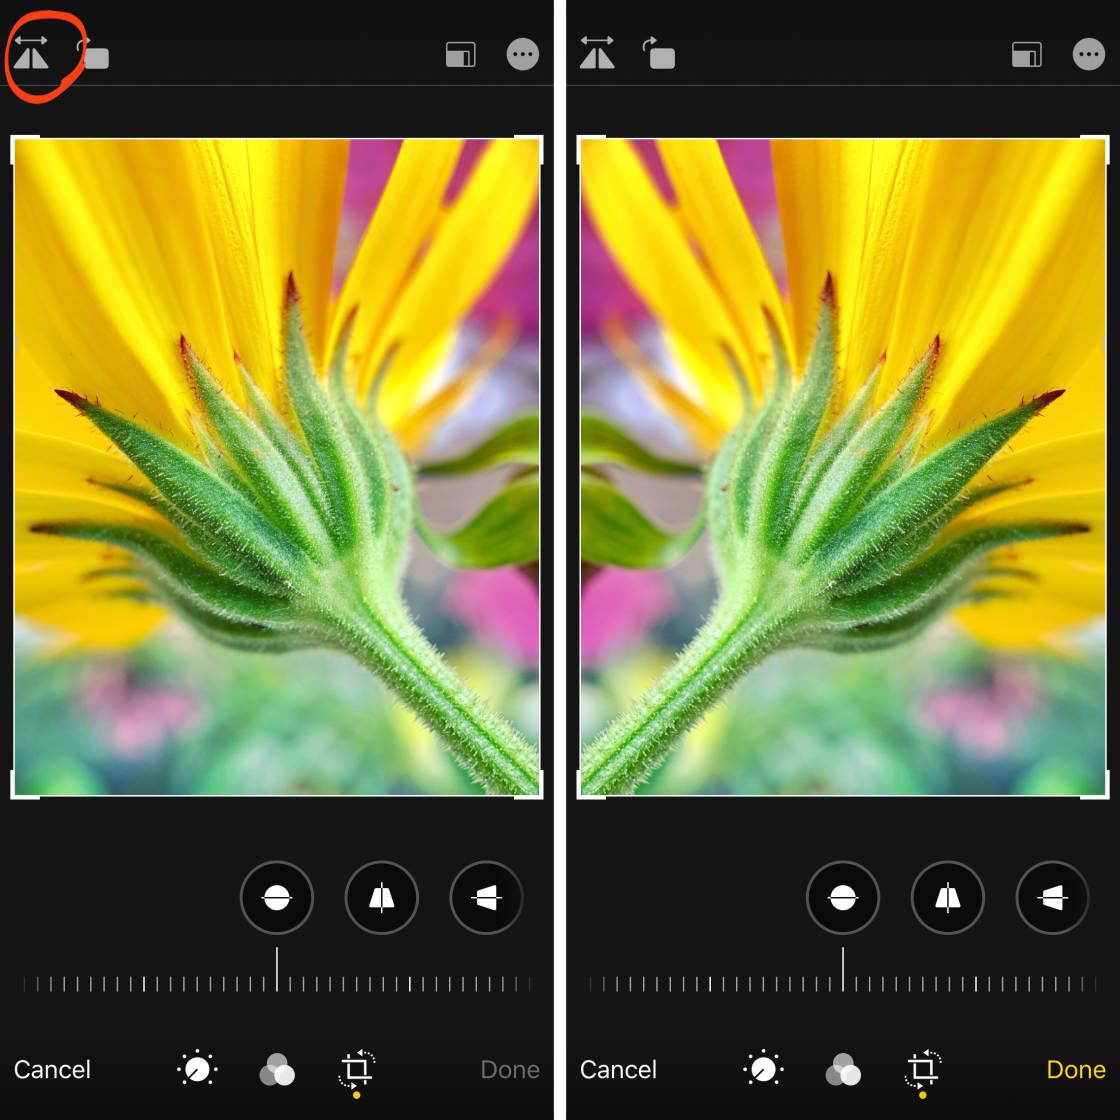
6.four Rotate & Flip
At the acme left of the Ingather screen are ii icons: Flip and Rotate.
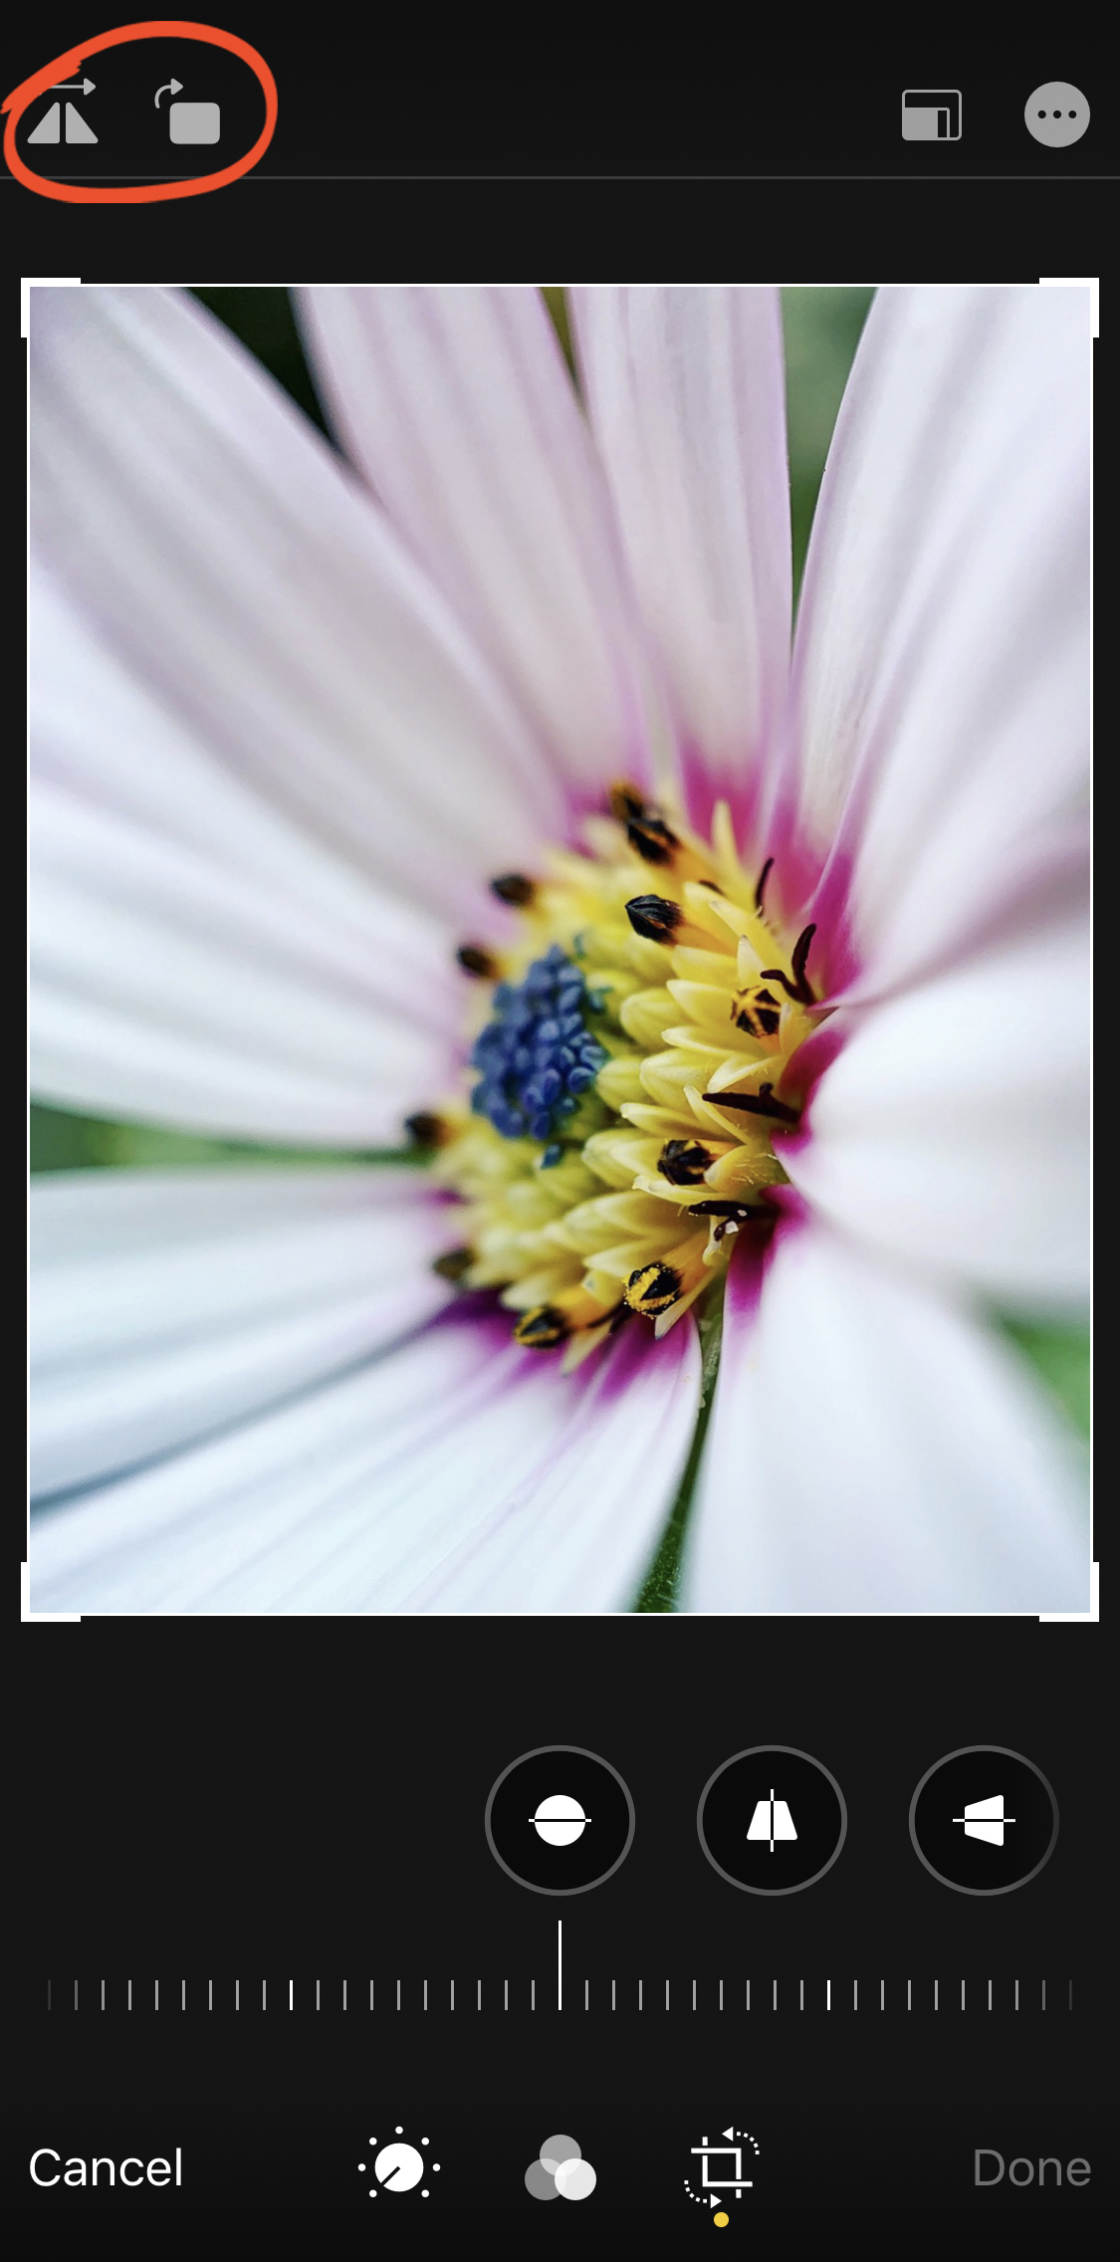
Tap theRotate icon to rotate your photo xc degrees at a fourth dimension.
Tap theFlip icon to flip your image horizontally.
6.5 Crop
The Ingather tool lets you remove the edges of your image.
Cropping your photo is bang-up for getting rid of distracting elements from the edges of the frame. This results in a cleaner, simpler image with a stronger visual impact.
You may also wish to crop your image to improve its limerick. For instance, cropping can help you lot create better symmetry or apply the dominion of thirds after taking your photo.
Cropping as well allows you to zoom in on a distant subject field. But be careful not to ingather likewise much of the photo every bit this can upshot in a small-scale, low-quality image.
To crop your photograph, drag the corner ingather handles. A white edge indicates where the new edges of the photo will be.
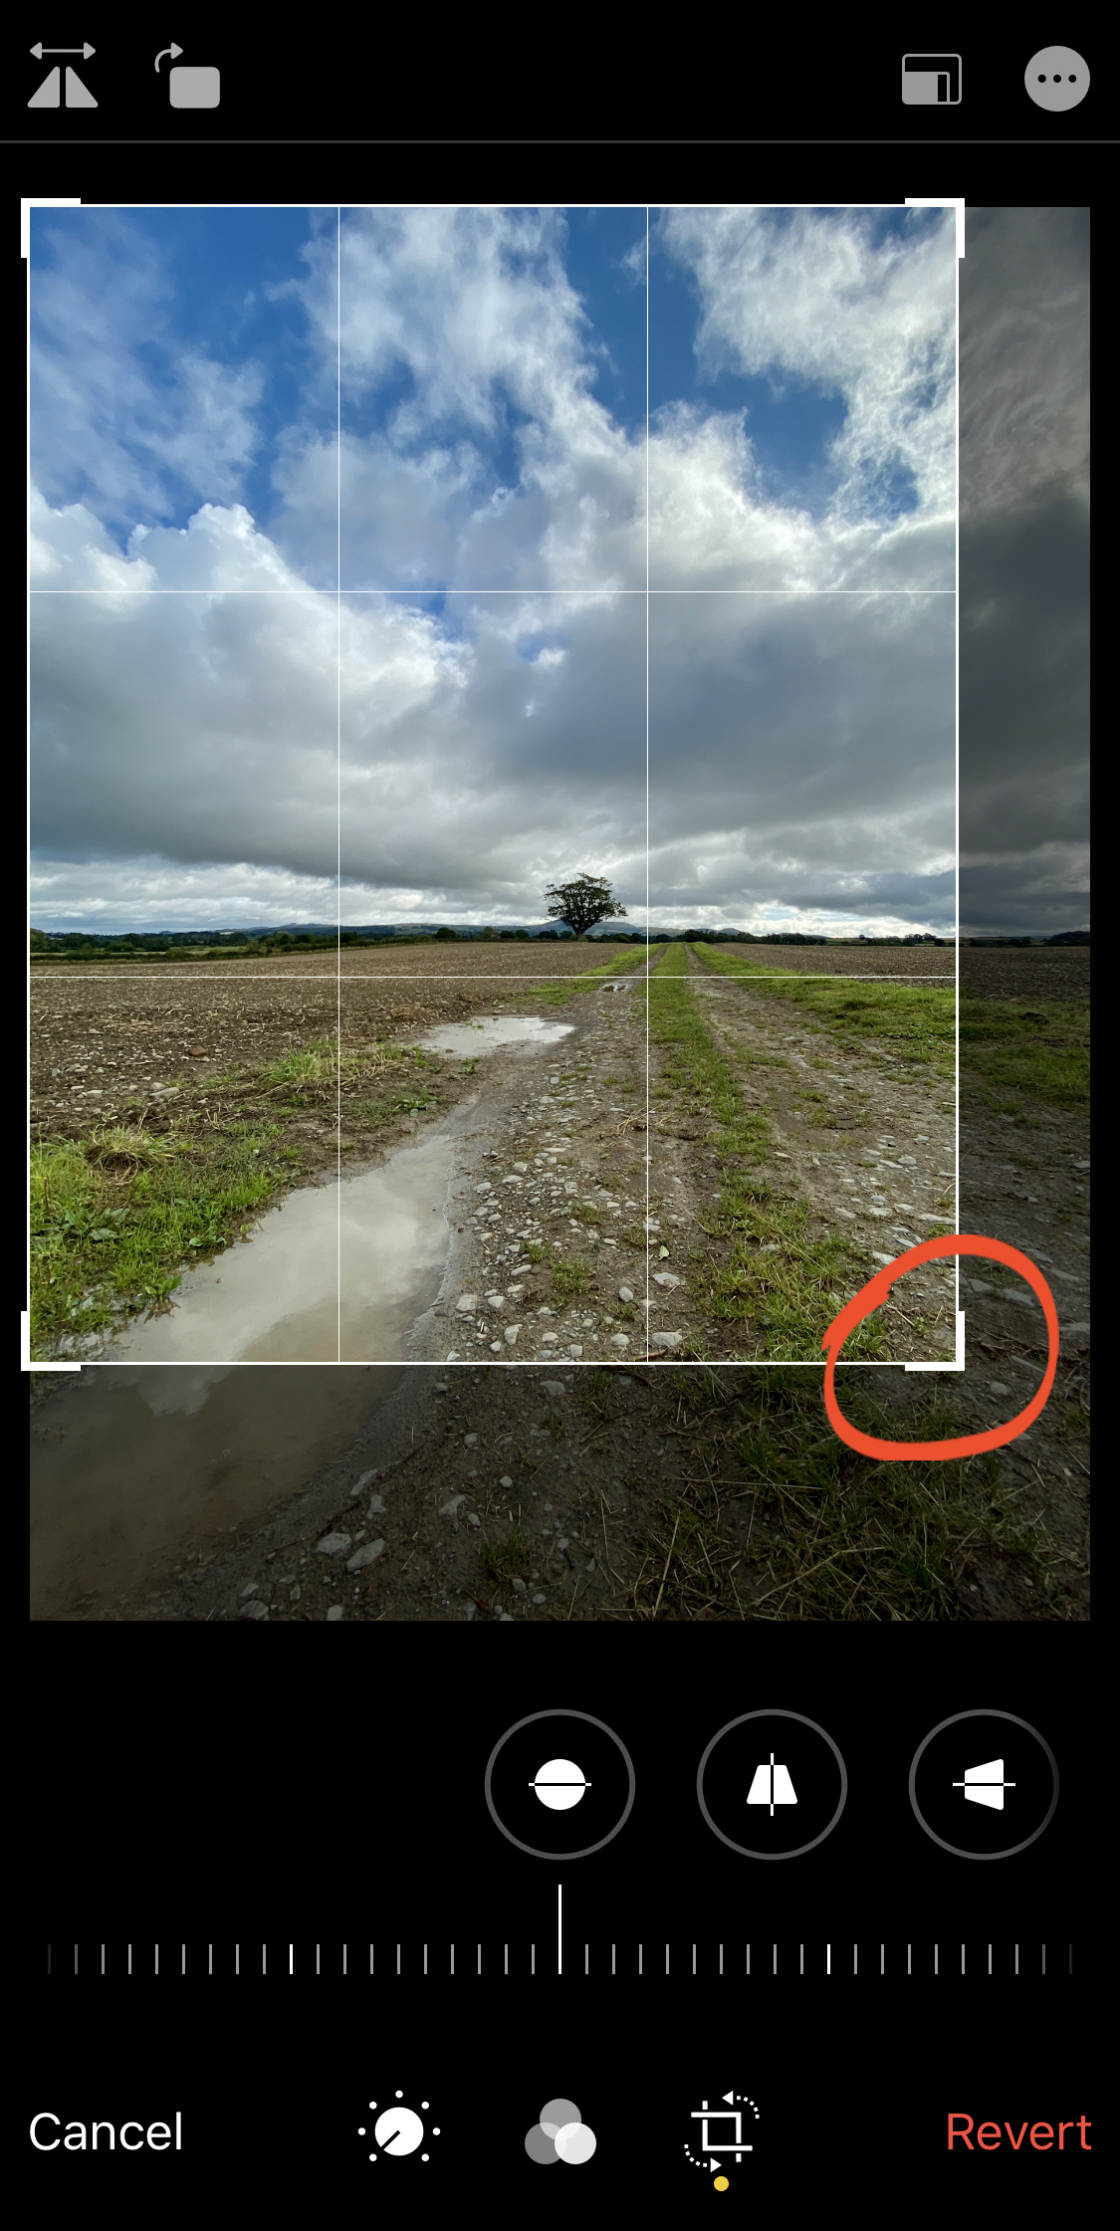
If yous crop in as well far, drag the corner ingather handles out again. Or compression inwards with ii fingers to bring more of the image dorsum into the frame.
You lot can too drag the epitome preview to conform the position of the prototype within the crop frame.
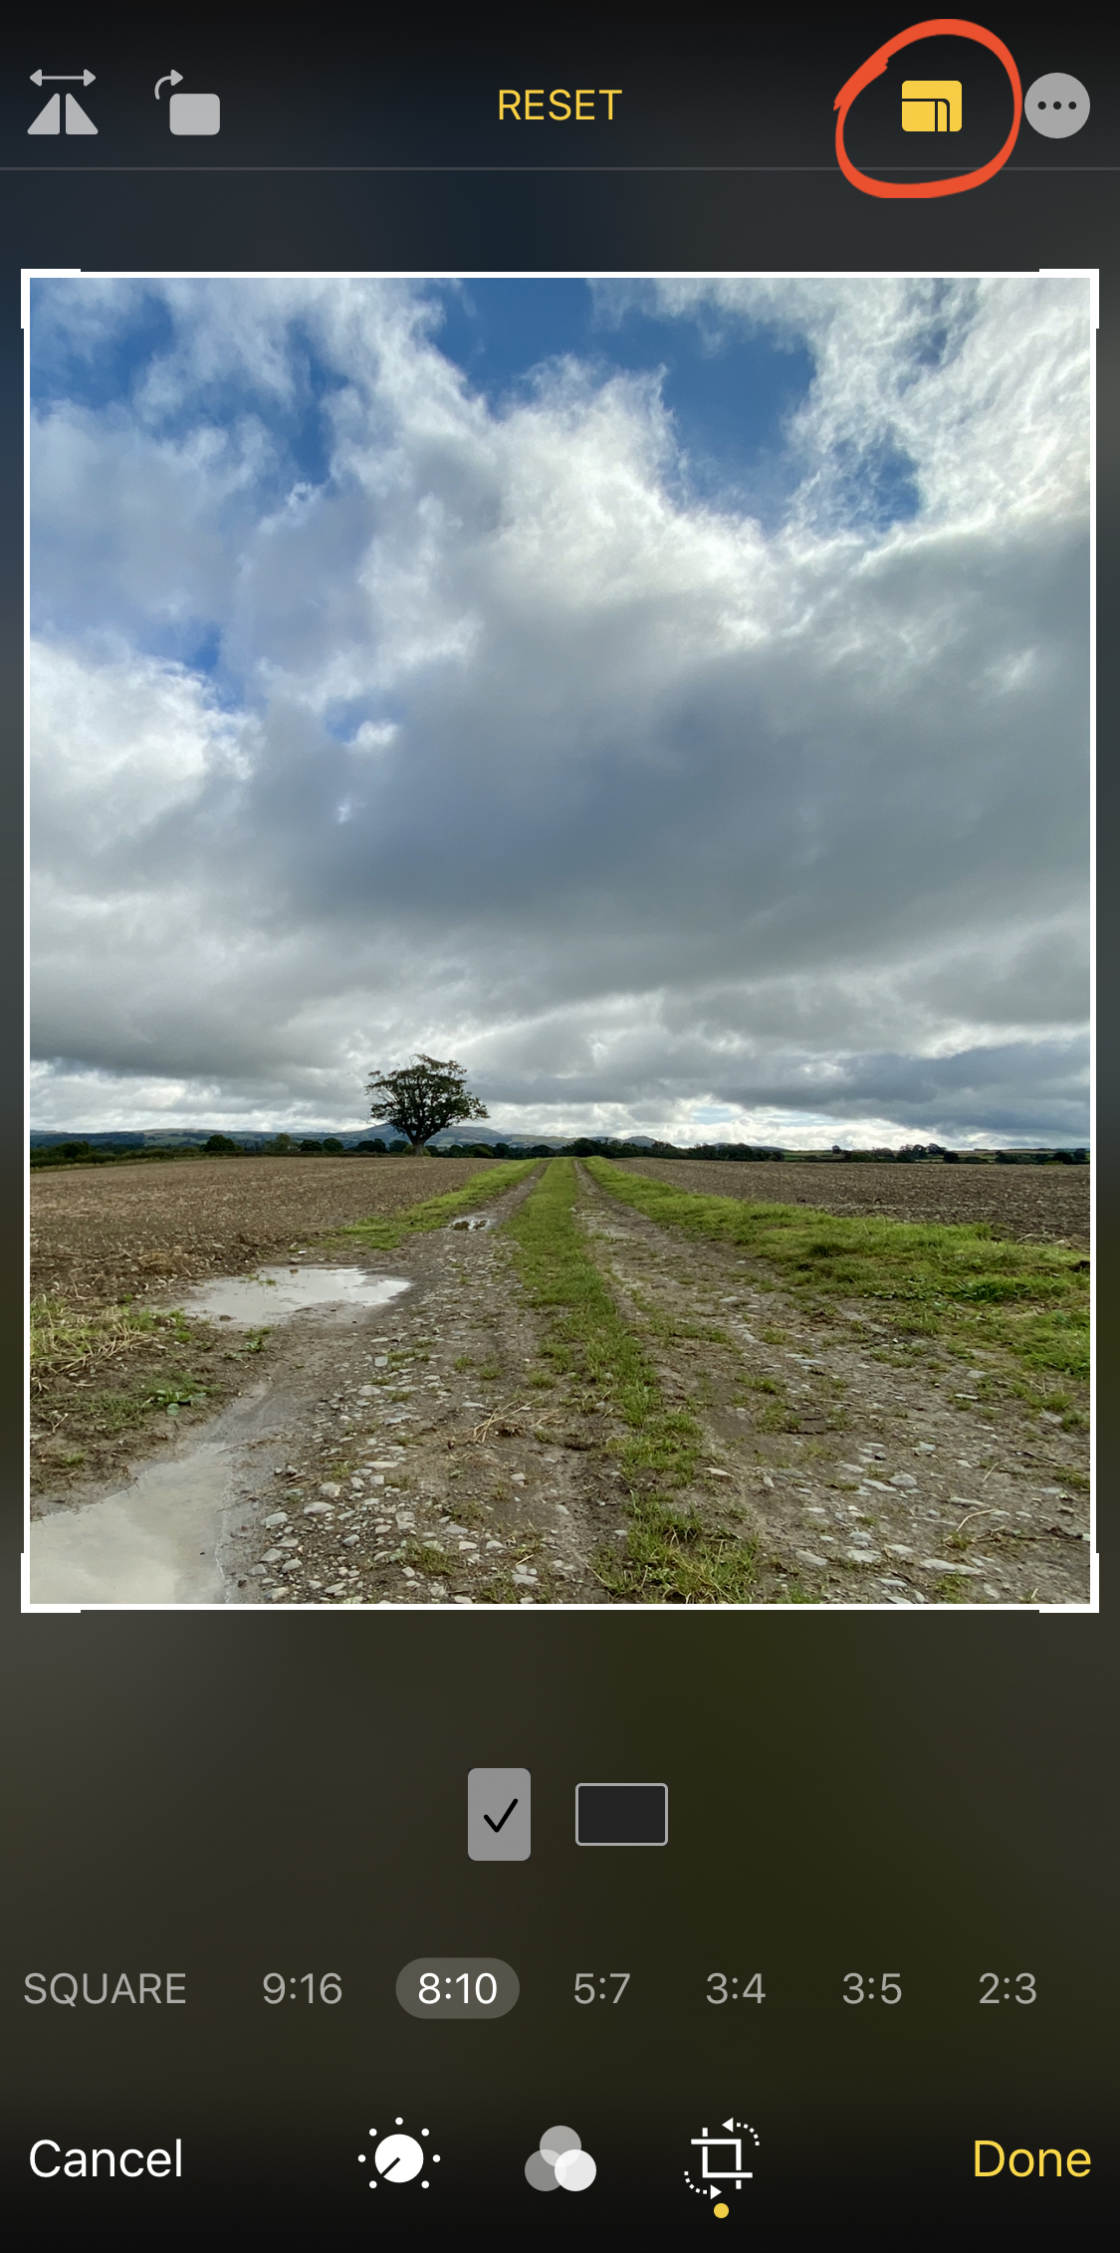
If you want to ingather to a specific aspect ratio, tap theAspect Ratio icon at the top right.
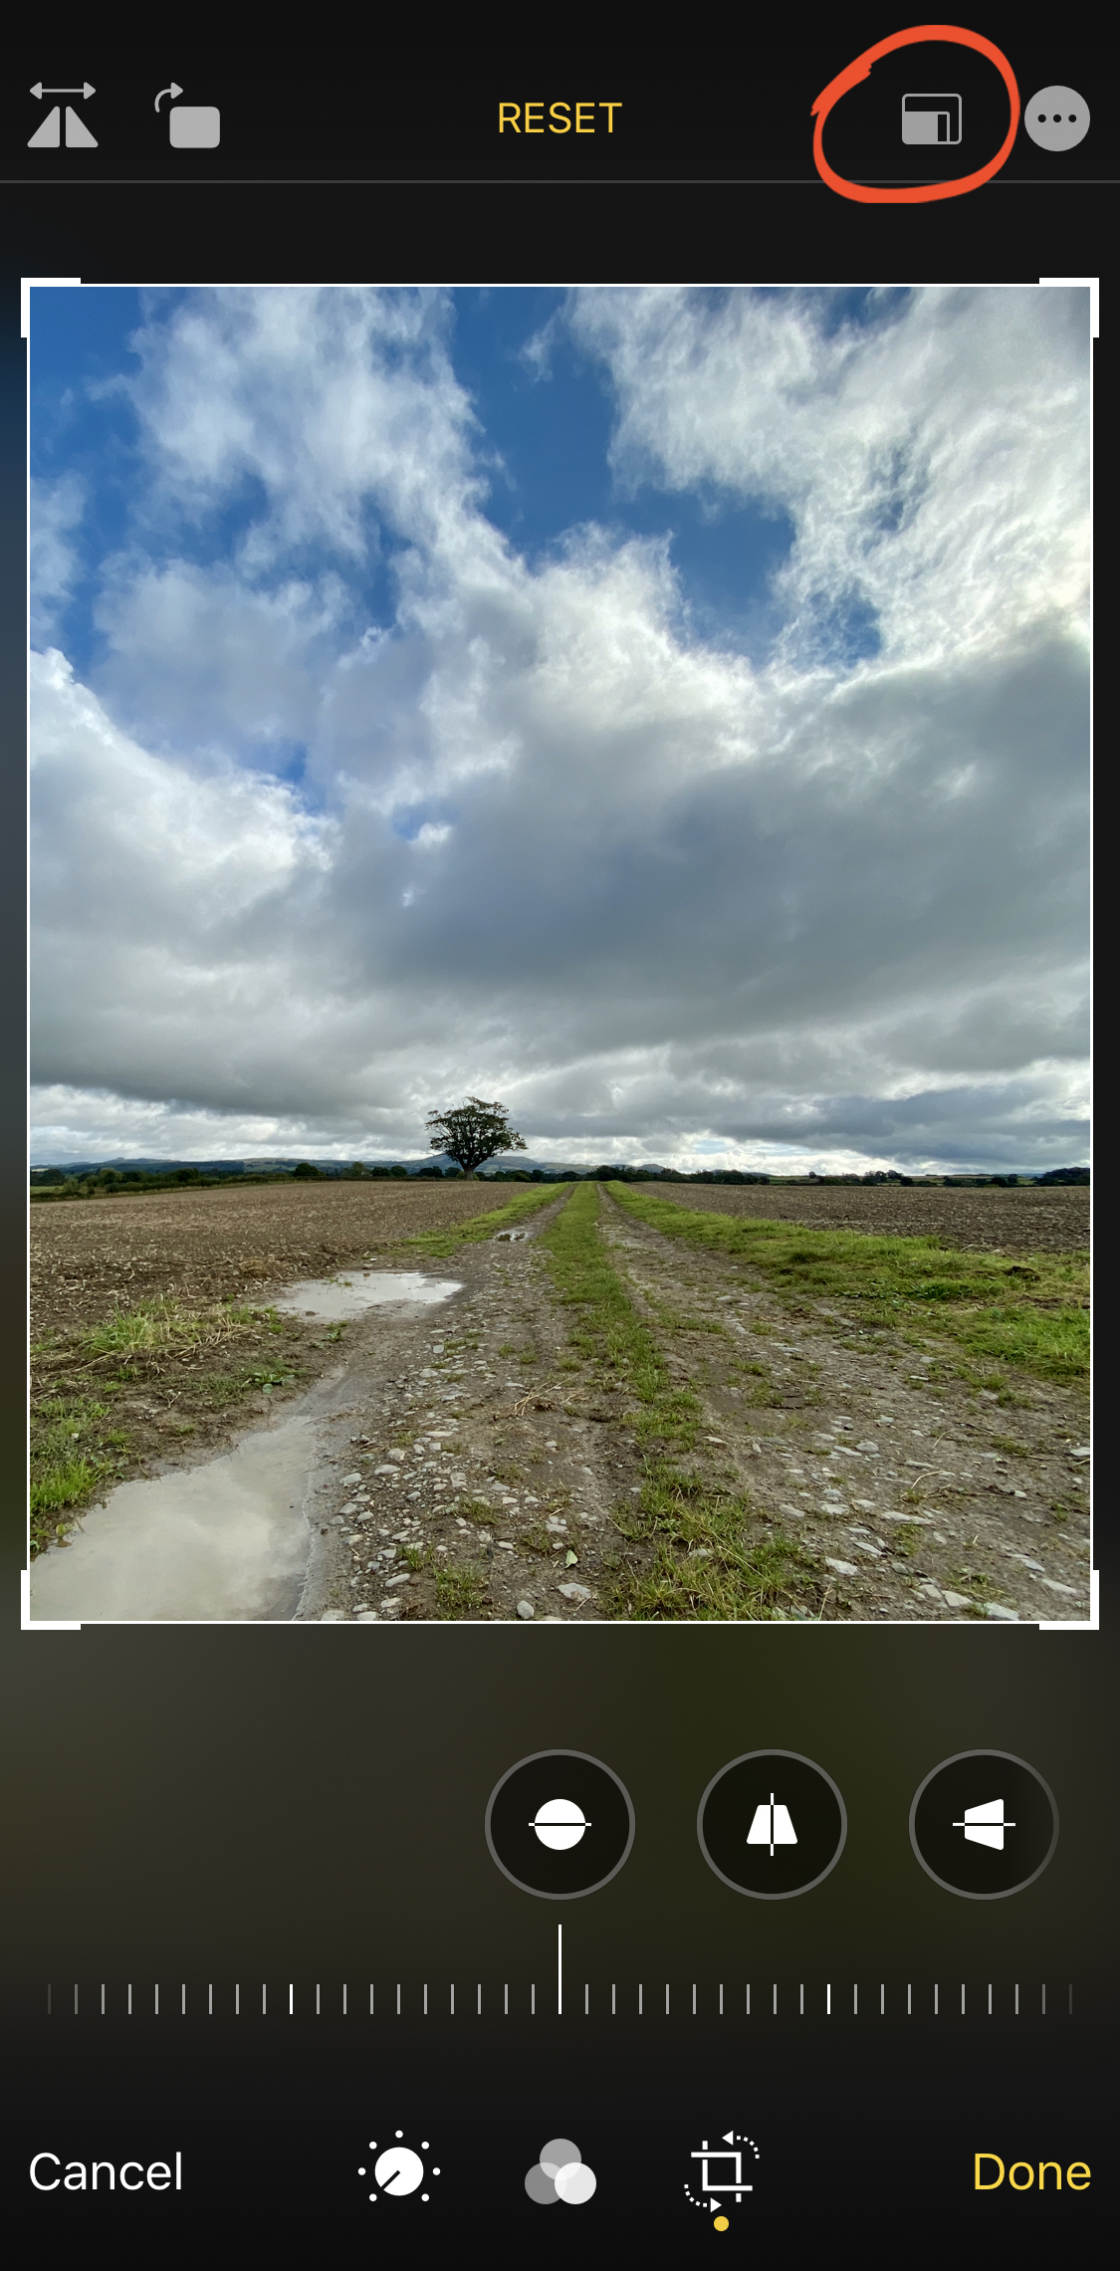
Swipe across the row of aspect ratios, e.thou. Square, nine:16, 8:10, etc. So select the one y'all want to utilise.
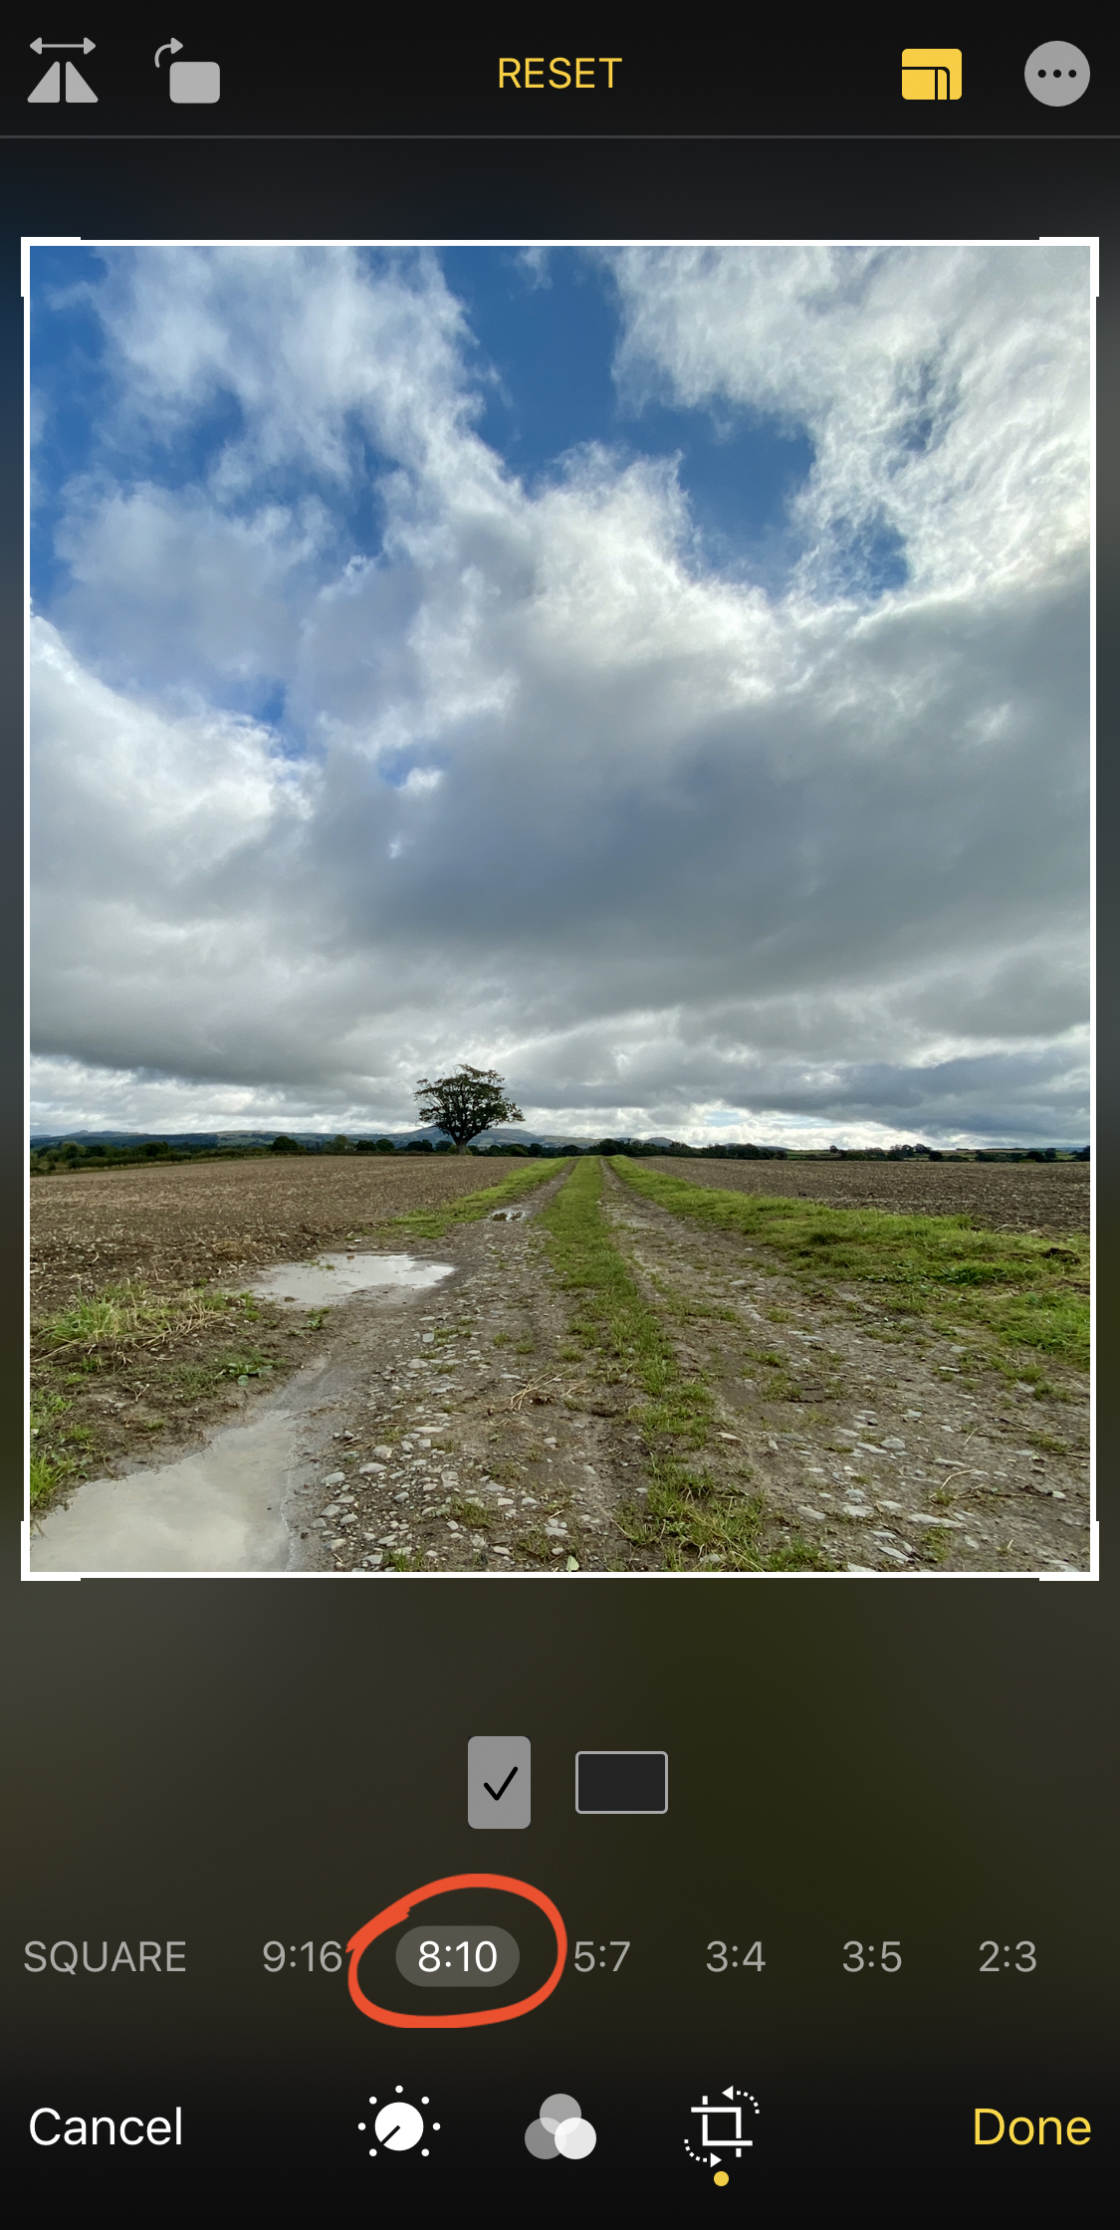
To a higher place the aspect ratio options, you tin can choose whether your photo to be cropped vertically or horizontally.
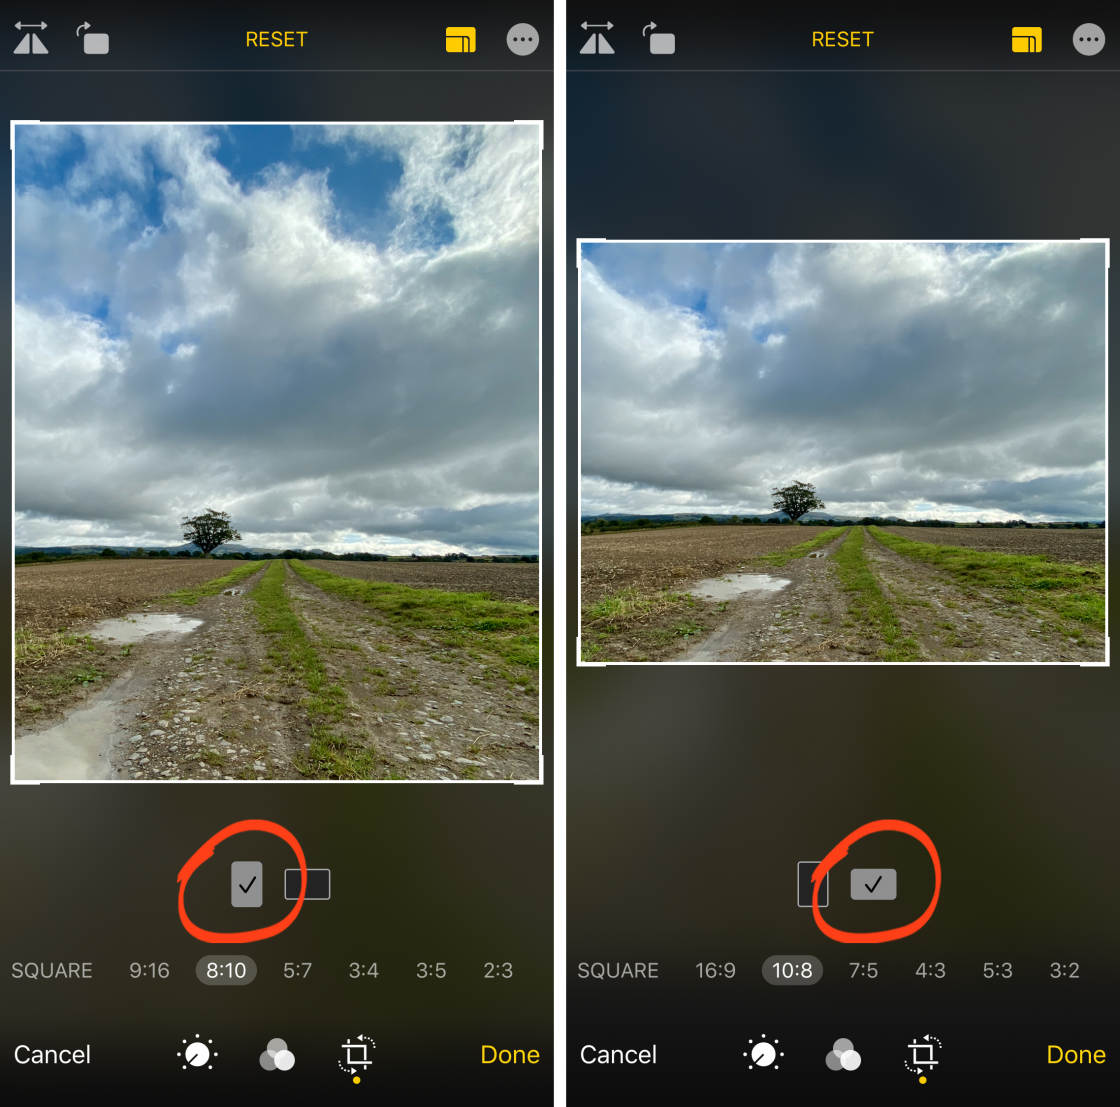
You can pinch in or out to adjust how much of the motion picture is cropped. And you can drag the paradigm to conform which area appears within the crop frame.
To leave the Attribute Ratio settings, tap the Aspect Ratio icon at the top correct.
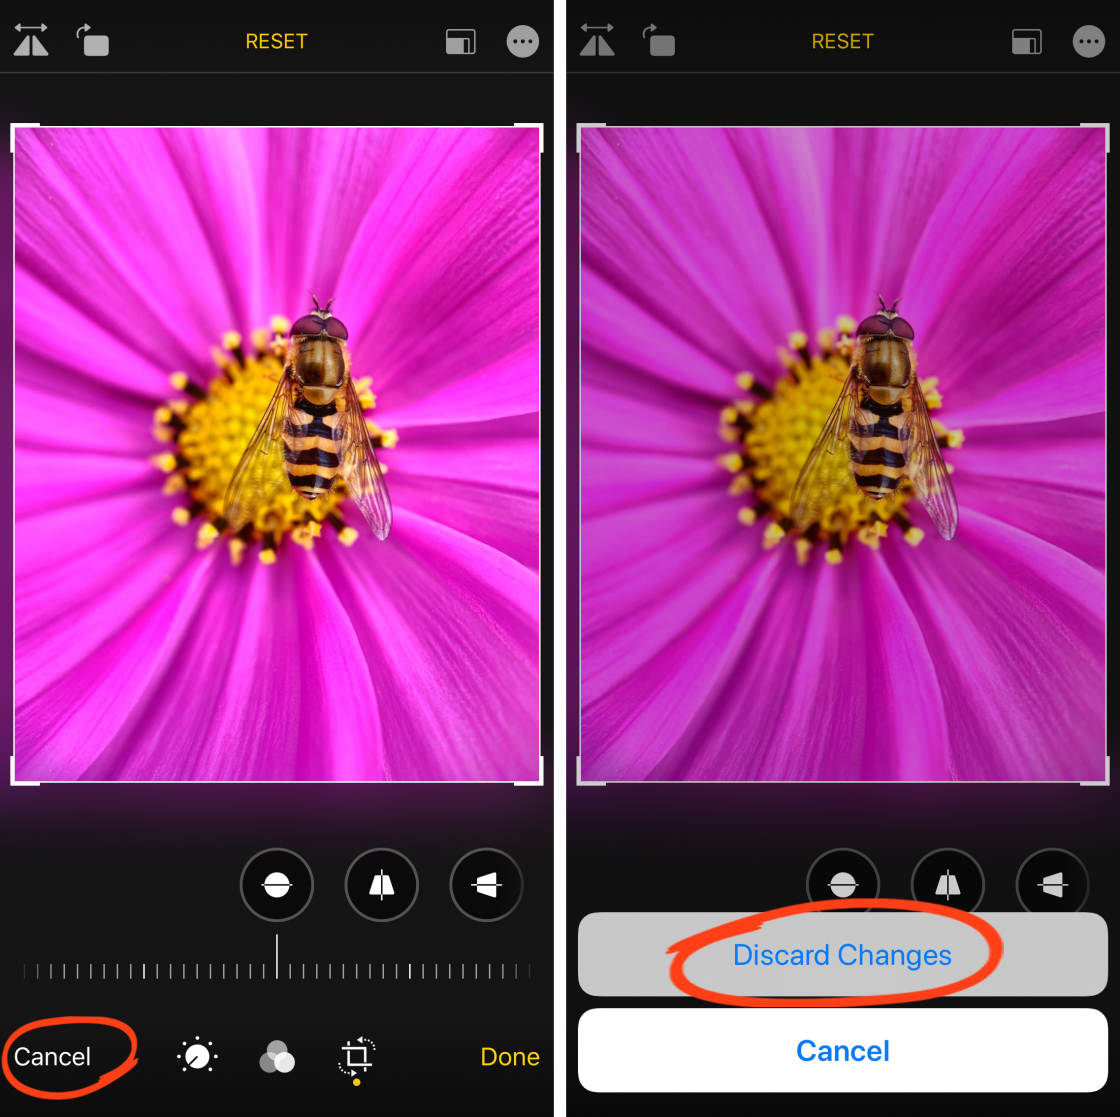
vii. Save Your Edited Photo
When you've finished editing your photo, tap Done to salvage the changes.
Your edited prototype will appear in your photograph library.
If yous'd prefer not to save your edits, tap Cancel (instead of Washed) in the photo editor. Then tap Discard Changes.
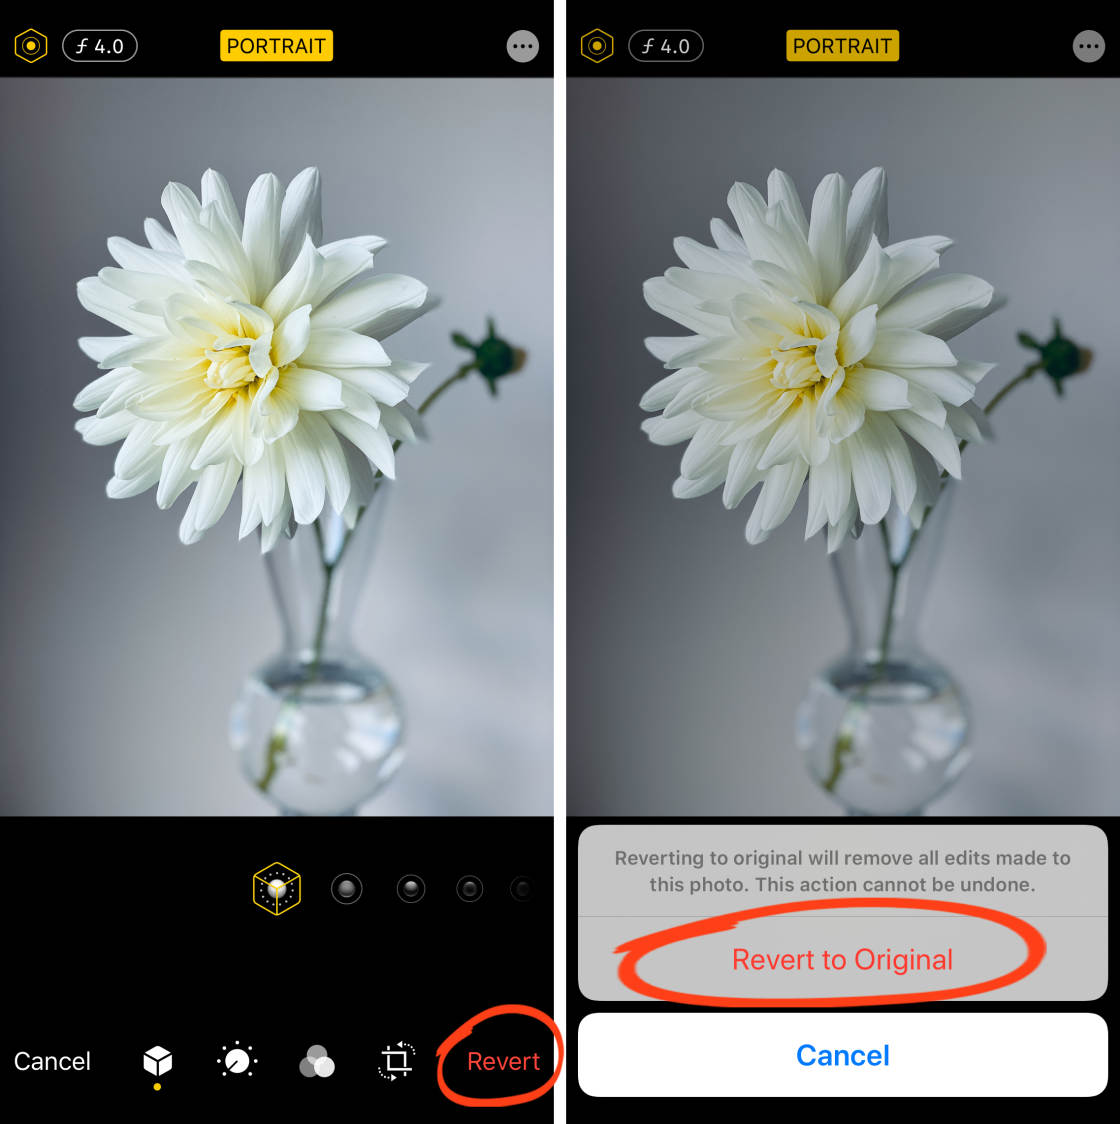
8. Remove Or Alter Your Edits
Edits that y'all make in the Photos app are non-subversive. This means yous can remove or change them at any fourth dimension – even after you've saved the changes.
And so if you're not happy with your edits, you lot can ever arrange the settings you applied. Or y'all tin remove all edits and revert back to the original image.
To change or remove your edits, open up the photo in the Photos app and tapEdit.
If you want make changes to your edit, open any editing tool and brand your adjustments.

To revert to the original photo, tapRevert at the bottom right. Then tap Revert To Original.
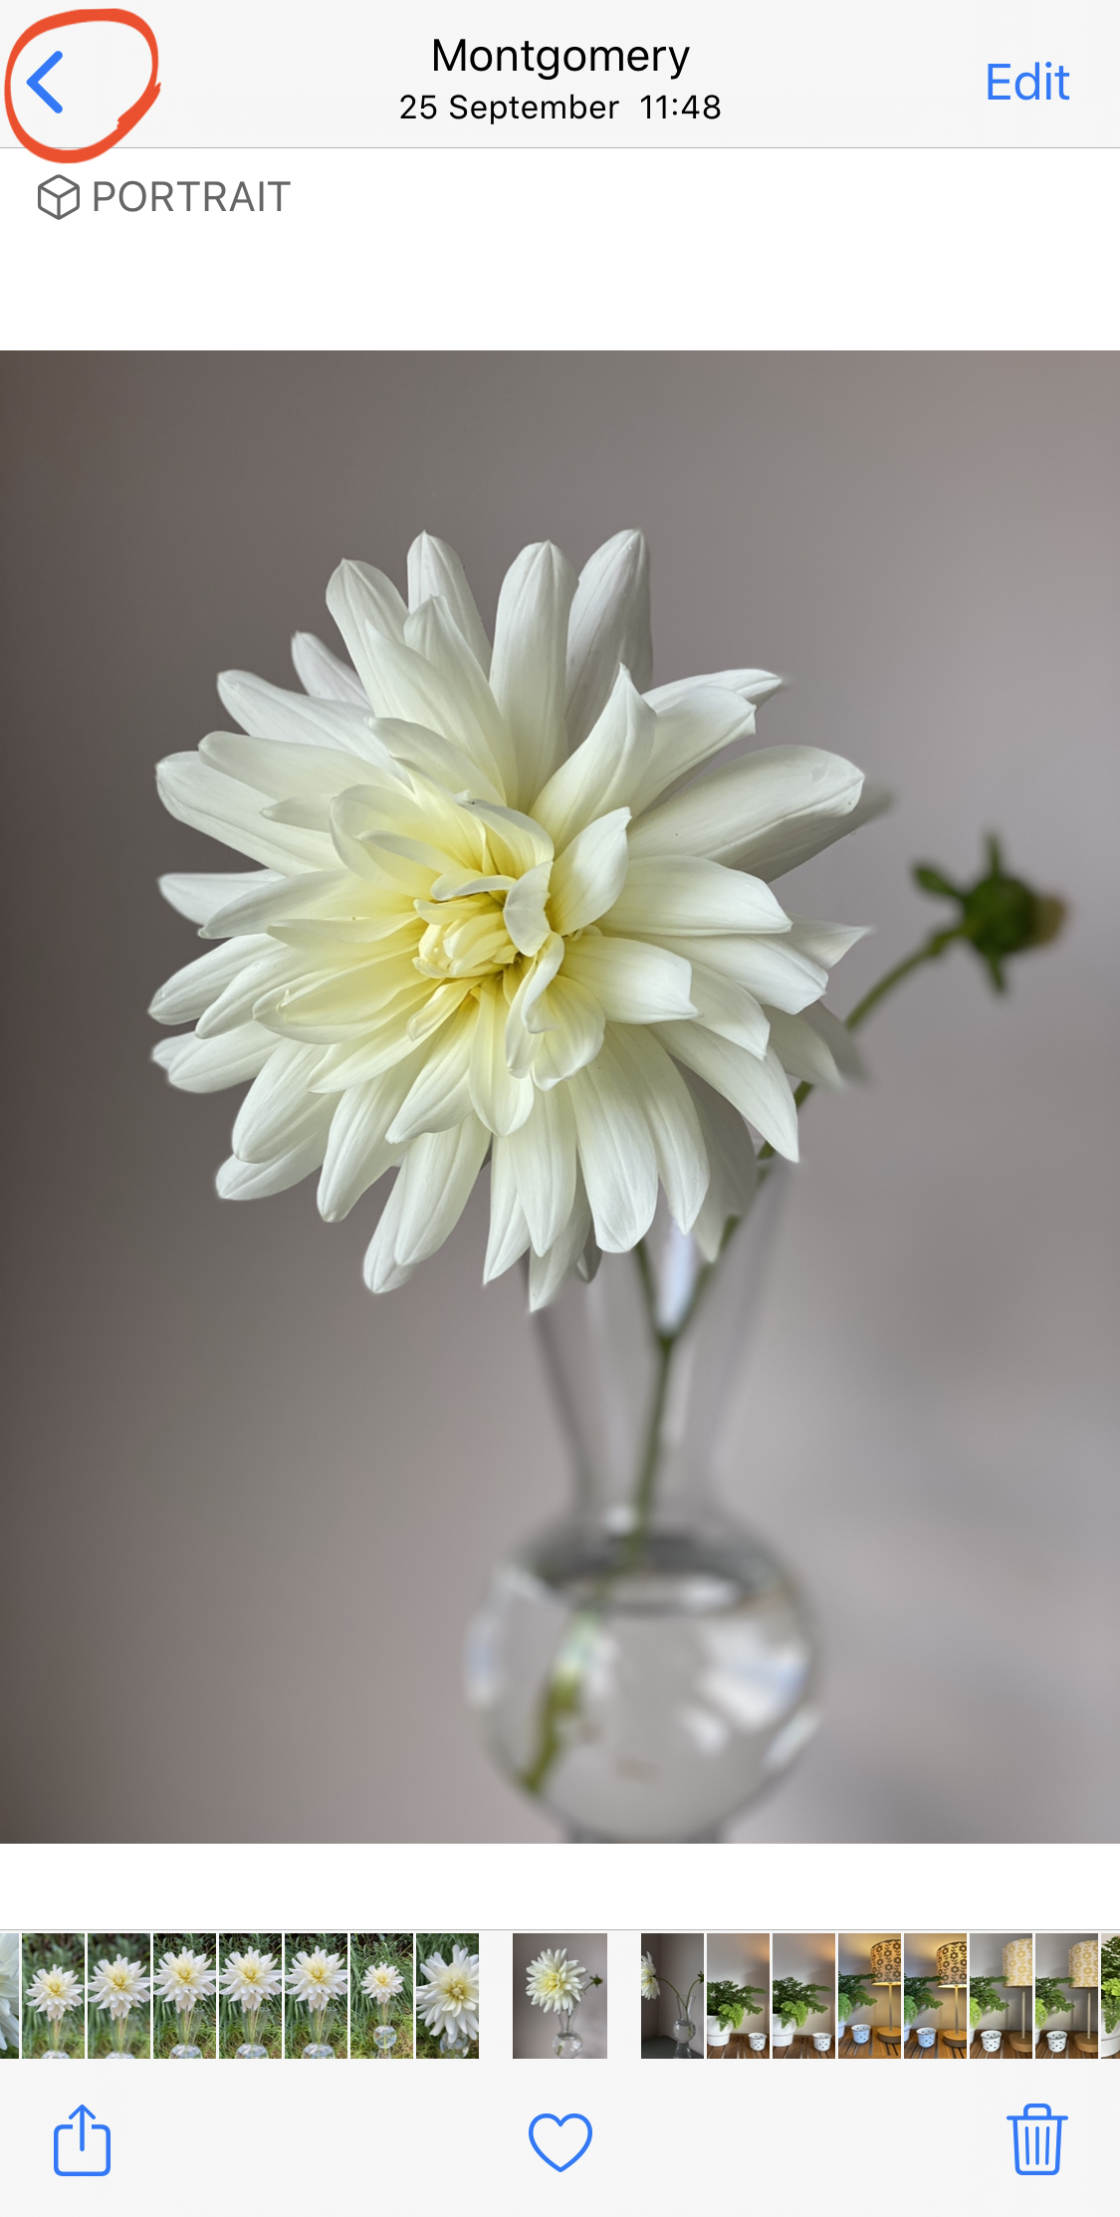
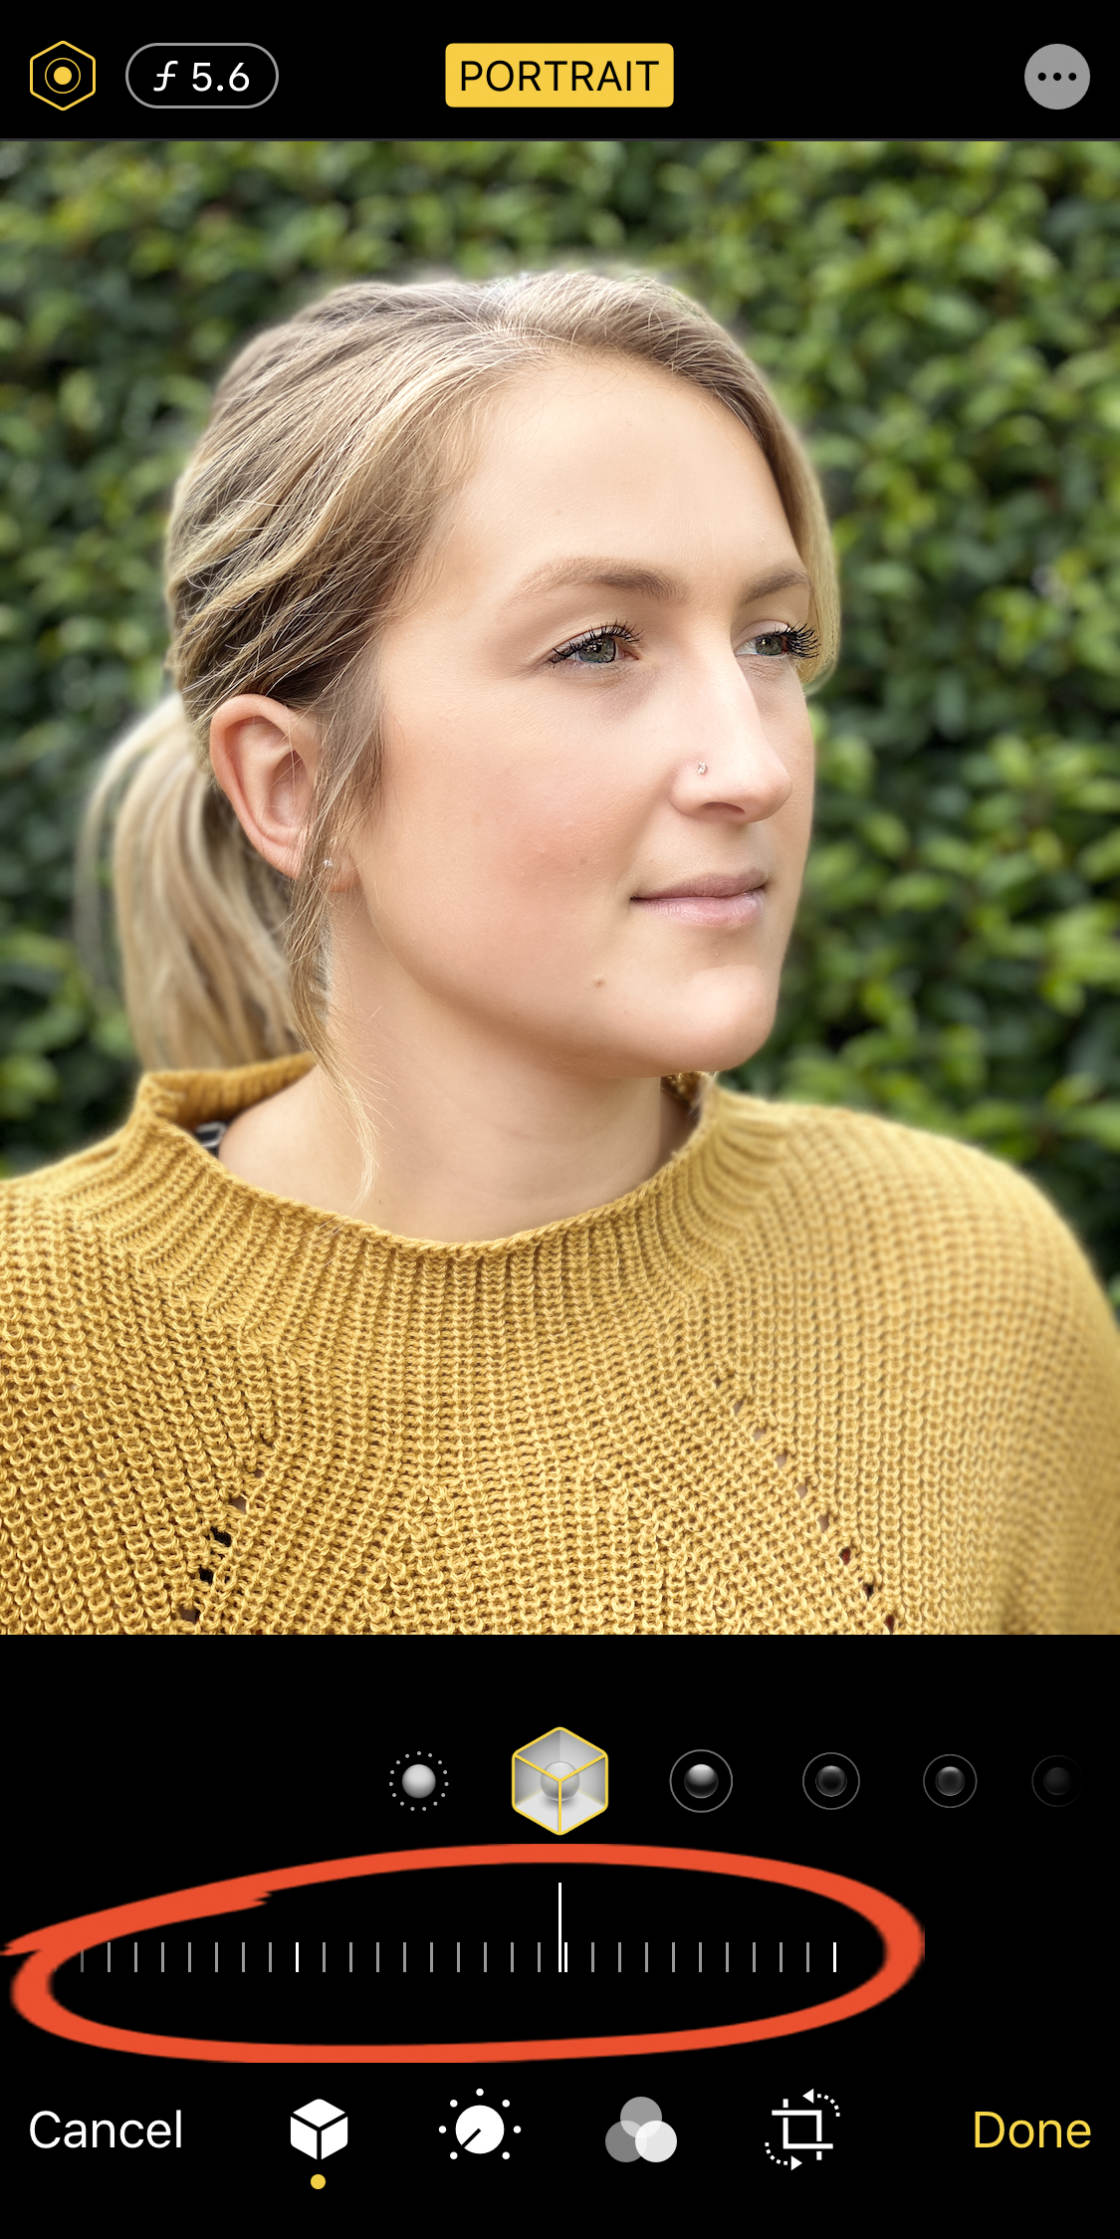
9. Edit Portrait Fashion Photos
Portrait mode in the iPhone camera app allows you to shoot photos with a beautifully blurred background.
You tin can edit Portrait style photos in the aforementioned way as whatever other photograph. Merely you also have some boosted editing options unique to Portrait mode.
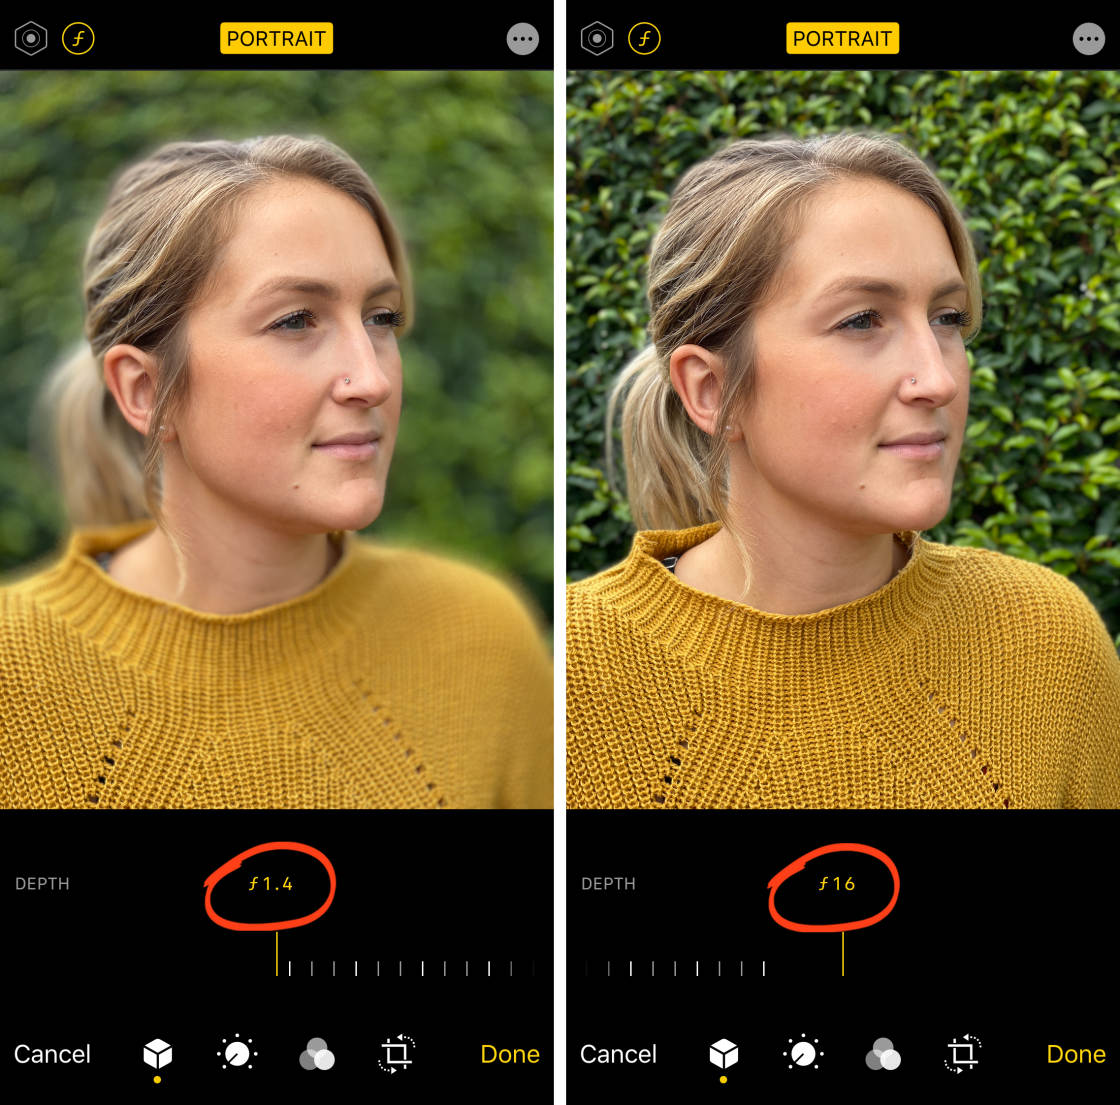
9.1 Depth Control
Do yous have the iPhone 11, xi Pro, xi Pro Max, XR, XS, or XS Max?
If then, you can change the forcefulness of the groundwork blur in your portrait photos.
To adjust the blur strength, open your Portrait style photo and tap Edit.
Tap thef/number icon at the top left of the screen.
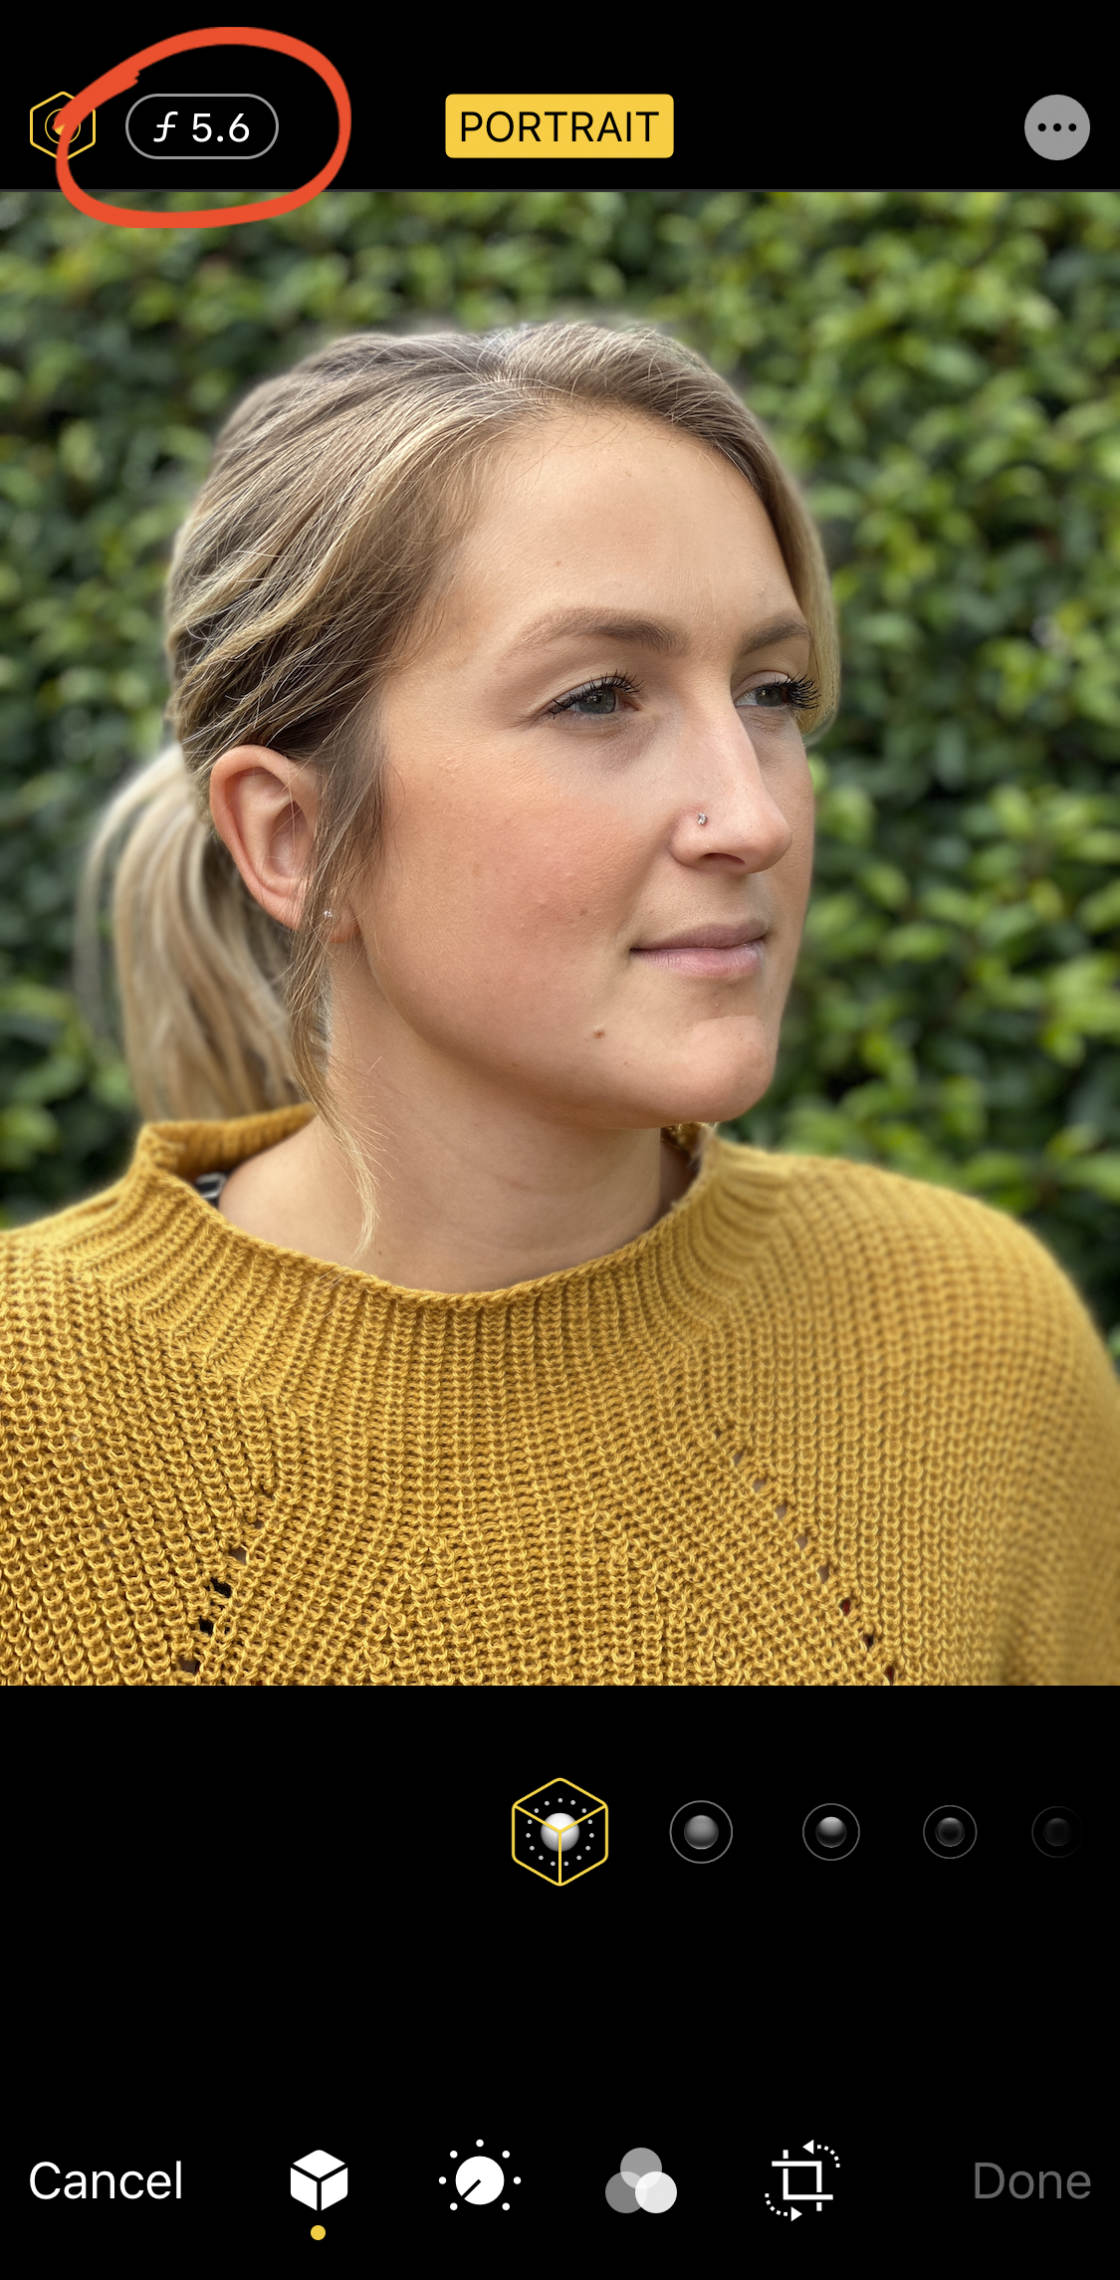
At present drag the Depth slider beneath your photo. A depression f/number creates more blur. A high f/number shows more particular in the background.
9.2 Portrait Lighting
Another Portrait fashion editing option is Portrait Lighting (not bachelor on iPhone 7 Plus).
Portrait Lighting lets y'all apply studio lighting effects to your Portrait mode photos.
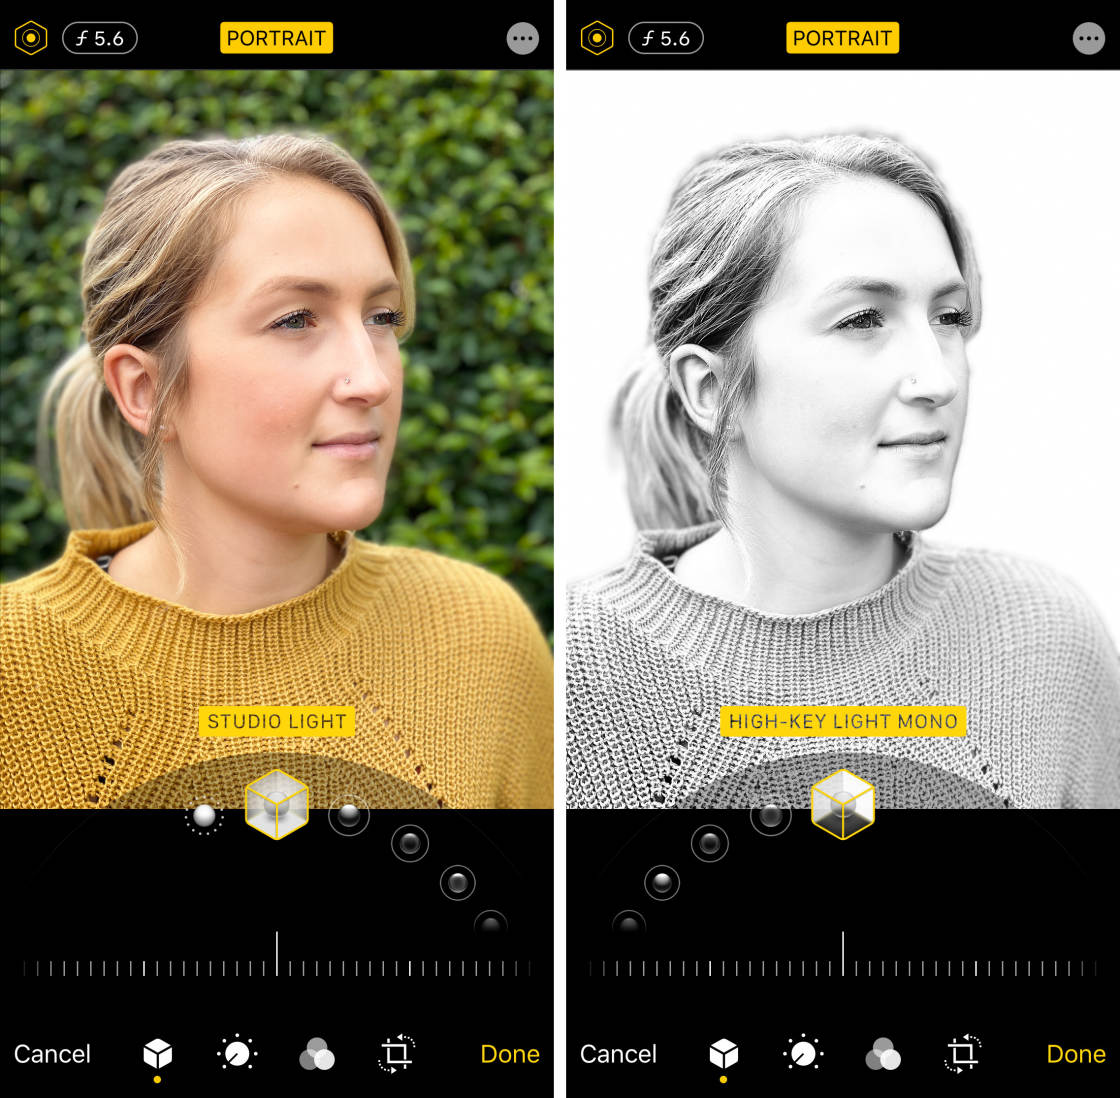
In Edit mode, ensure the Portrait Lighting (hexagon) icon is selected at the top left of the screen. Then swipe through the Portrait Lighting options (cube icons) at the bottom of the screen.
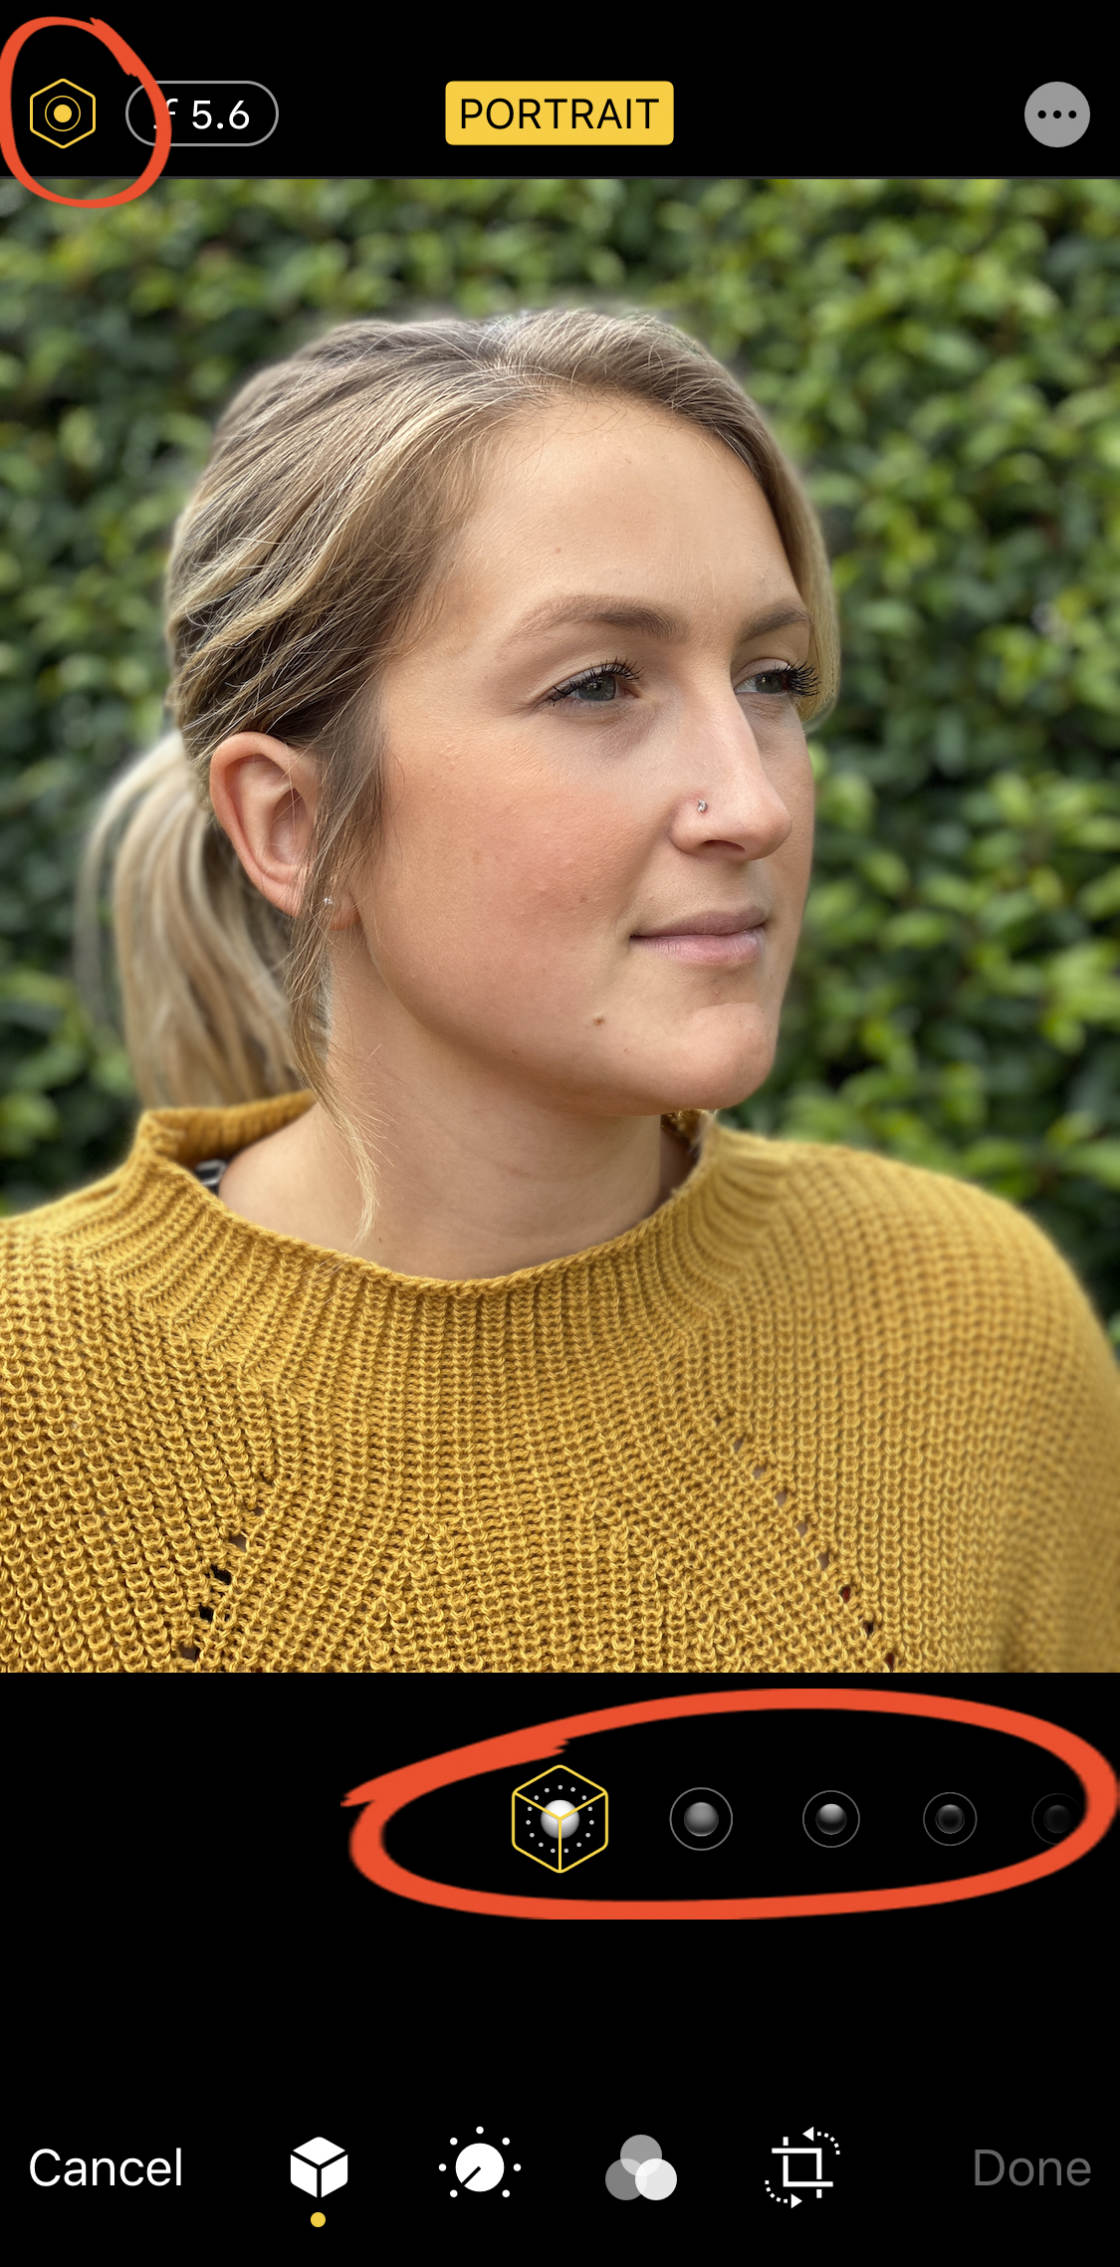
Select a Portrait Lighting outcome, e.k. Studio Light, Profile Light, Stage Light, etc.
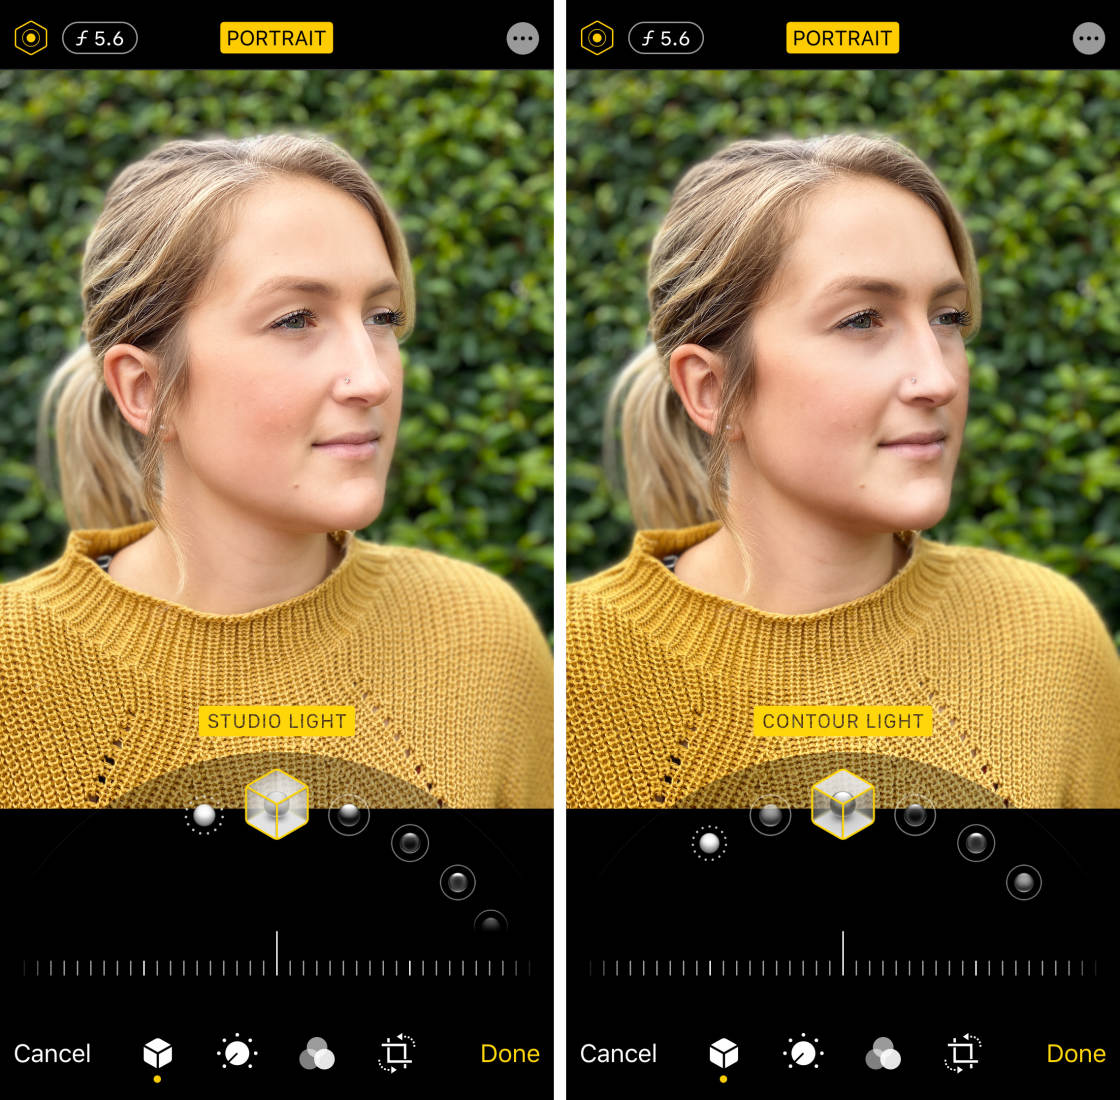
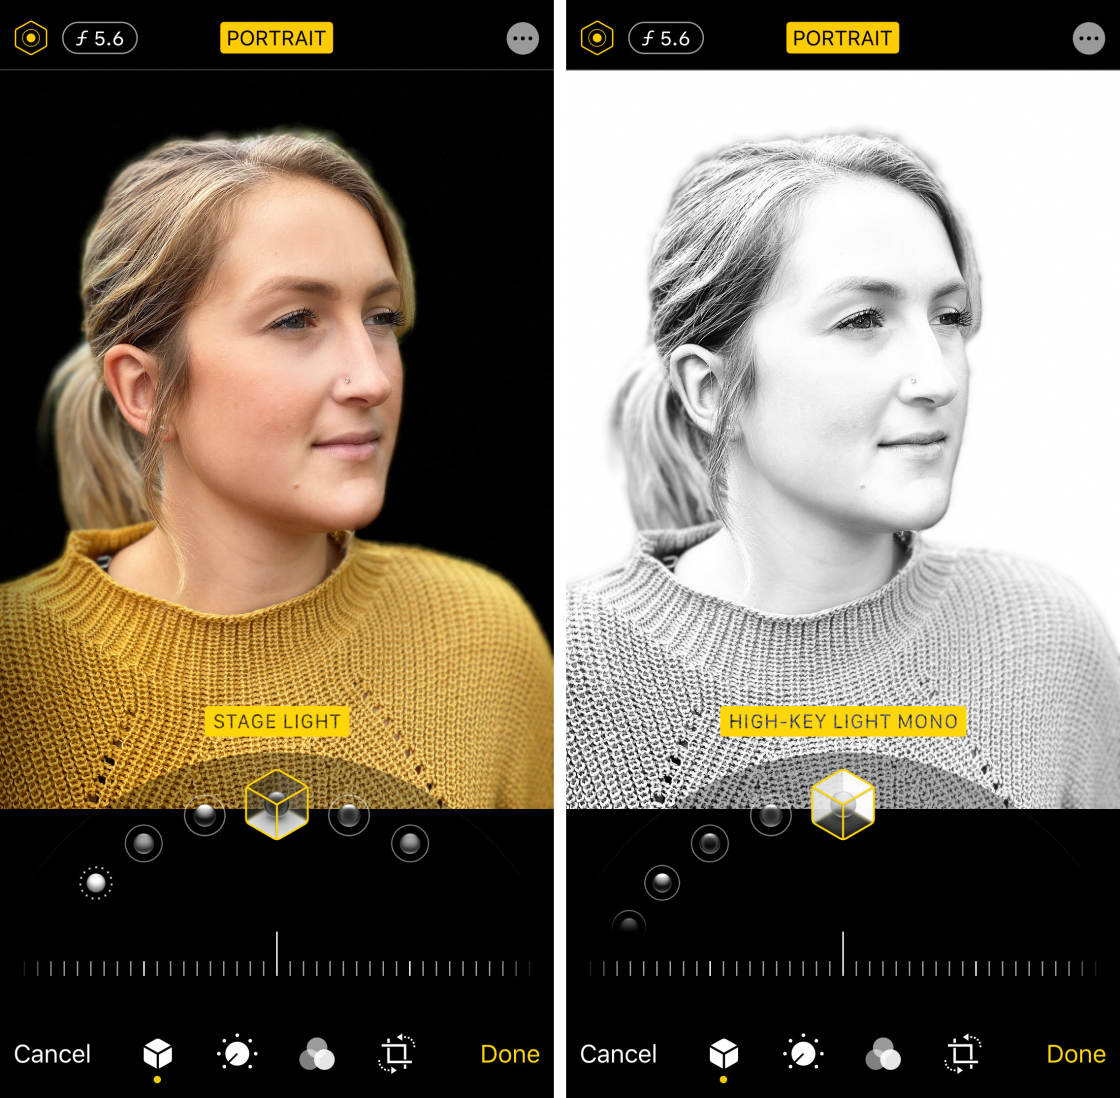
Employ the slider to adjust the forcefulness of the Portrait Lighting effect.
ix.iii Remove Background Blur
If you decide you don't desire the background blurred, you can remove the depth effect from your portrait photograph.
In Edit mode, tap the yellow Portrait choice at the superlative of the screen. Y'all can switch the blur dorsum on at any fourth dimension by tapping thePortrait option once more.
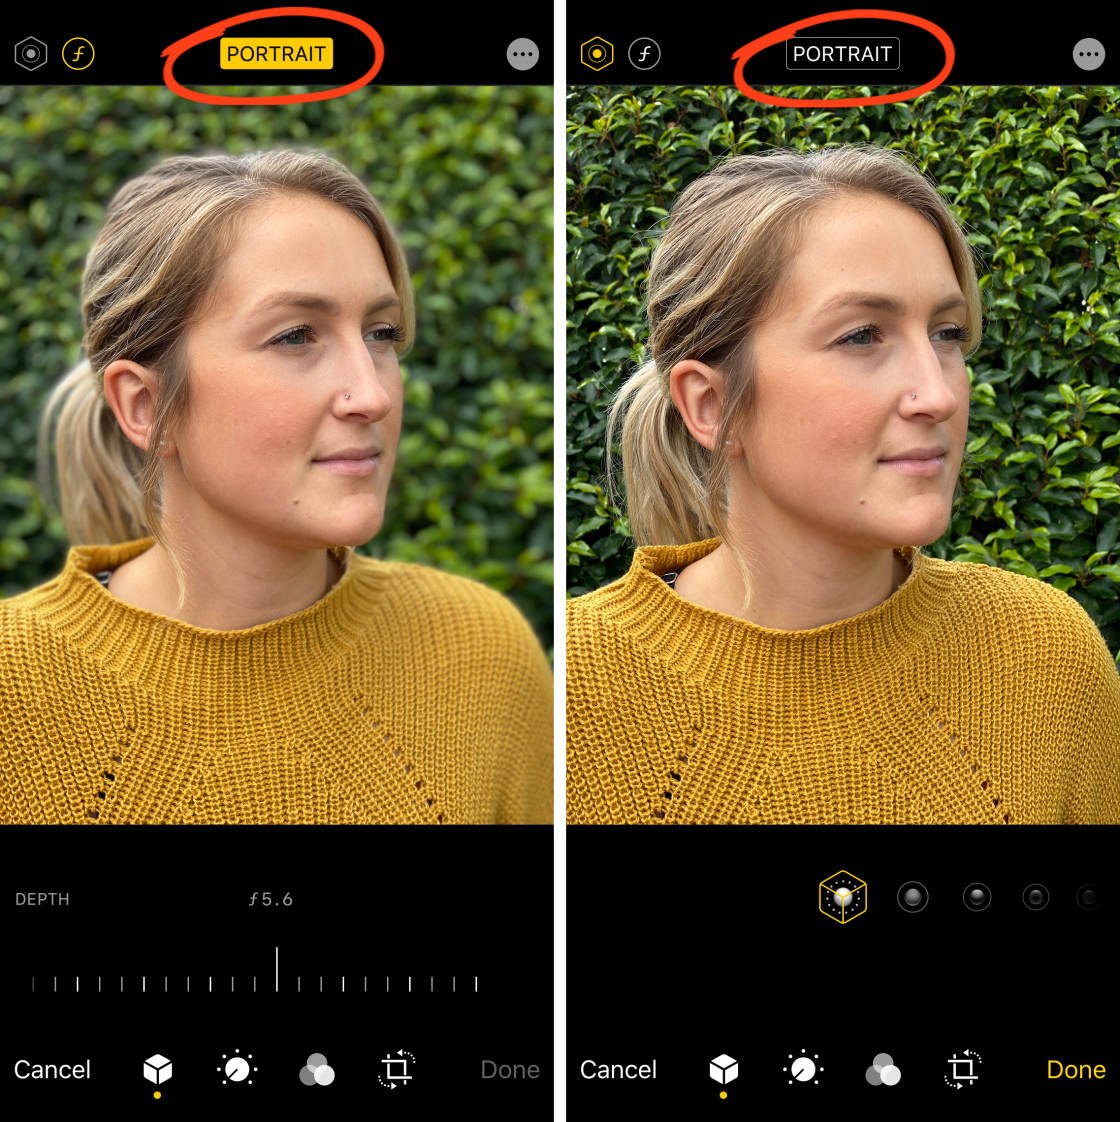
When you've finished editing your Portrait mode photo, tapDone to save the changes.
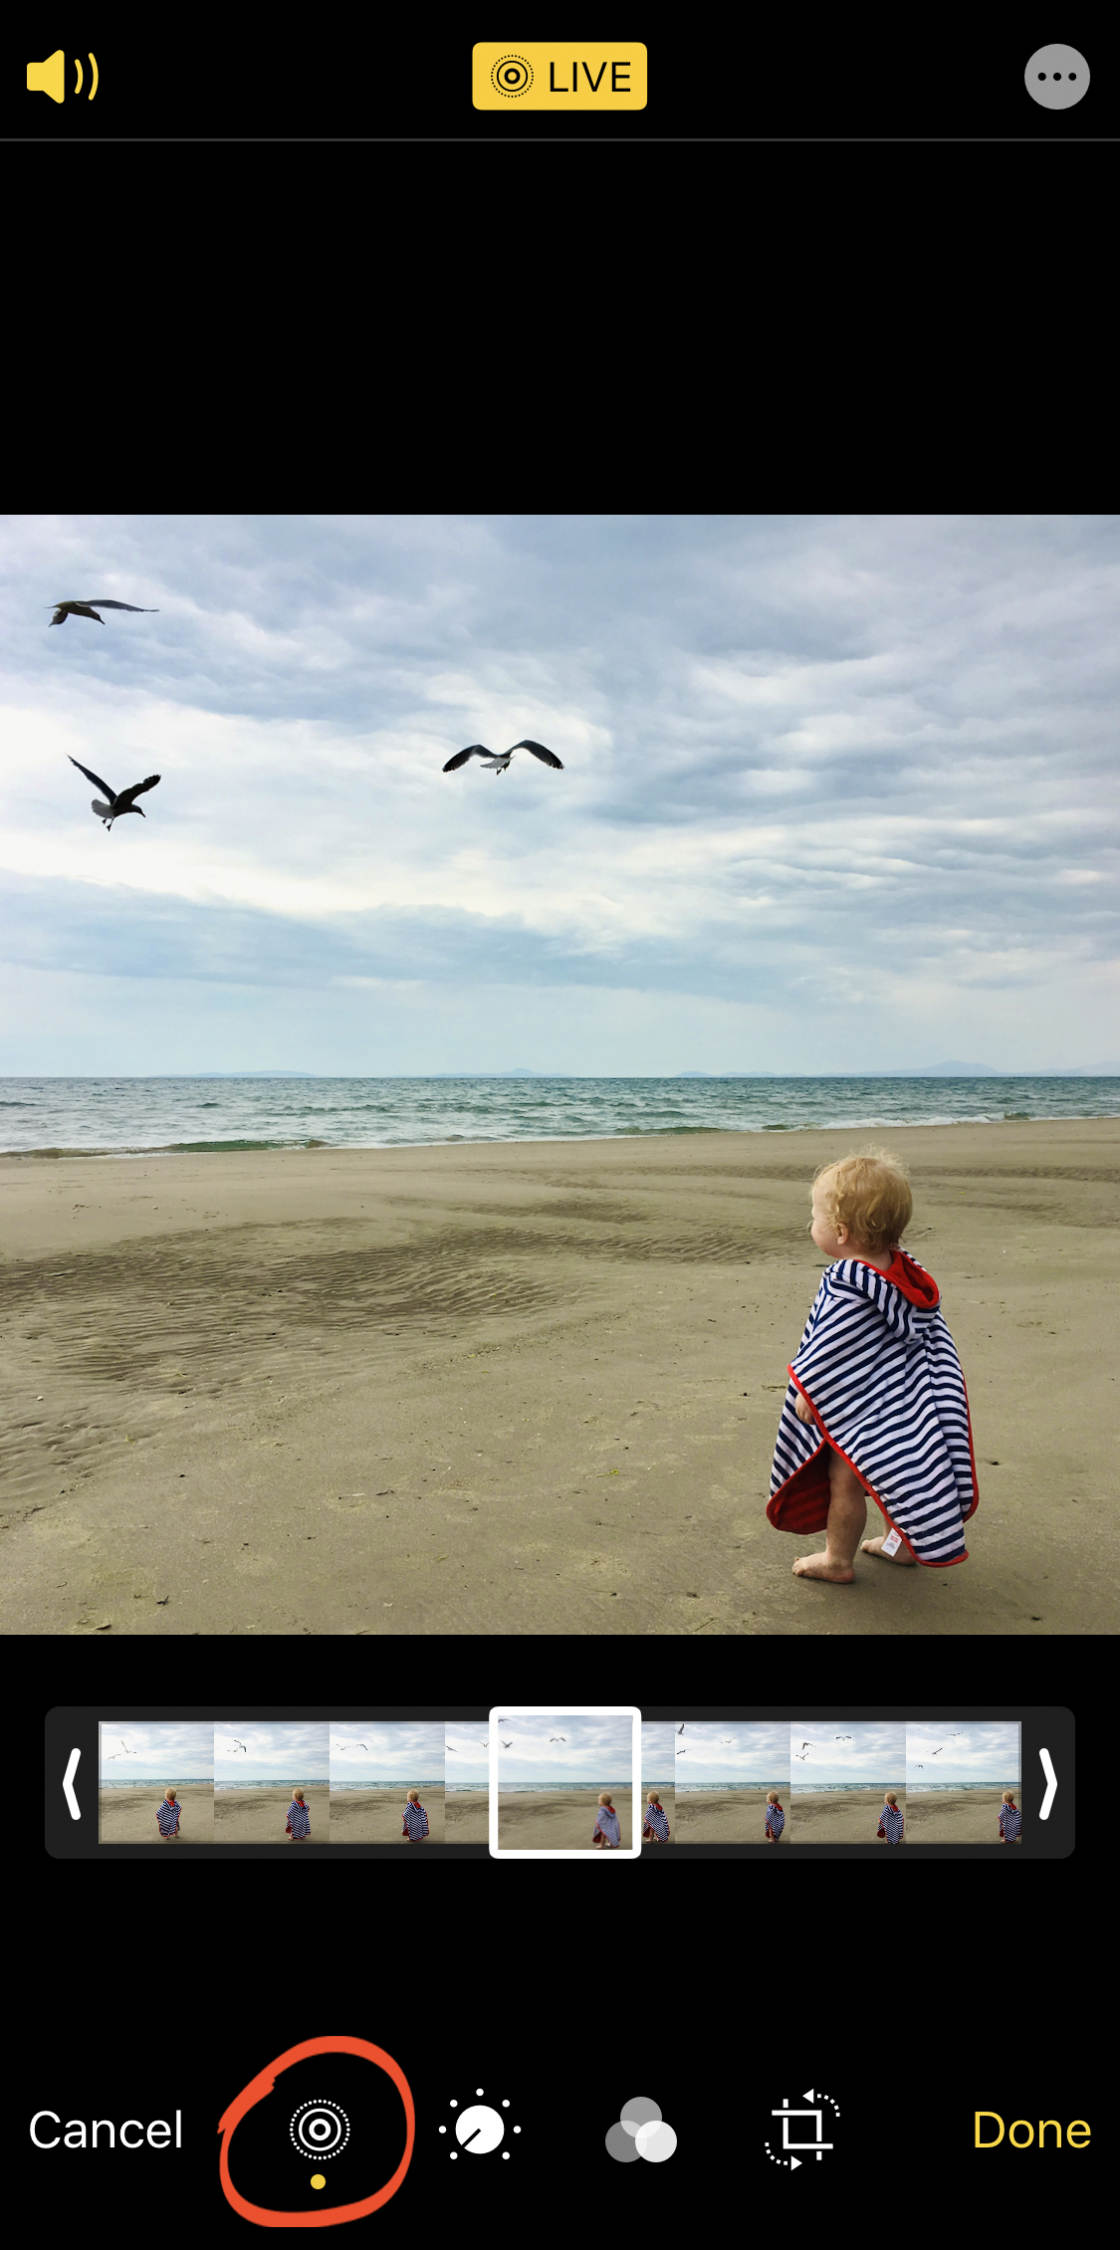
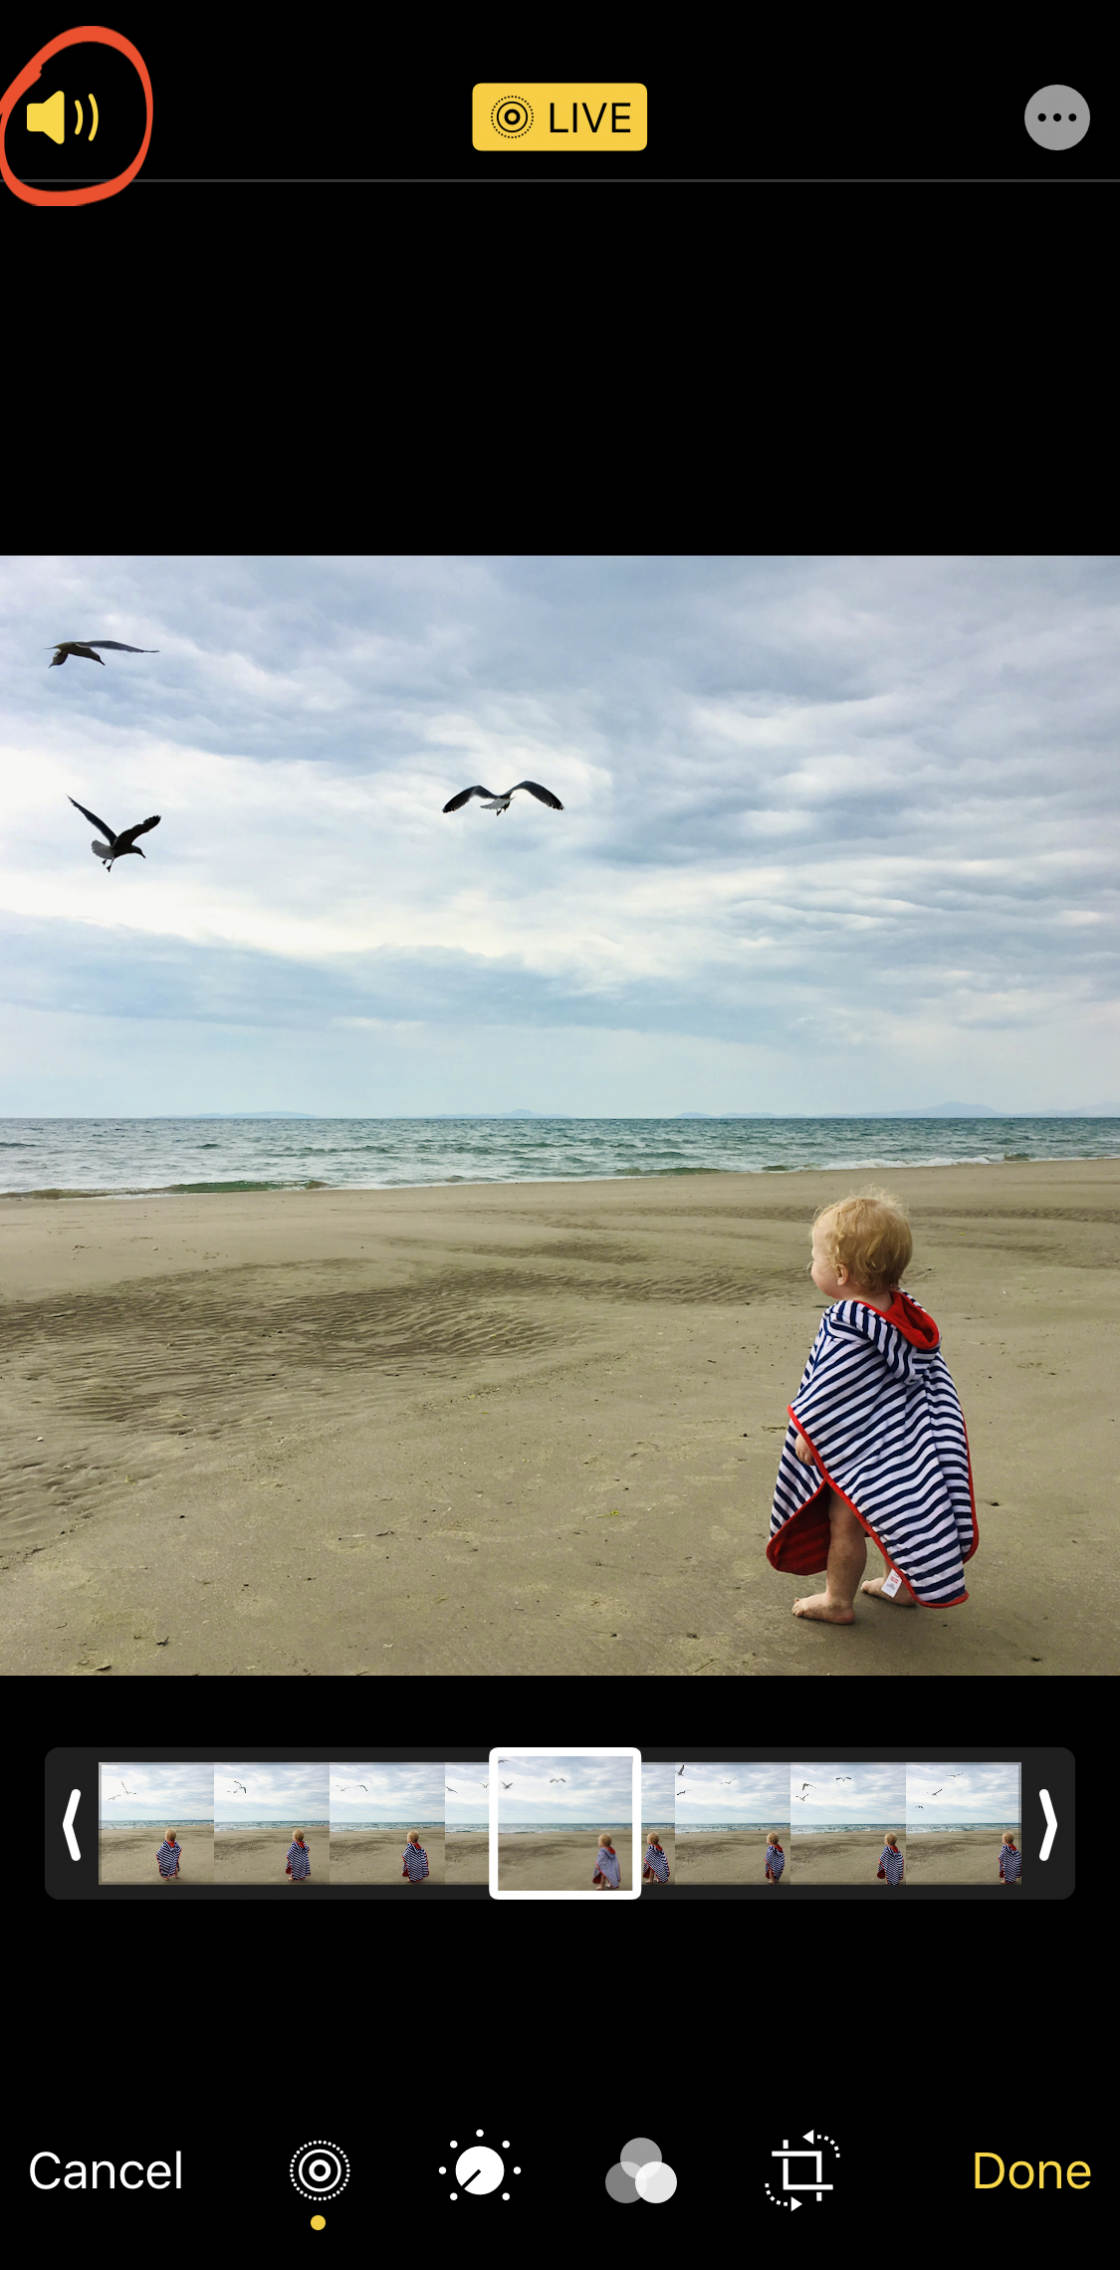
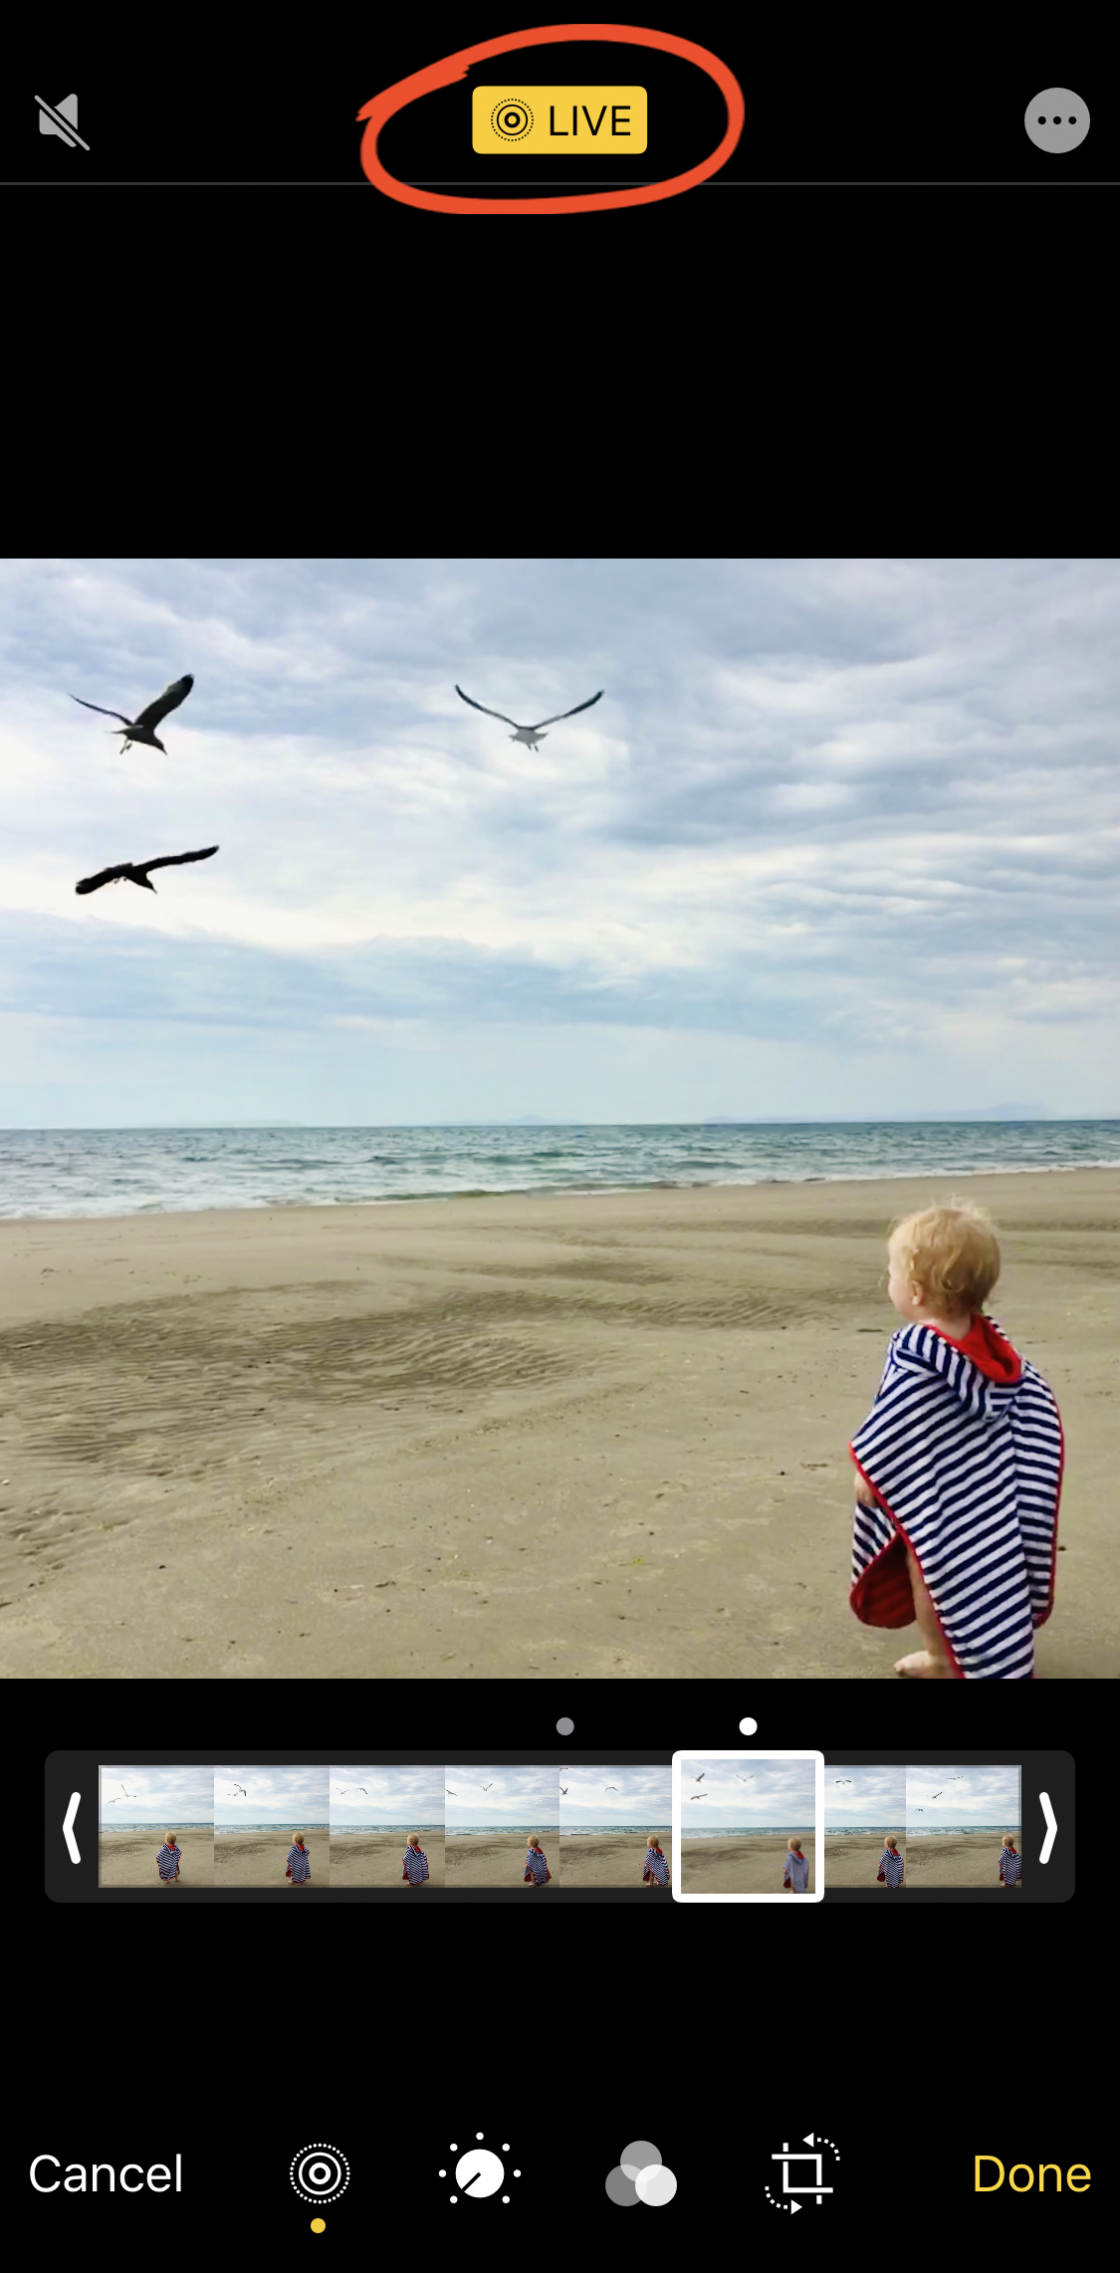
x. Edit Alive Photos
Alive Photos is an iPhone camera characteristic that allows you to capture moving images. When you shoot a Live Photo, the consequence is a 3-second video, complete with movement and sound.
Y'all can edit Alive Photos in the aforementioned way equally regular images. Merely you besides have another editing options available.
When yous open upEditmode for a Alive Photo, you'll see theLive icon at the bottom of the screen. Tap the Live icon to open the Live Photo editing tools.
If y'all don't similar the sound on your Live Photo, tap the yellow Sound (speaker) icon to switch off the sound. Y'all tin can turn the audio dorsum on at any time by borer the Sound icon again.
If you want to convert your Live Photo to a regular yet image, tap the yellow Liveicon at the summit of the screen. You can catechumen the prototype back to an blithe Live Photo at any time past tappingAlive at the pinnacle of the screen.
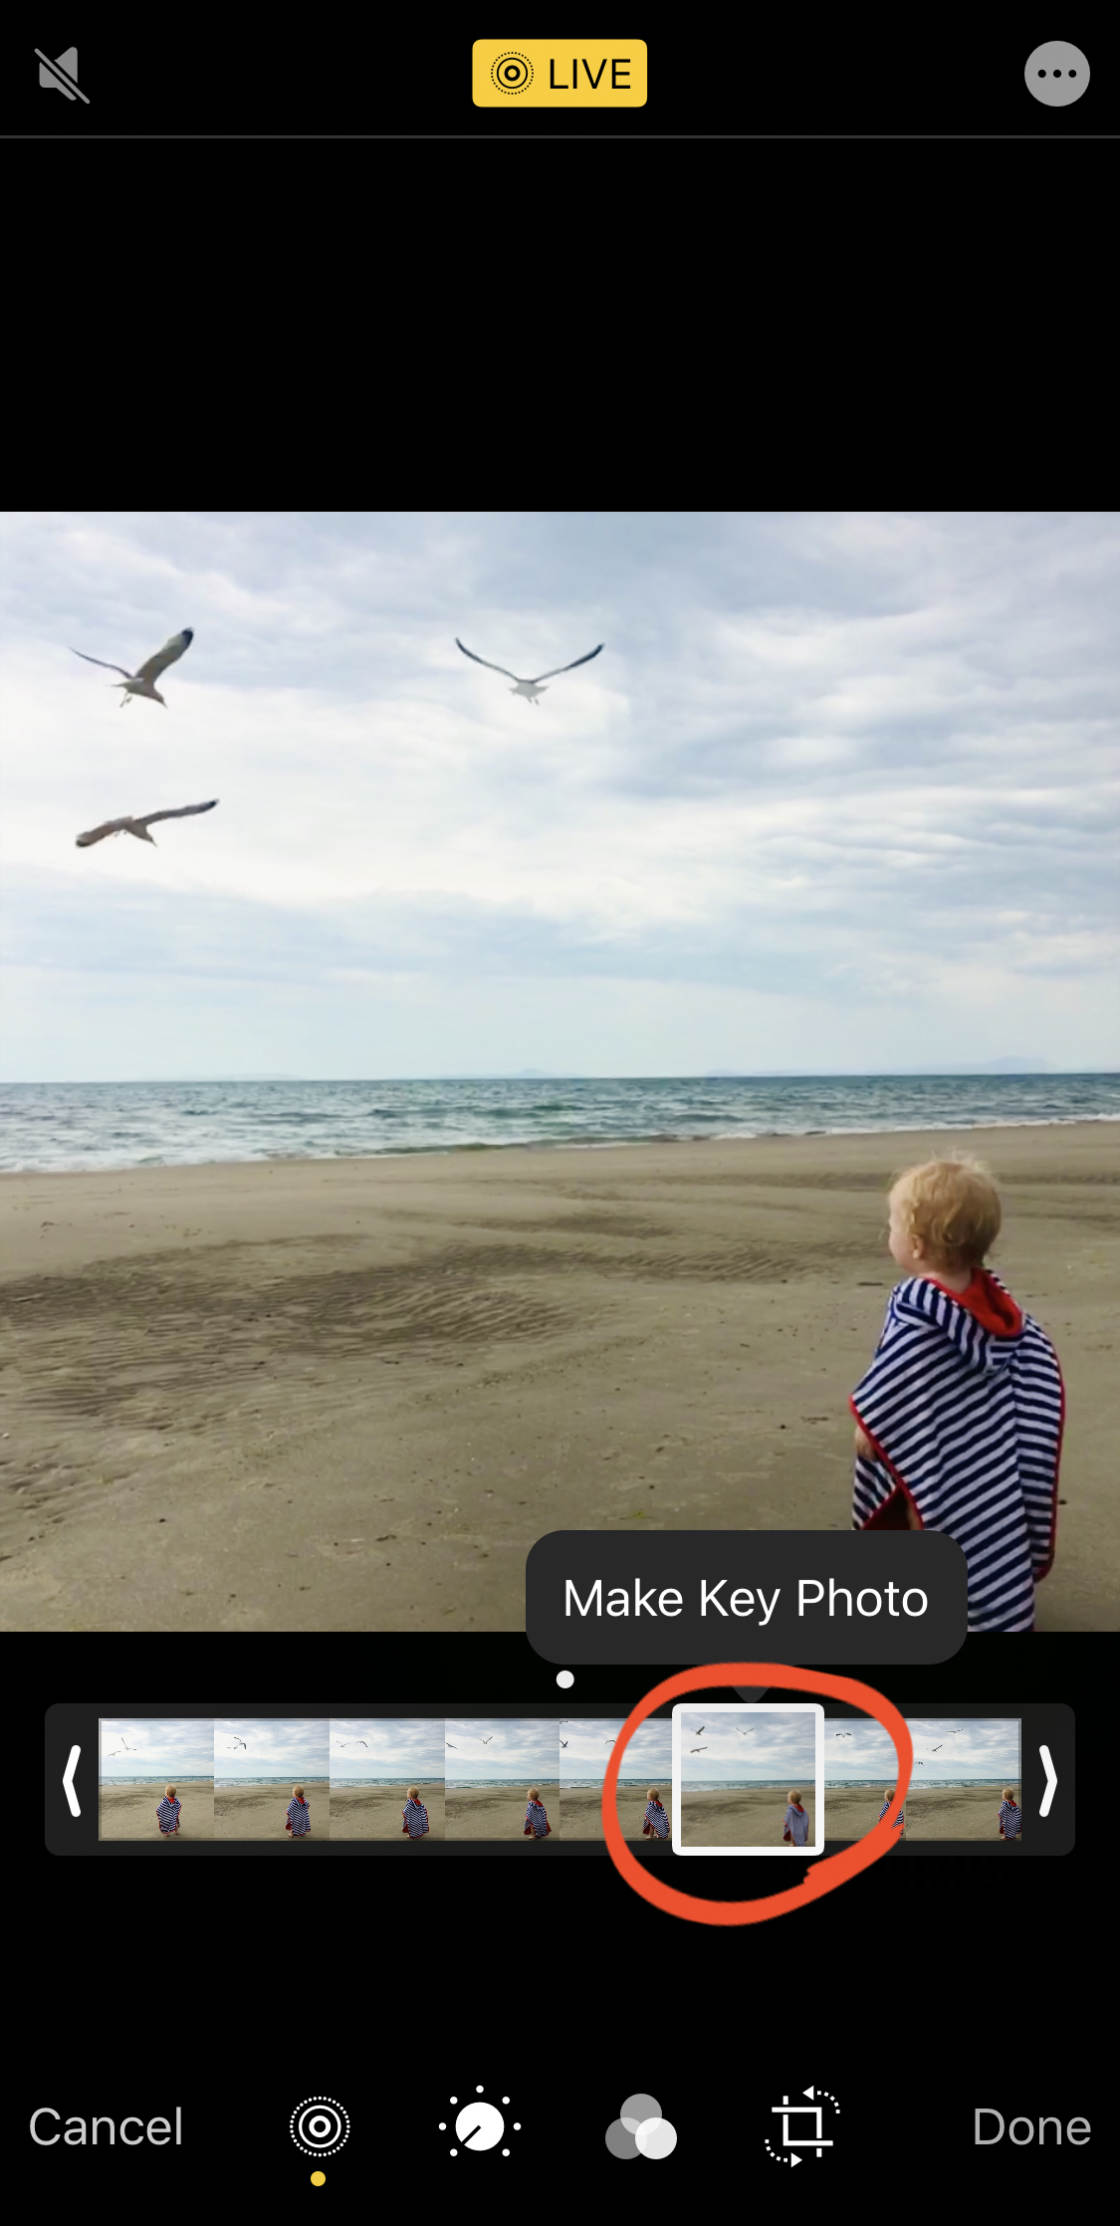
Beneath your photo is a row of image thumbnails. These are the individual frames that make up the 3-second Live Photograph. To change the cardinal photograph (the one you lot come across in your photo library), drag across the thumbnail slider until you find the frame you want. Then tap Make Fundamental Photograph.
When y'all're happy with your Alive Photograph edits, tap Done to save the changes.
As well as the Alive Photo settings in Edit mode, you'll notice other options past swiping upward on a Live Photograph in your photo library. Here, you can employ a Loop, Bounce, or Long Exposure effect to your Alive Photo.
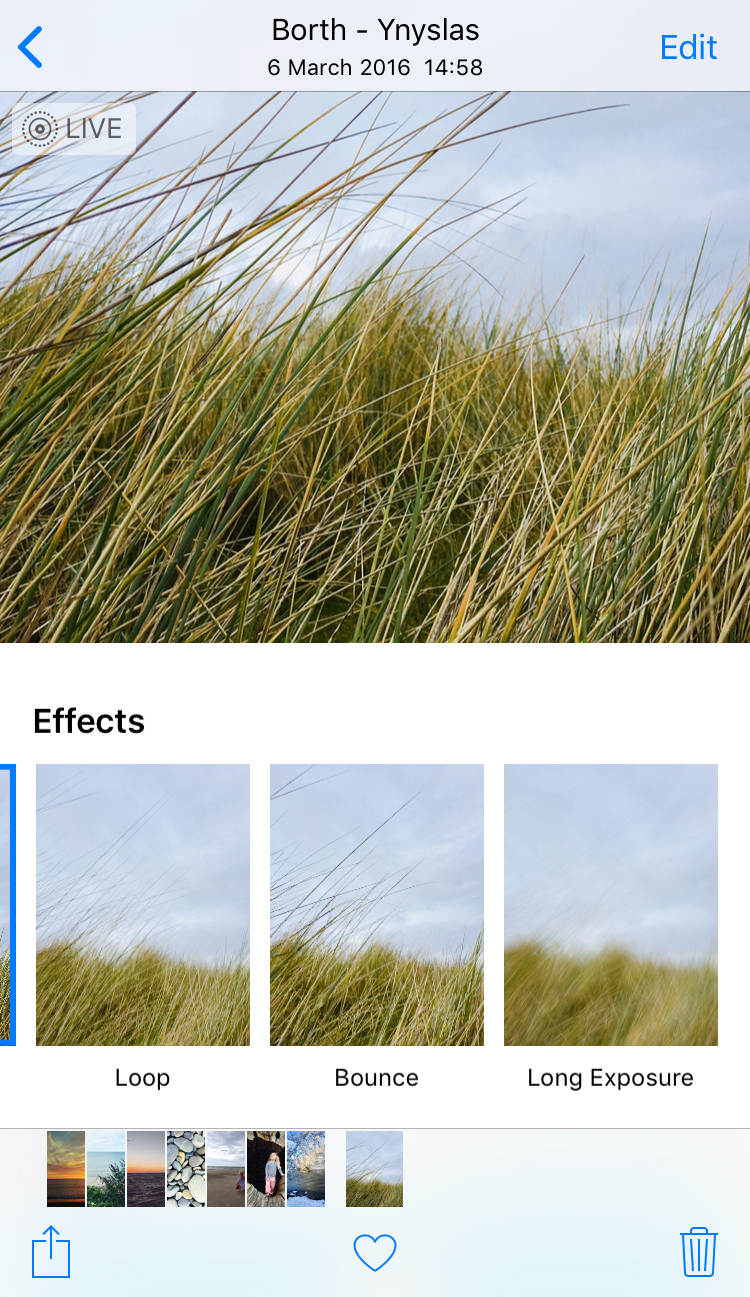
Loop converts your Live Photo into a continuous video loop.Bounciness turns your Alive Photo into a continuous video that plays forrad and and then in reverse.
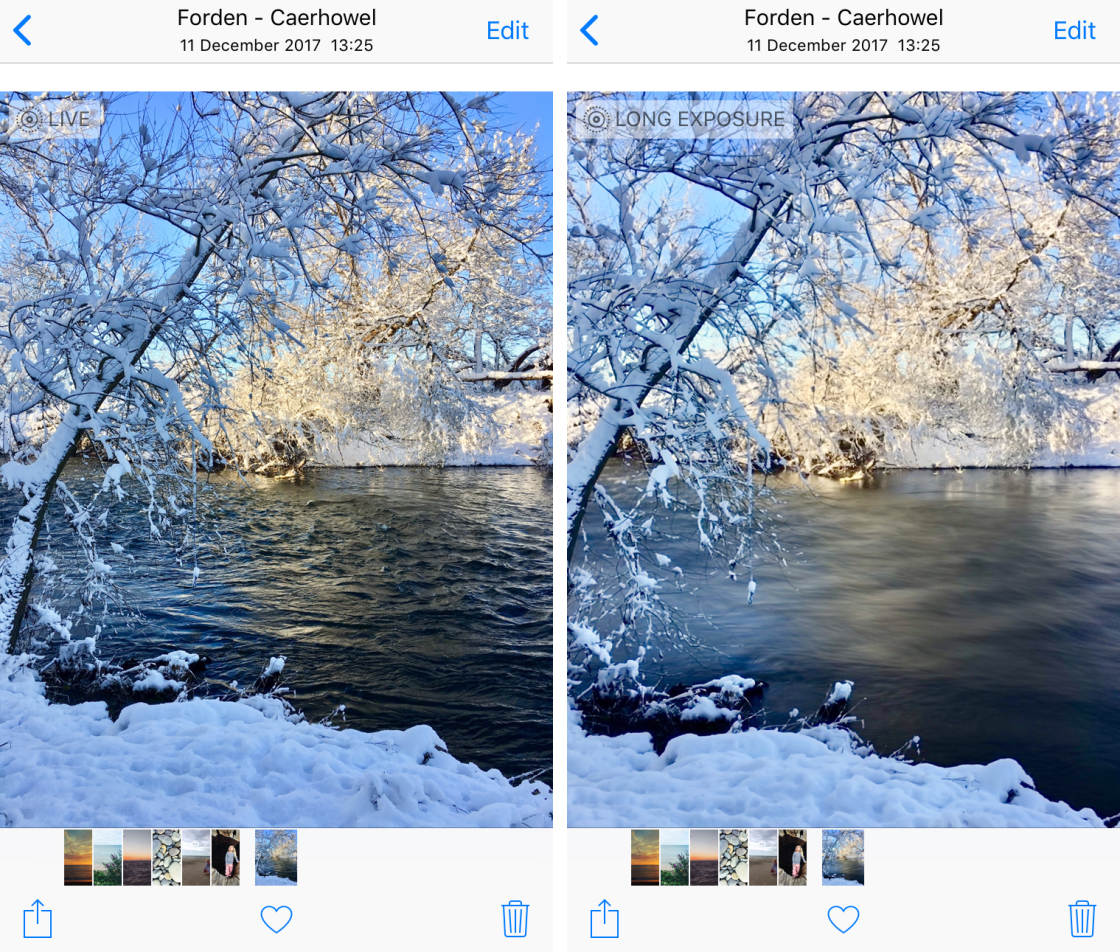
Long Exposure creates a beautiful slow shutter upshot, blurring any move in the scene. Utilize this setting to create stunning waterfall and river shots where the water appears silky smooth.
11. Edit Videos In The Photos App
Did you know you tin can now edit videos in the iPhone Photos app?

Yous tin can use all of the photo editing tools to edit videos, fourth dimension-lapse videos, and slo-mo videos.
There's also a Trim tool for trimming the start and finish of your video.

Click hither for a complete guide to editing videos in the iPhone Photos app.
12. Benefits Of Using The iPhone Photos App For Editing
With and so many iPhone photo editor apps available, it can be difficult to know which ones to use.
The iPhone'due south congenital-in Photos app is frequently overlooked as a photo editor. But the redesigned Photos app in iOS 13 has a lot to offer when it comes to editing your pictures.
Depending on your editing needs, the Photos app might be all you need for improving your iPhone photos.
Benefits of using the Photos app to edit your images include:
- No need to download additional third-party photo editing apps
- Edit your images without having to leave your iPhone photo library
- Suitable for beginners too as more avant-garde users
- Yous tin can change settings for Live Photos and Portrait Style aftertaking the shot
- Edits are not-destructive, allowing yous to alter or remove your edits at any time
- You lot can also edit videos in the aforementioned way that you edit photos
13. Limitations Of The iPhone Photos App
The editing tools in the Photos app are perfect for everyday paradigm editing. But it does take some limitations.
It'southward missing certain features that you'll find in some other popular photo editor and photoshop apps.
In item, it doesn't include the option to brand selective adjustments to a certain part of an image. And it doesn't take a healing tool for removing objects from your photos.
If yous're looking for a more advanced photo editing app with these tools, the complimentary Snapseed app is a dandy pick.
Snapseed gives you ultimate control over how to edit photos on iPhone. Notwithstanding it's still piece of cake for beginners to use.
Click here to learn how to edit photos on iPhone using the Snapseed app.
Source: https://iphonephotographyschool.com/how-to-edit-photos-on-iphone/
0 Response to "How To Retouch Photos On Iphone"
Post a Comment